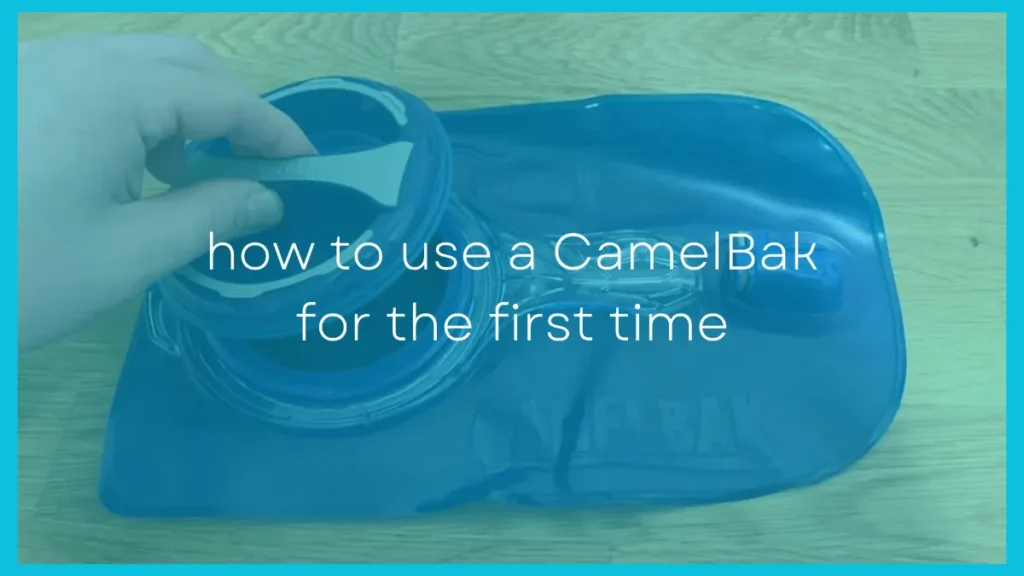
Using a CamelBak for the first time probably seems pretty simple — just fill it up and go. But there’s a bit more to it than that and there’s a few things you’ll want to know and do before you head out on your first trail.
If you fail to do this you might end up with yuk tasting water, a bite valve that doesn’t work properly or the pack could be uncomfortable and even stop working during your adventure.
The first time you use your CamelBak, you should make sure the backpack fits, use lemon juice to remove the plastic taste, wash the bladder thoroughly, fill the reservoir with clean drinking water, check for leaks, then place the reservoir in your pack. When you’re done, it’s important to empty your bladder, clean it properly, and dry it fully before putting it away.
I know it’s tempting to dive right in, and honestly you’d probably be okay doing just that.
But spending about a half hour or so to properly set up your CamelBak could save you some frustration down the road.
Step 1: Make Sure Your Pack Fits
The first thing you should do with your new CamelBak, before filling it or removing any tags, is to make sure the backpack fits correctly.
This sounds simple but the CamelBak packs can be surprisingly small and some people might struggle to fit in them while for others they may be oversized.
- Loosen the shoulder straps and place the backpack on. The pack is designed to be tight so you’ll likely need to loosen and retighten the straps everytime you put it on.
- Pull the shoulder straps snug, but not too tight. You should be able to squeeze a couple of fingers between the front of your shoulder and the strap fairly easily.
- Connect the sternal strap (the one that runs across your chest). It should rest at the bottom of your sternum, just above your solar plexus.
- If your pack has a waist strap, connect it as well. It should lay across the top of your hips.
- If everything lines up correctly and feels comfortable, remove the tags and move on to step two.
Step 2: Remove The Plastic Taste
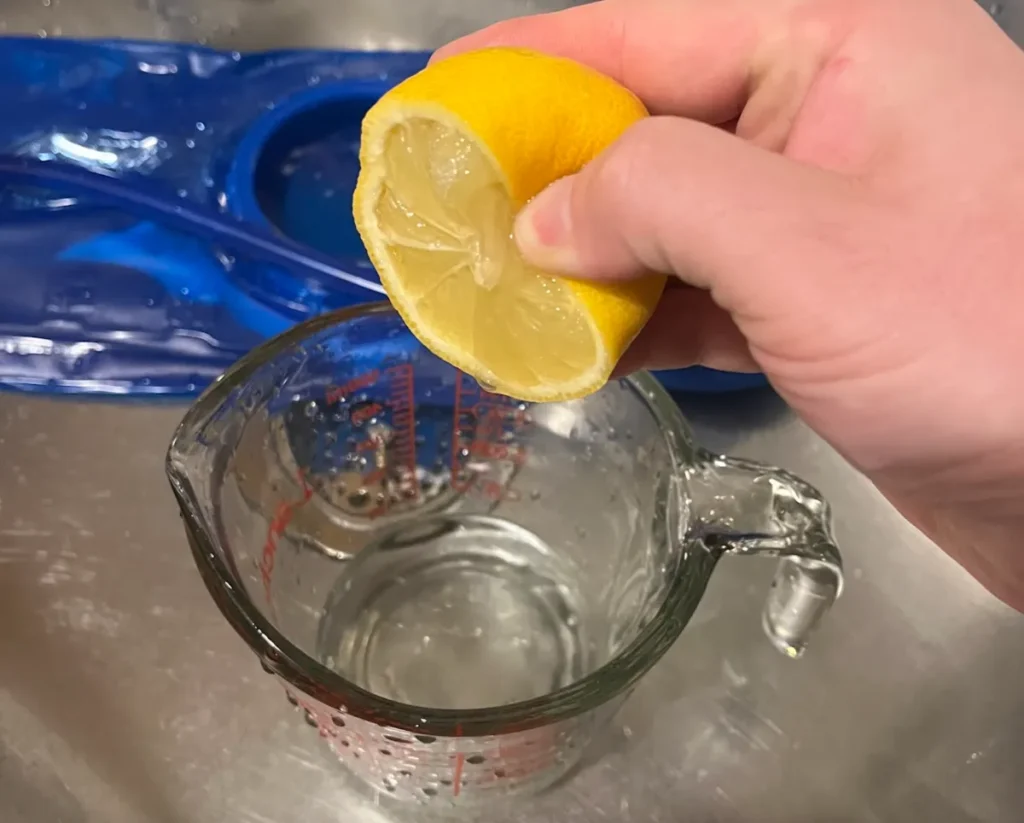
A common complaint with new CamelBak bladders is that they usually have a weird plastic taste.
I certainly experienced this the first time I ever used my CamelBak and it was gross. Made me not want to drink the water.
It’s completely harmless and doesn’t bother some people, but for others it’s a dealbreaker. Luckily, it’s pretty easy to remove:
- Fill your reservoir with hot water and about ¼ cup of fresh lemon juice per liter of water that your bladder holds.
- Squeeze out any remaining air and seal the reservoir shut.
- Squeeze the bite valve over the sink until water flows out, so lemon juice contacts all of your bladder’s interior surfaces.
- Let it soak for at least 30 minutes.
- Empty the bladder.
Step 3: Wash Your Bladder Thoroughly
It’s not absolutely necessary, but it couldn’t hurt to give your bladder a proper wash before you drink from it.
Sometimes during manufacturing, chemicals from the manufacturing process can end up on your product and can end up in your water if you don’t clean it first.
- Rinse out your bladder with hot running water.
- Soak the reservoir and tube with cleaning tablets (my preferred choice), distilled white vinegar, or baking soda for about 20 minutes.
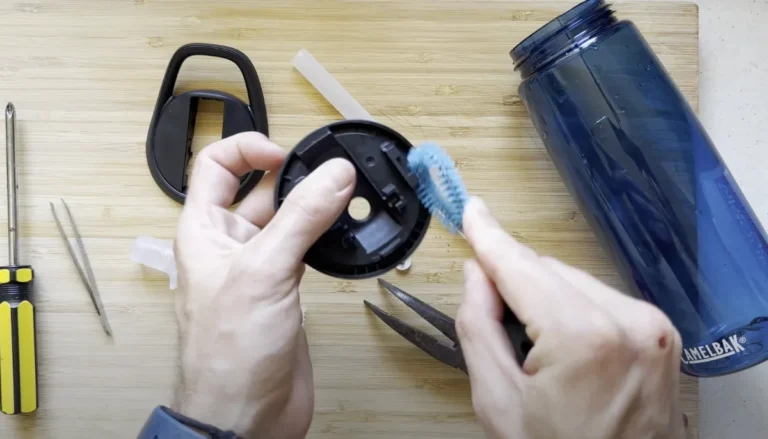
- Scrub every surface of your reservoir with a soft-bristled brush or sponge and a mild dish soap.
- Scrub the interior of the delivery tube with a tube cleaning brush, or with this trick if you don’t have one.
- Rinse away any remaining detergent under hot running water.
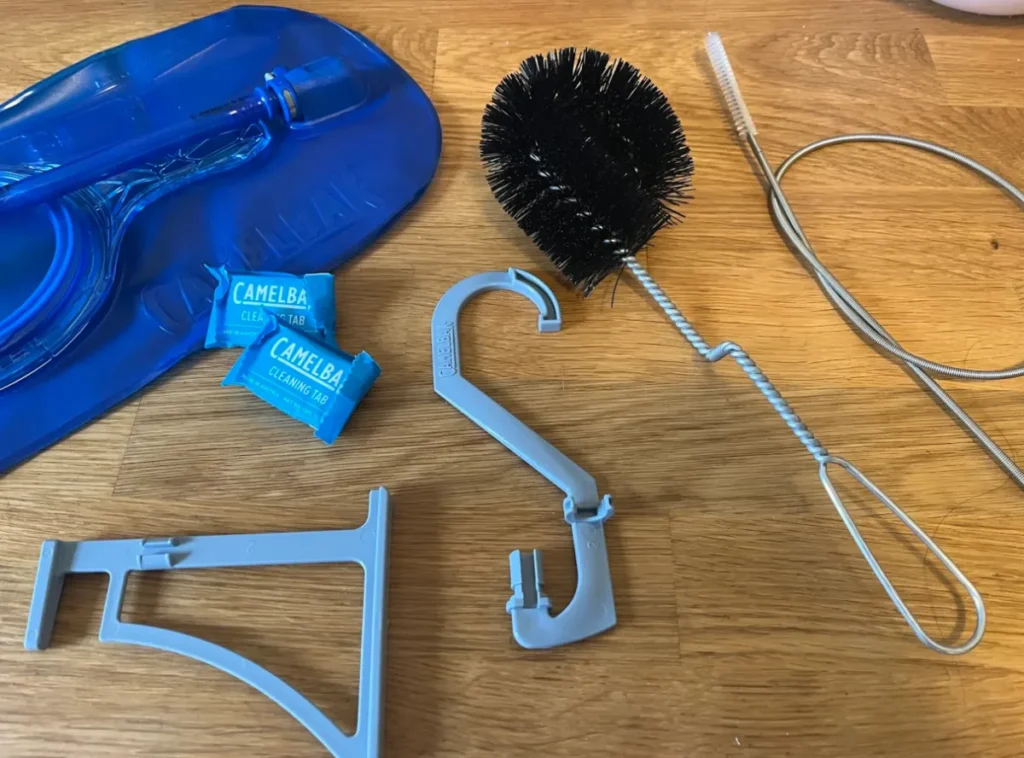
To me, a cleaning kit is a borderline mandatory accessory for your CamelBak.
It comes with a reservoir brush, tube brush, reservoir hanger, and a couple cleaning tablets — everything you need to make cleaning your bladder a quick, painless process.
Ever since I got mine, I’ve been a lot more consistent cleaning my CamelBak.
Step 4: Fill The Reservoir
Filling a CamelBak is pretty straightforward:
- Remove the bladder from the backpack.
- Unscrew the cap if you have a Crux, Unbottle, or Stoaway Reservoir. Slide open the TRU Zip zipper if you have a Fusion reservoir.
- Fill the reservoir about 80 to 90% full. If you overfill it, it’s more likely to rupture.
- Squeeze any remaining air out of the bladder so you’re not left sucking on air when your bladder is almost empty.
- To close a Crux, Unbottle, or Stoaway Reservoir, twist the cap counterclockwise until it clicks, then tighten as normal. To close a Fusion reservoir, simply slide the zipper shut.
Step 5: Make Sure Everything Works And Nothing’s Leaking
It’s a good idea to check your CamelBak for any leaks or defects before actually using it. After all, it’s better to find out now instead of halfway through your hike or bike ride.
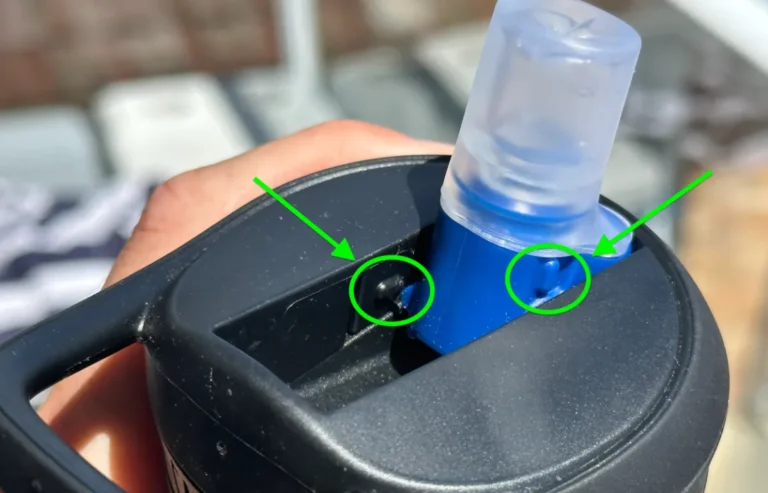
If it’s leaking then the #1 cause is the lid not being put on correctly. It can be easy for the threads to get misaligned. But this is easy to fix.
- Make sure there’s no excess air in your reservoir.
- Dry off any moisture on the exterior of the pack with a clean dishcloth or towel.
- Give the bladder a few gentle squeezes. Turn it over, so the fill cap is down, and squeeze it a few more times.
- Shake the bladder a few times, turning it over halfway through.
- Check for moisture around the fill cap, QuickLink port, and seams.
- Take a drink or two through the delivery tube. Water should flow pretty freely. You shouldn’t feel like you’re straining to drink.
A few of the most common problems have really simple solutions:
- If water is leaking from the reservoir’s fill cap, the lid is probably just loose or cross threaded. Open the cap, turn it counterclockwise until you hear a click, then screw it firmly shut.
- If water is leaking from the QuickLink port (where the reservoir and tube connect), remove the tube and slide it back into place firmly while holding the QuickLink release button.
- If you’re having trouble pulling water through the bite valve, check that the drinking slit isn’t sealed. If it is, roll the end of the bite valve firmly between two fingers or pry the slit open with a knife or fingernail.
Step 6: Put Your Bladder In Your Pack
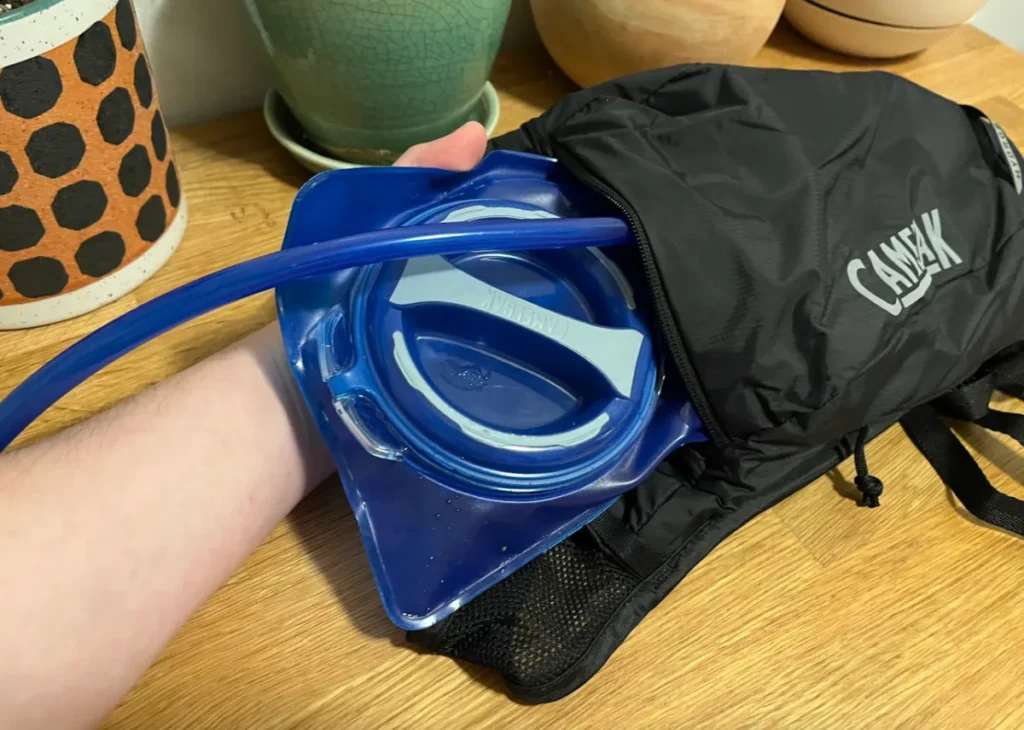
To easily put your bladder into your pack:
- Unzip the backpack and hold it vertically in one hand.
- Pick up your reservoir in your other hand, holding it by the top seam, NOT the handle. If you grab the handle, the bladder will fold a bit and make it a lot harder than it needs to be.
- Lower the bladder into the bladder pocket.
- Locate the fabric loop on the top interior of your backpack and slide it through both of the hooks on your bladder. If you only use one hook, it’ll slide off pretty easily and failure to do this can end up with the bladder sinking to the bottom of the bag which can be very annoying.
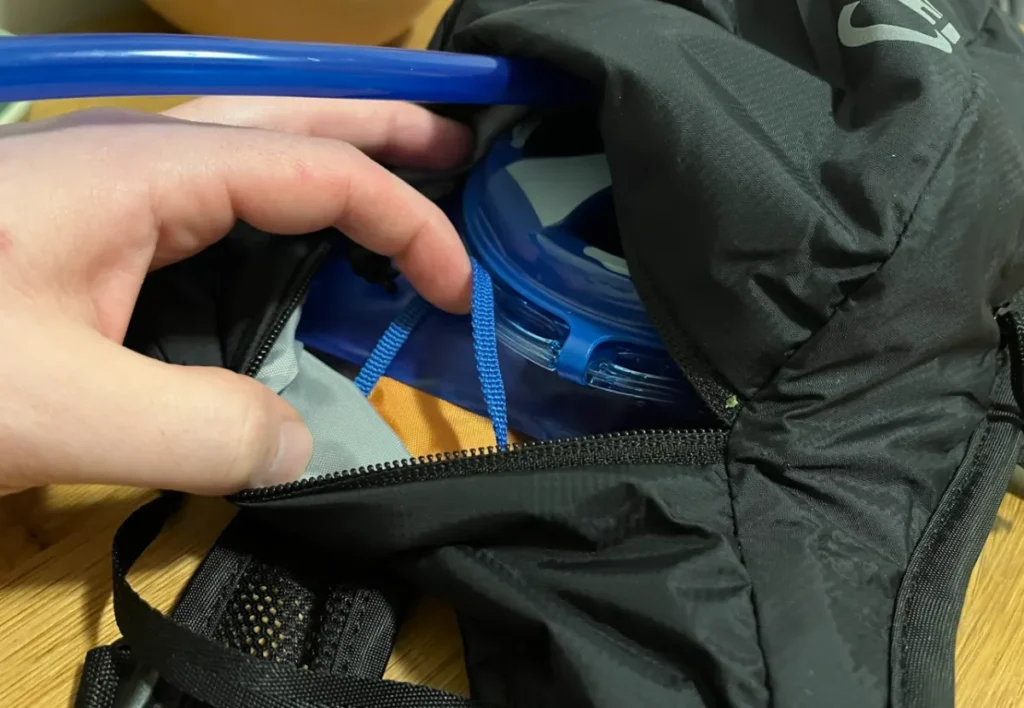
- Thread the delivery tube through the slot near the right shoulder strap and pull it all the way through.
- Connect the tube to the tube trap on the shoulder strap.
- Put your CamelBak on and you’re all set. Enjoy the adventure.
Caring For Your New CamelBak
A solid maintenance routine will help extend your CamelBak’s lifespan and prevent mold and mildew from growing in your bladder.
For starters, it’s important to clean your bladder regularly. I use CamelBak tablets after every use, with a proper wash and scrub every week or two.
Second, always let your bladder dry completely before putting it away. Leaving any moisture in your reservoir will eventually lead to problems with mold and mildew.
A quick CamelBak hack is to put your CamelBak in the freezer if you don’t have the time (or energy) to completely dry it. The freezer will stop mold from growing as quickly so it’s a great storage place between uses.
And finally, get into the habit of checking for mold and mildew every time you use your bladder. A few of the most common signs are:
- A musty or earthy smell.
- Slimy, slippery walls on the interior of the bladder.
- Dark spots, especially on the threads of the lid and around the seams of the reservoir.