CamelBak makes some of my favorite bottles as they’re decently priced and my kids like the fun lid designs of the Eddy+ and Podium.
The only problem is that sometimes the lid designs can make it a bit tricky to deep wash the bottle. Being able to really get in there to clean every nook and cranny gives me peace of mind that I’m not drinking from a bottle that has hidden mold (like the Contigo bottles).
Luckily there are a few steps you can take to really give a deep clean to your CamelBak bottle.
Eddy+ and Podium owners will have a few extra steps to take for each lid type, and Chute Mag, Carry Cap, and Fit Cap owners will have simplified versions of these steps.
In order to properly clean CamelBak water bottles, follow these steps:
- Disassemble and remove and lid components so that you can clean every surface of your mouthpiece and lid to remove mold (Eddy+ disassembly guide, Podium disassembly guide).
- Use a bottle brush and hot soapy water to scrub your bottle and lid pieces thoroughly.
- You can also soak all bottle parts in vinegar for extra sanitization and to kill mold.
- For tough stains or odors, you can also choose to soak your bottle in hot soapy water or vinegar for a period of time. Baking soda can also work great for especially stubborn stains or smells.
Cleaning a CamelBak is pretty straightforward, and the only real challenge you’ll face is the actual disassembling of lid components.
While it can be a bit tricky at first, I’ll touch on the easiest way to go about this down below, as well as the best tips and tricks for properly cleaning CamelBak water bottles.
Things You’ll Need
This list incorporates every item you’ll need to properly clean any CamelBak bottle, as well as some bottle-specific items that you’ll be using for disassembling purposes.
- Dish soap
- White vinegar (for added sanitization and mold killing)
- Baking soda (optional, great if you have any non-water beverages)
- Soft-bristled Bottle Brush (This 3-in-1 set from Amazon is my go-to)
- For Eddy+: Tweezers, Strong sharp-ended knife, Pliers (preferably thin-nosed)
- For Podium: Butter Knife
Step 1: Take Your Lid Apart (Eddy+ and Podium)
The lids on the Eddy+ and Podium have smaller components that need to be disassembled and removed to be scrubbed and deep cleaned.
For the Chute Mag, Carry Cap, and Fit Cap owners you won’t have to do this step.
The Eddy+ bottle, for instance, has a lid that’s split into two portions entirely and mold and gunk can easily build up on the inside without you even knowing.
Take Apart Eddy+ Lid
To take the Eddy lid apart, grab a pair of tweezers, a strong knife with a sharp end, and some pliers (thin-nosed will work best).
Then follow the steps I’ve demonstrated in the video below, or refer to my guide here.
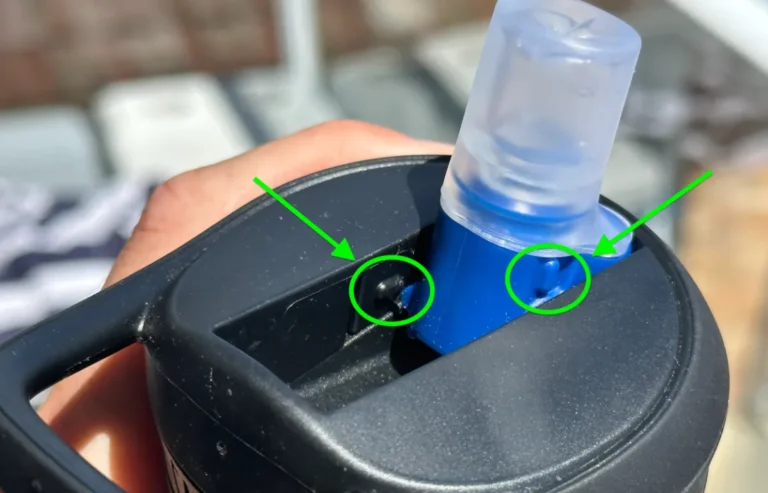
- Remove the lid, straw and bite valve
- Remove the plastic dowel using a knife or thumb tack
- Remove the top portion of the lid
- Remove the air valve and bite valve attachment
Take Apart Podium Lid
For the Podium lid, grab a butter knife and follow my step-by-step instructions here, or watch my video down below.
It takes a bit of patience at first (approximately 5 minutes for the first time), but with some practice, you should be able to get this done in around 30-60 seconds.
If you have a Chute Mag, Fit Cap, or Carry Cap you won’t have to deal with this step (you lucked out).
Step 2: Wash the Main Portion of the Bottle
Grab your dish soap and bottle brush and thoroughly scrub the interior of your bottle with hot soapy water (you can also use a sponge if you don’t have a brush).
I do recommend using a brush for steel bottles like the Chute Mag and Carry Cap as the base is wider and will require extra reach.
After scrubbing, be sure to rinse your bottle thoroughly until the suds are completely gone.
While most CamelBak bottles are really just meant for water, you might have some tough stains or smells if you drink any tea or juice through yours.
In this case, you can also fill the bottle with hot water and a tablespoon of baking soda and soak your bottle for about an hour before giving it another scrub. Alternatively check out this guide for removing cloudiness from the inside of bottles.
Baking soda works especially great on tough stains and odors caused by sticky drinks.
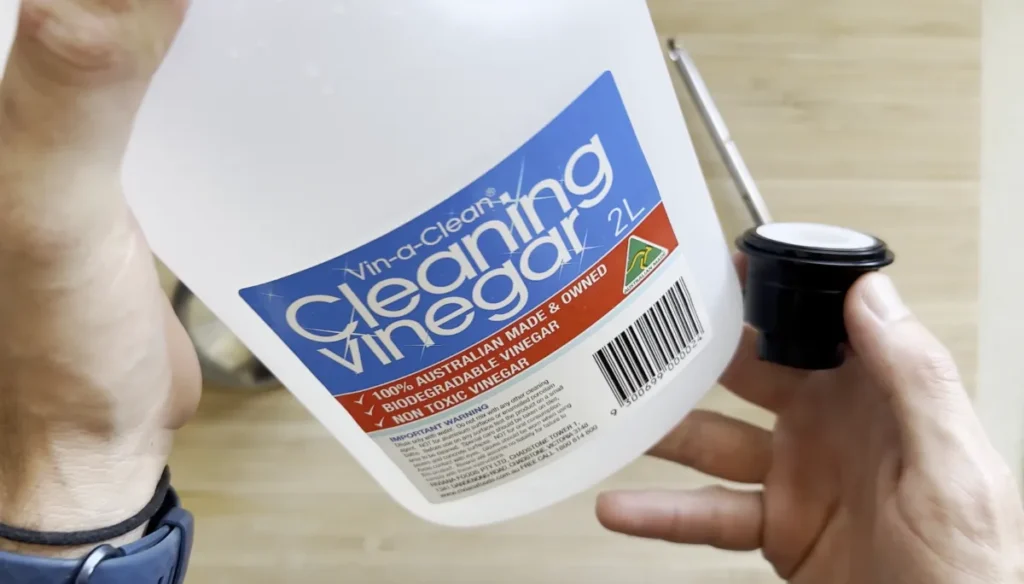
Even if your bottle has no stains or odors after scrubbing, I always recommend soaking it in some white vinegar as it’s a natural mold killer and will remove any remaining bacteria.
To do this, simply soak your bottle in equal parts vinegar and hot water and scrub/rinse afterward.
Step 3: Clean the Lid Components
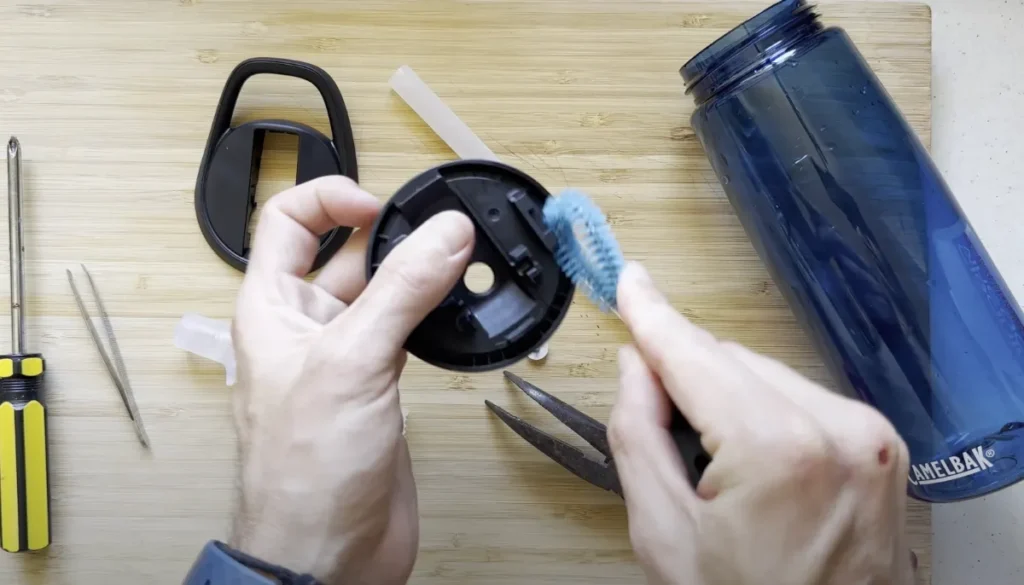
Now it’s time to wash the lid components that we disassembled earlier.
While simple lids like the Chute Mag, Fit Cap, and Carry Cap will usually only require some thorough scrubbing, the Eddy+ and Podium lid components will require some soak time to get deep cleaned.
Start by grabbing your bottle brush and scrubbing each piece thoroughly with warm soapy water. The brush will really come in handy for lids like the Chute Mag where you’ll need to clean the wide mouthpiece and the little cap that goes over.
If you clean your bottle regularly and really stay on top of things, you can usually stop after scrubbing every nook and cranny.
If you’re a bit behind on bottle care (I too am guilty of this), then I strongly recommend soaking the pieces overnight with a 1:1 solution of white vinegar and water.
These pieces can develop mold without you even knowing, especially if it’s been a while since you last took apart the lid.
A vinegar soak will kill all of the mold that’s remaining on each component, after which you should give them one final scrub with soapy water.
Step 4: Thoroughly Dry All Pieces
This is one step I feel gets overlooked WAY too often.
Properly drying your lid components before putting them back together is extremely important for preventing mold.
It’s like when you wash your car just to end up with water marks from not drying it properly. Well, in this case, the “water marks” on your bottle will be mold that grows from moisture.
In order to avoid mold growing, make sure to let your lid components dry completely before reassembling. I usually just leave them out to dry overnight, but if you’re really in a rush you can either dry them with a towel (hitting every nook and cranny) or use a hair dryer to air dry them.
This goes for the Carry Cap, Fit Cap, and Chute Mag as well. If you’re planning on throwing your bottle in the cabinet after washing, MAKE SURE that you give your lid some airtime or towel it off thoroughly before storing it away.
I also like to store my lid and bottle separately
However you choose to go about it, just make sure that your lid components are completely dry before putting them back together. Not doing so is a surefire way to end up with mold.
Step 5: Reassemble Your Lid
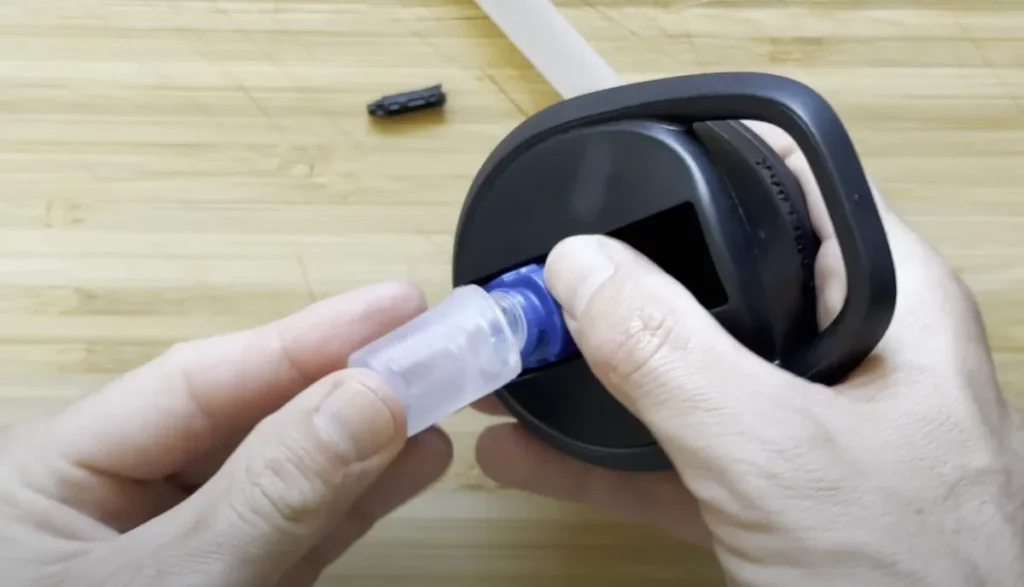
The final step for Eddy+ and Podium owners is to put everything back together.
To do this, simply follow the steps in my Eddy+ lid disassembly and cleaning guide or Podium disassembly and cleaning guide, but in reverse order. There are a few tips that can help with Eddy’s reassembling, so I strongly recommend checking out my guide for it.
Being diligent with this step is especially important to avoid a potential bottle leak down the line, so I recommend following each step of the guides carefully on this part.