Me and my kids love the CamelBak Eddy bottles with their unique bite valve. It’s a fun way to drink water and it really helps my kids drink more bottles of water everyday.
The bottle also makes their friends jealous which encourages them to use it even more.
But despite the proprietary antimicrobial technology (HydroGuard) used in CamelBak bottles unless you pull apart and clean these lids semi-regularly they can get bad odors, deterioration, discoloration, and mold (yuck!).
CamelBak talk about using the dishwasher or a bottle brush to clean your lids, but they don’t tell you about how water can get stuck in hidden or hard to reach parts of the lid and how to pull it apart for cleaning (plus how to put it back together).
With some trial and error I worked out how to disassemble and reassemble Eddy+ bite valve lids so you can clean them properly and remove mold from your CamelBak bottle.
I made an instructional video below which provides a good visual intro on how to take your Eddy lid apart.
You can also use the step-by-step guide below.
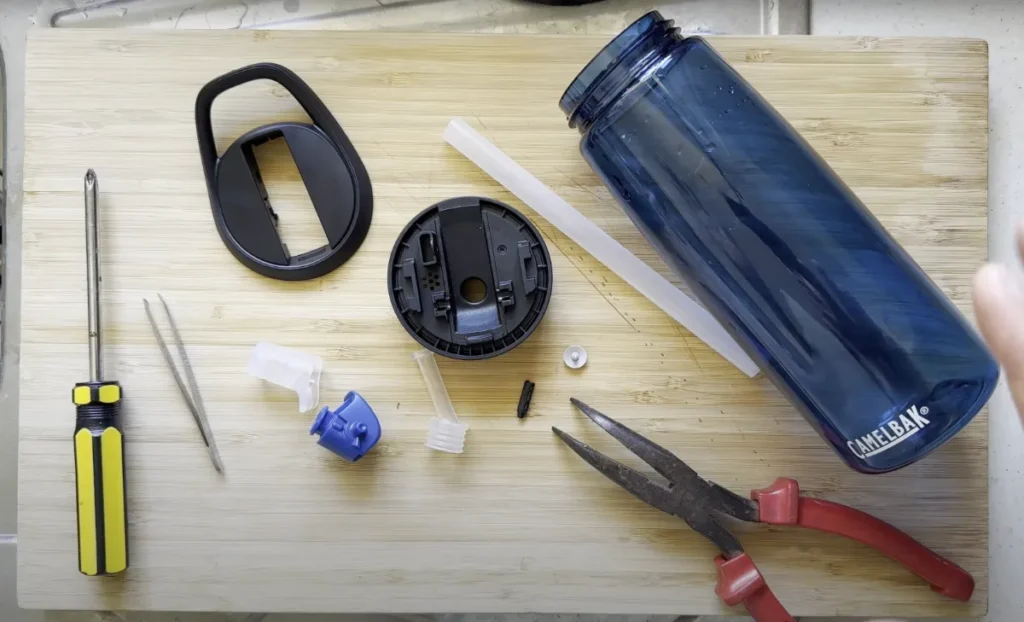
Step 1: Gather Needed Supplies
To take your lid apart, you need a few tools. It is best to get these before you get started to avoid having to stop in the middle of the process.
You need:
- Tweezers
- Thin nose pliers (thicker ones may work, but thin ones are easier)
- Strong knife with a sharp end
- Some patience
Once you have the needed supplies, you are ready to get started.
Pulling apart the lid will take approximately 5 minutes the first time you do it and 30-60 seconds for subsequent times.
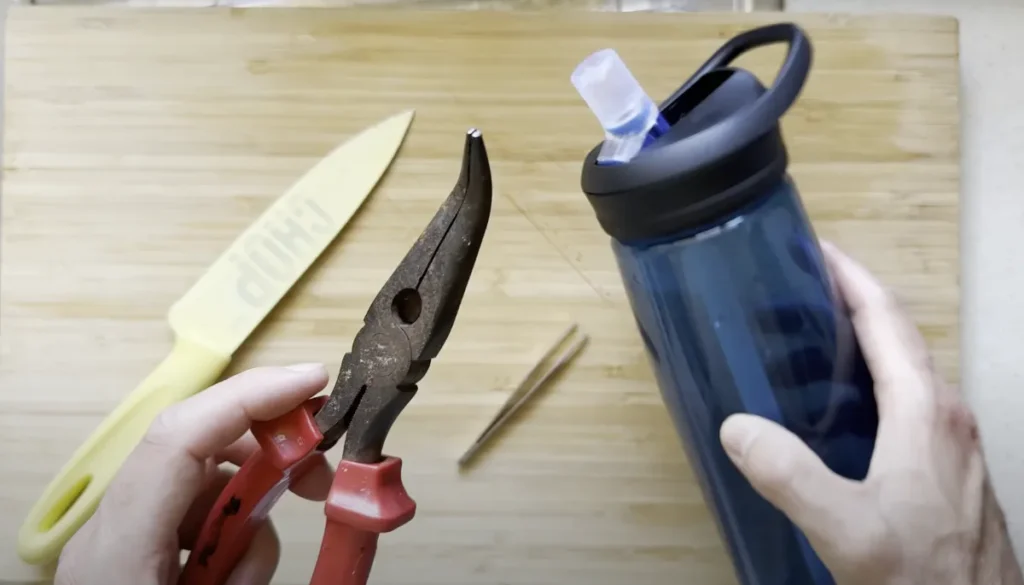
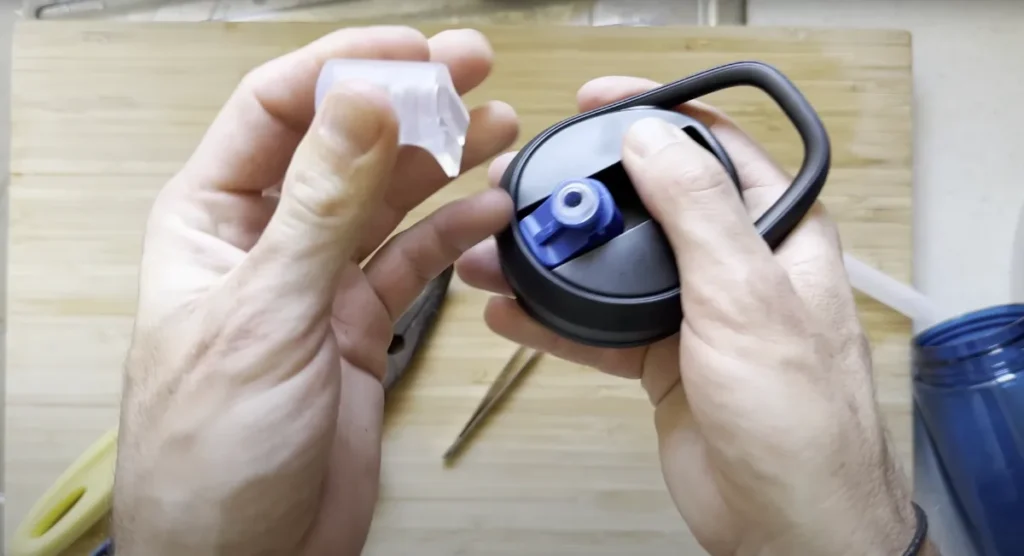
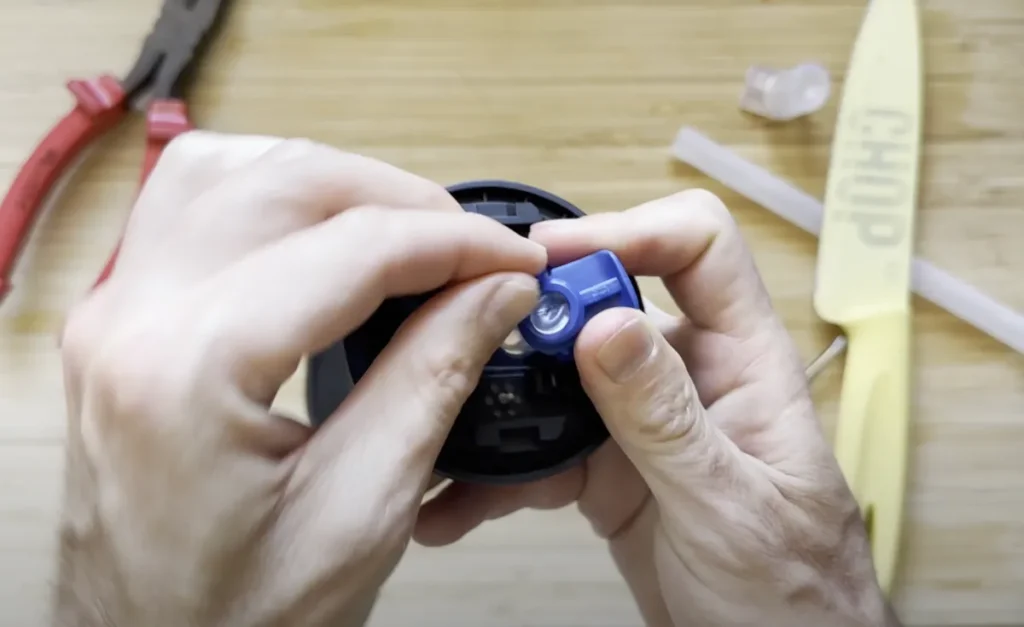
Step 2: Remove the Lid, Straw, and Bite Valve
First remove the straw from the bottom of the lid.
Then firmly pull off the bite valve. It should come away from the bottle rather easily.
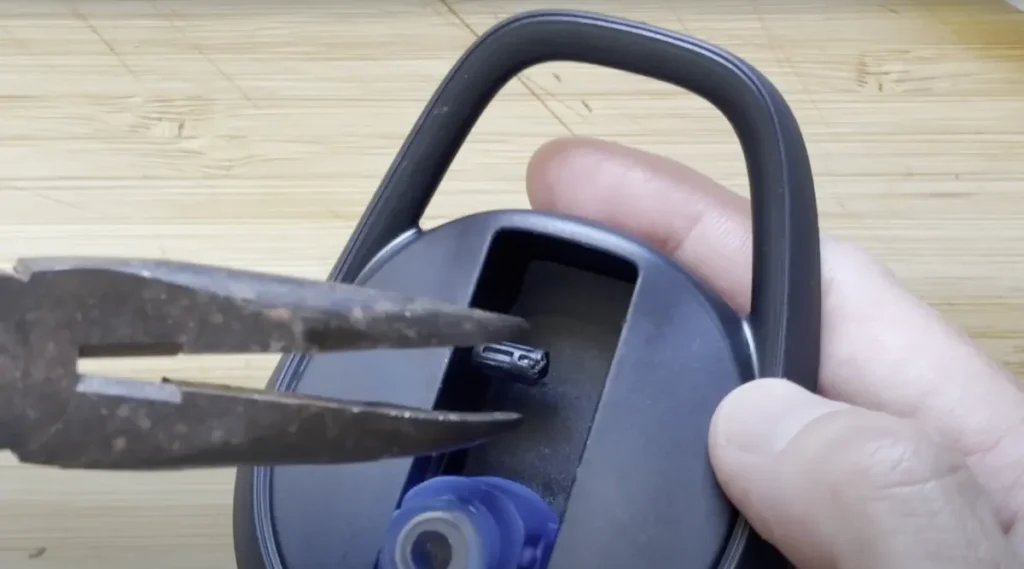
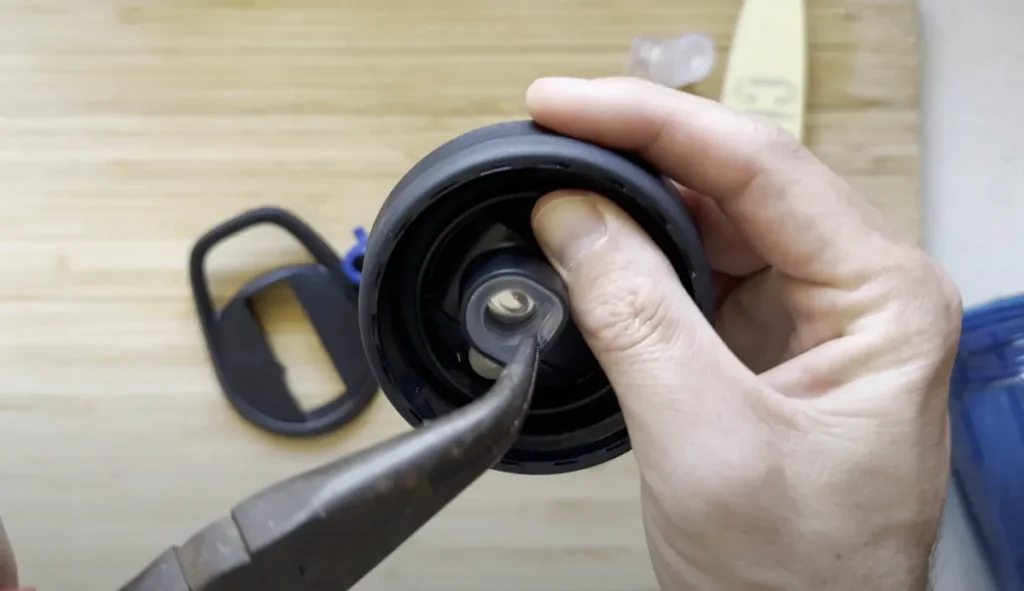
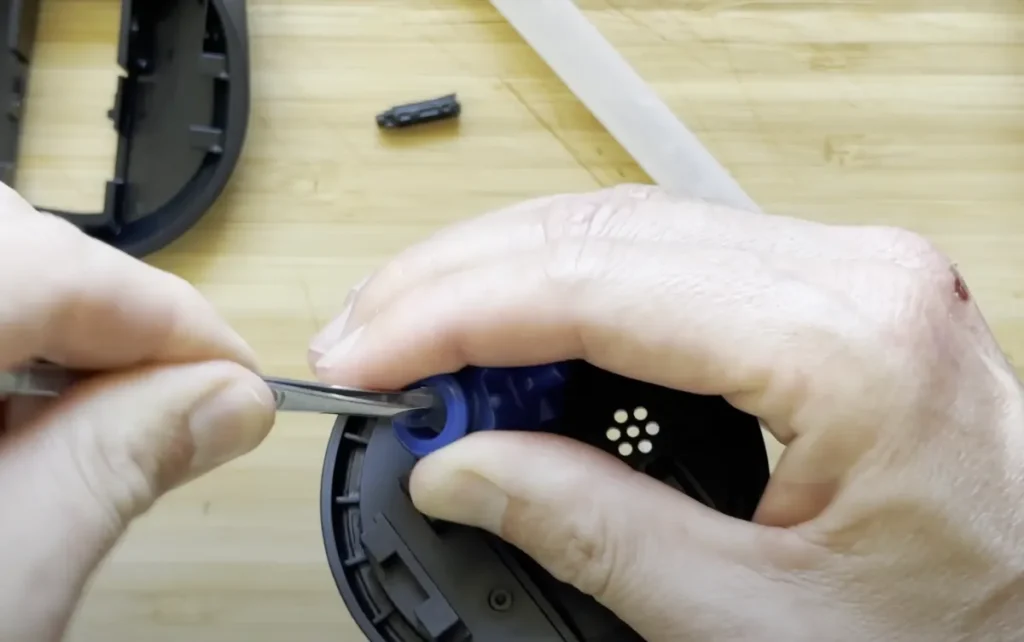
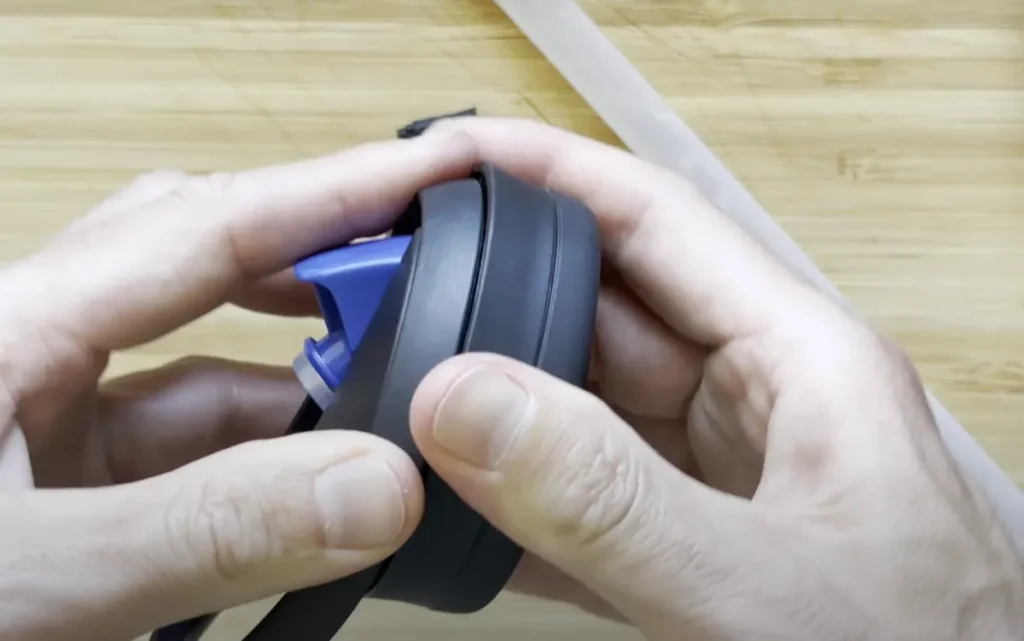
Step 3: Remove the Plastic Dowel
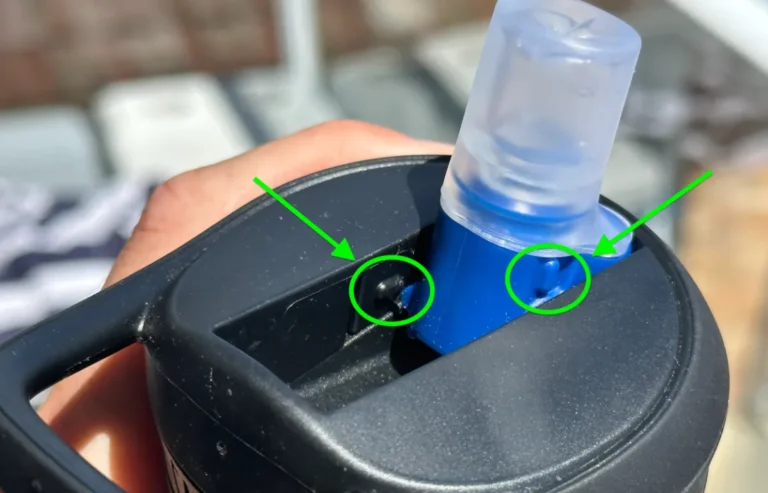
This is the most difficult part of the entire tear down.
CamelBak Eddy+ lids have a plastic dowel that connects the top part of the lid to the bottom part and it’s not easy to pull out.
It should look like a little circle on the side of the inside of your lid.
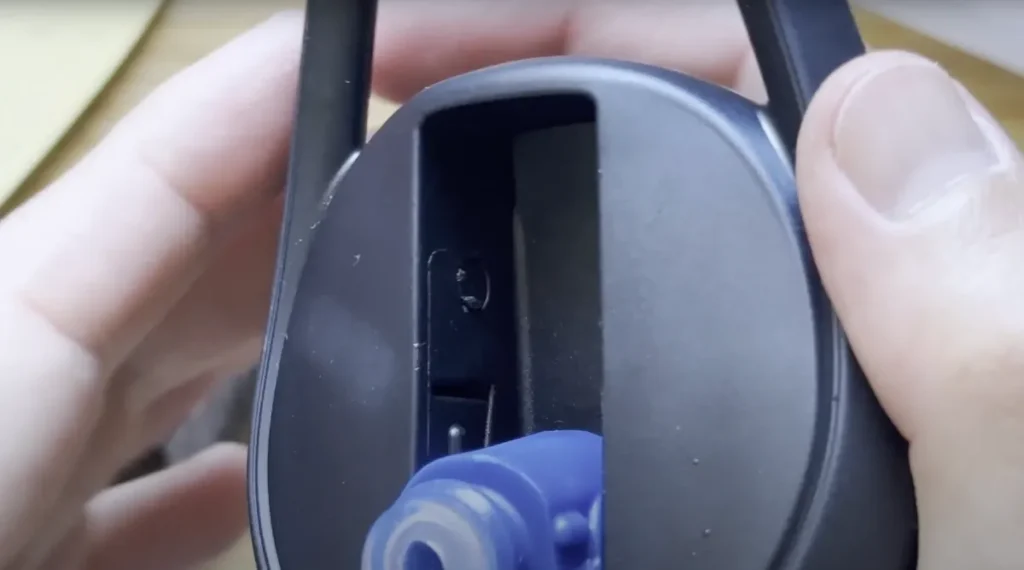
Using a strong pointy knife place the tip of the knife in the side of the dowel and lever it out.
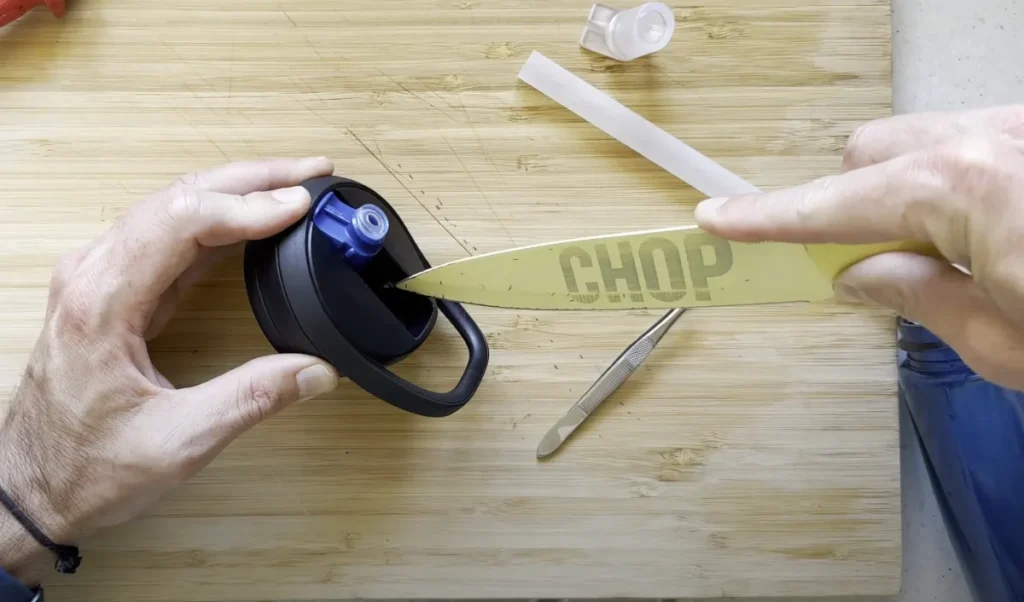
This may cause some cosmetic damage to the plastic dowel. But I don’t know how to get it out any other way and it won’t ruin the functioning of your lid.
This section is hidden once your bite valve is back on and you’re using the bottle so no one should even notice the damage.
Once the dowel has popped out a little bit you can grab it with your fingers and pull it out the rest of the way.
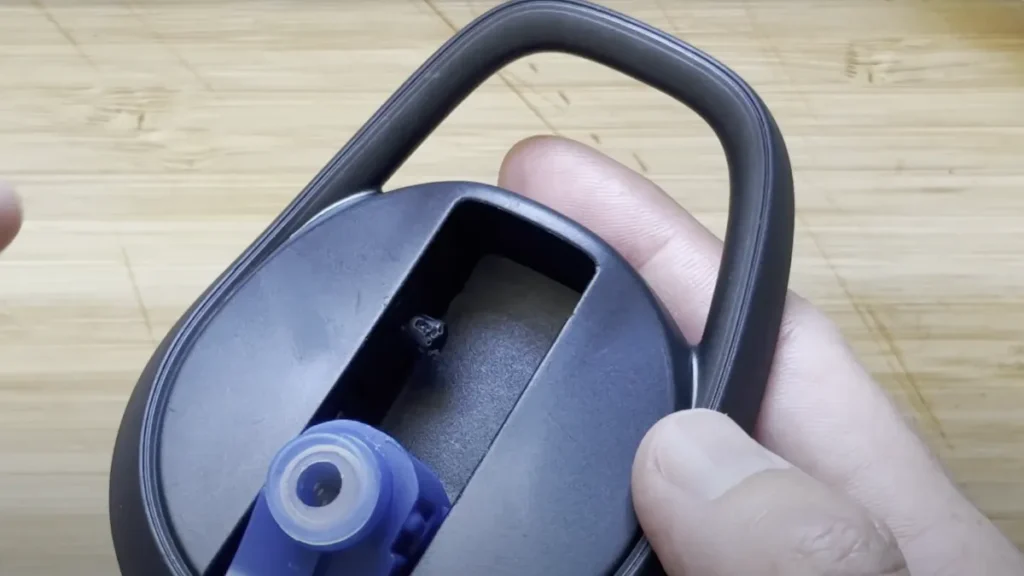
Alternatively you may want to use your pliers to pull it out if you’re struggling to do it with your fingers.
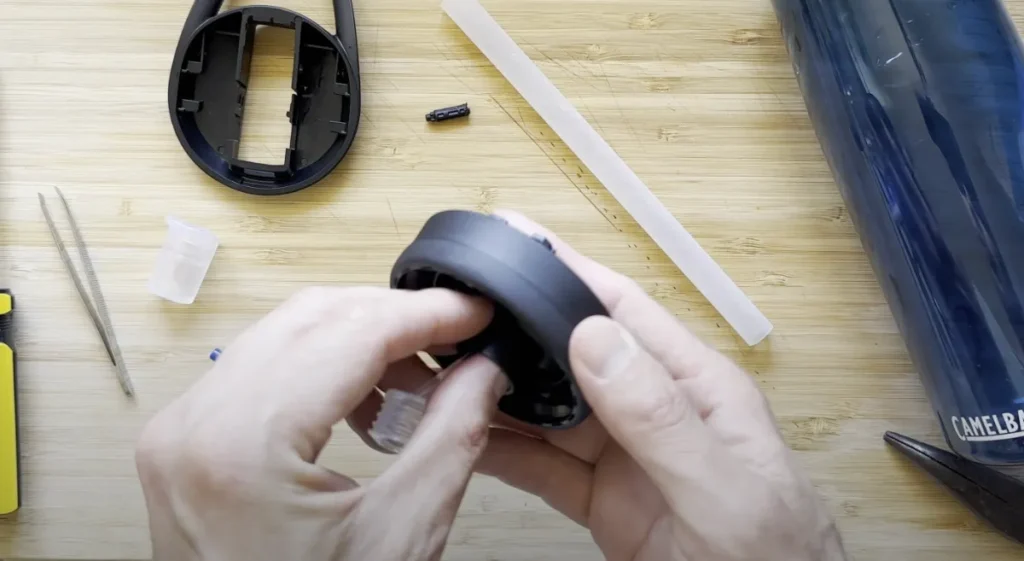
Step 4: Remove the Top Portion of the Lid
Once the dowel is remove the top portion of the lid is free to come off from the bottom portion.
Using your thumbs slide the top part of the lid upwards (towards the handle). It should only slide a little bit and then stop.
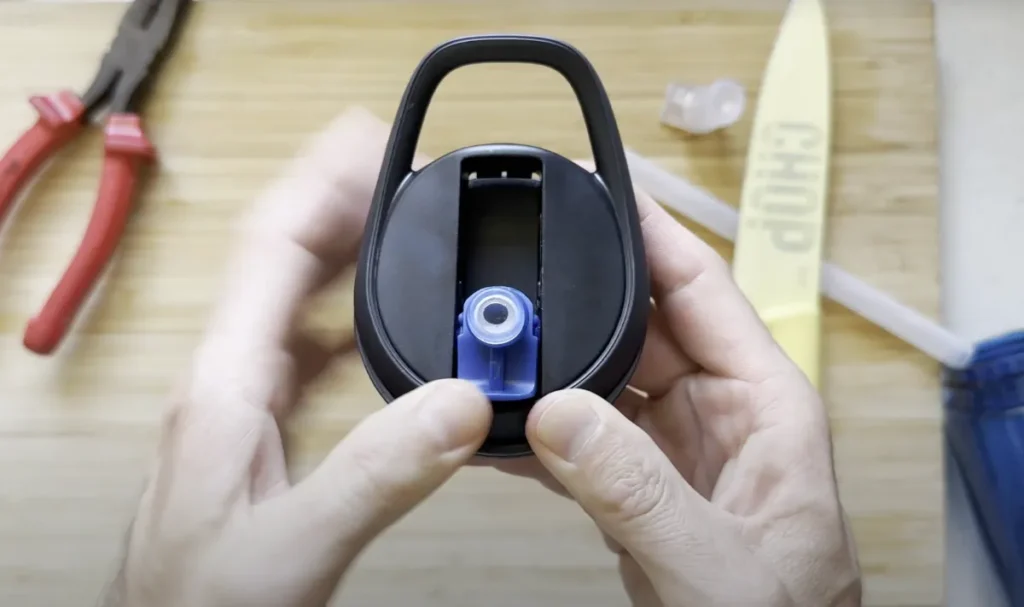
You’ll now be able to pull the top of the lid off revealing the underneath.
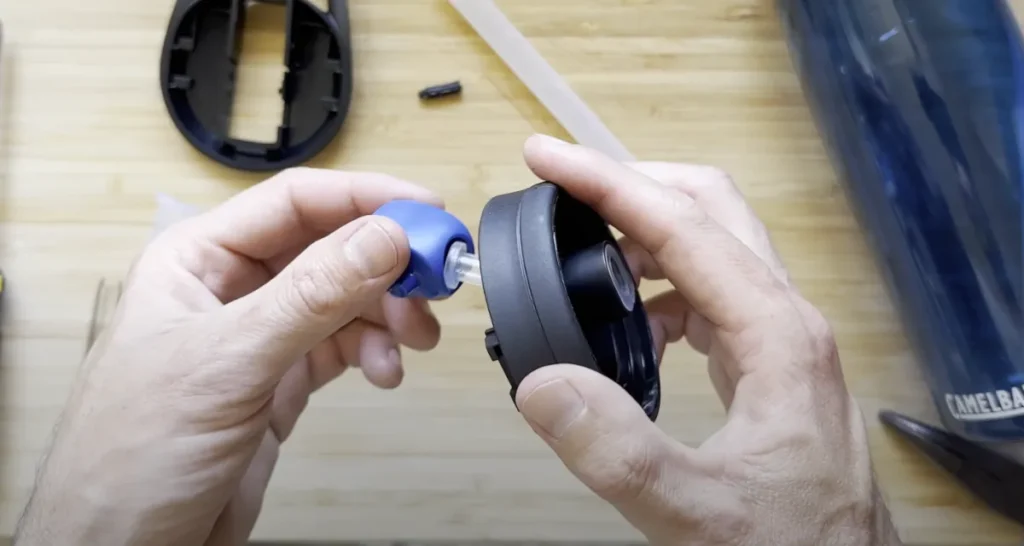
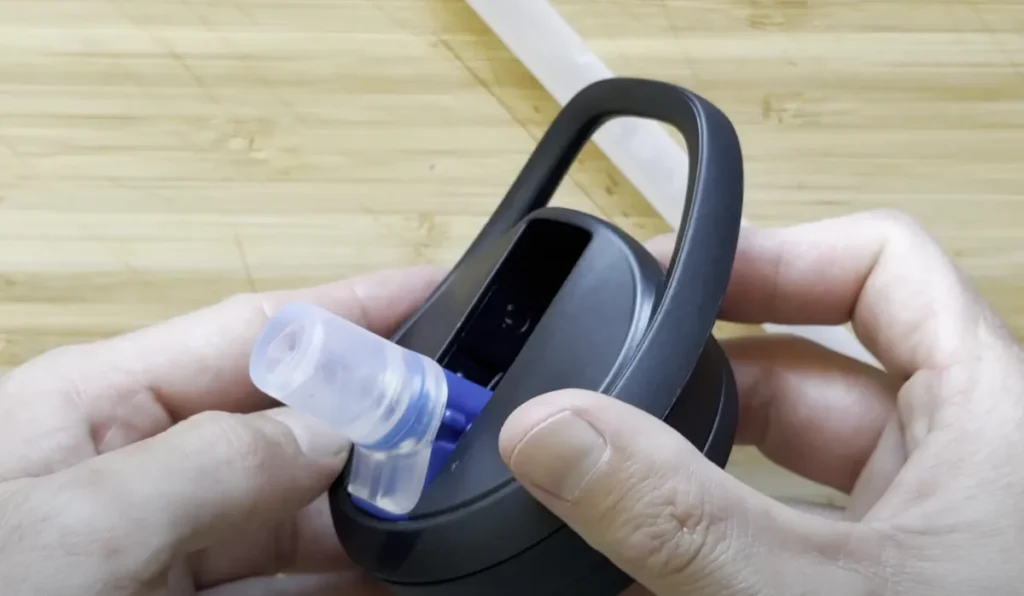
Step 5: Remove The Air Valve
Underneath the lid is a small circular one-way air valve.
This lets air into the bottle as you drink but doesn’t let water out. To remove this simply pull it out with your fingers or use pliers if you are having trouble.
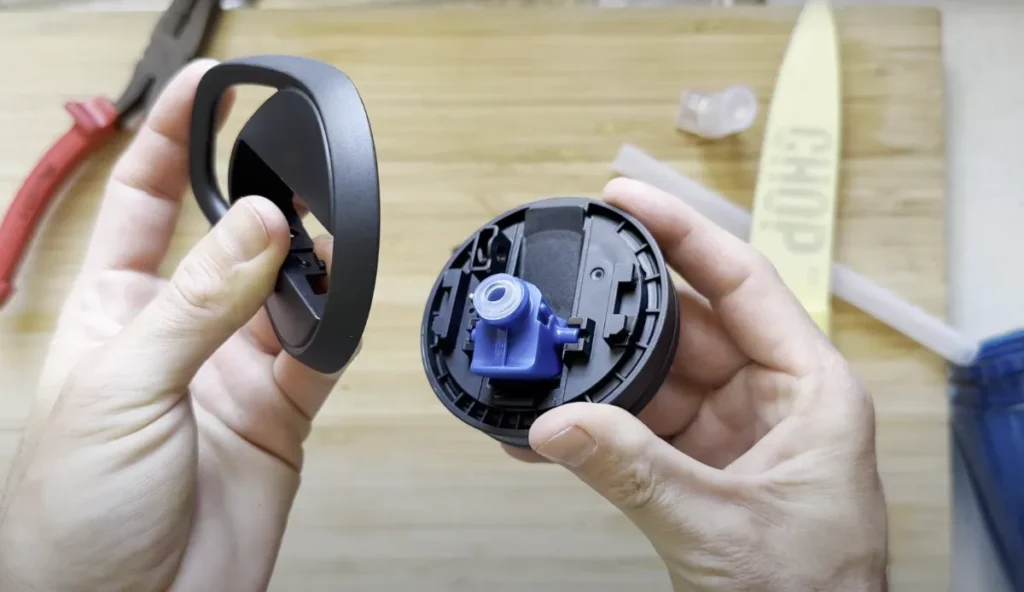
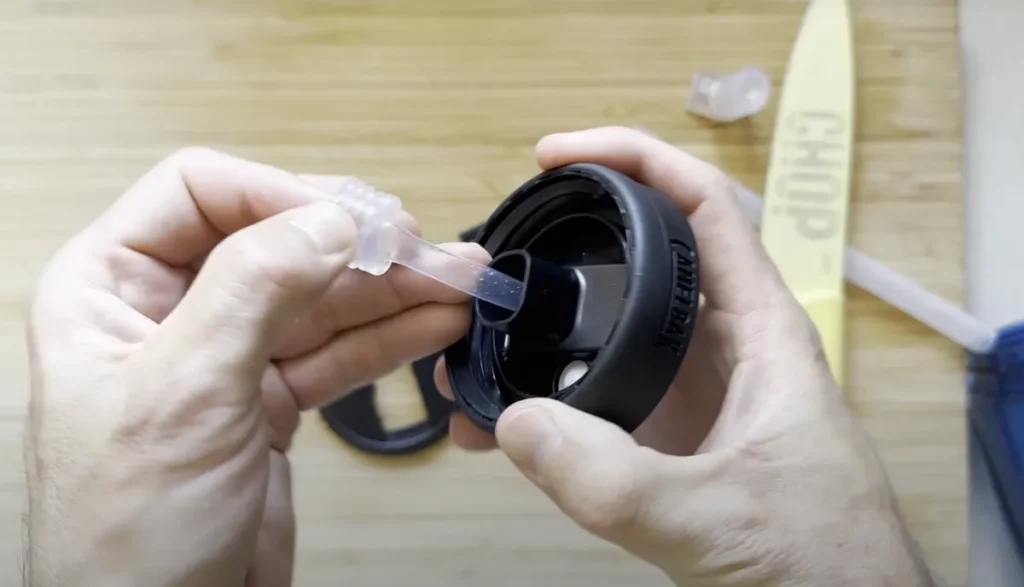
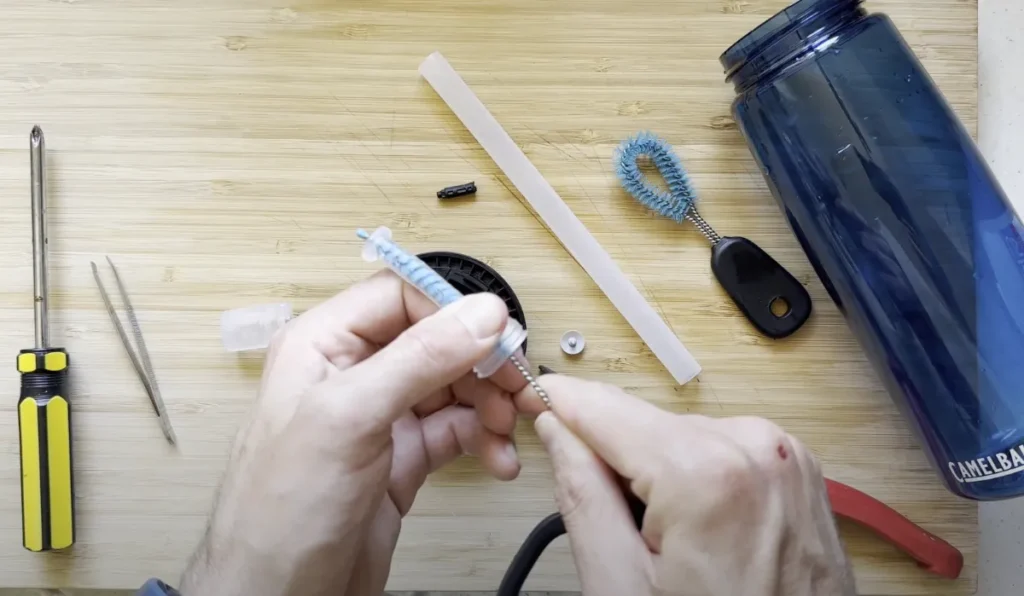
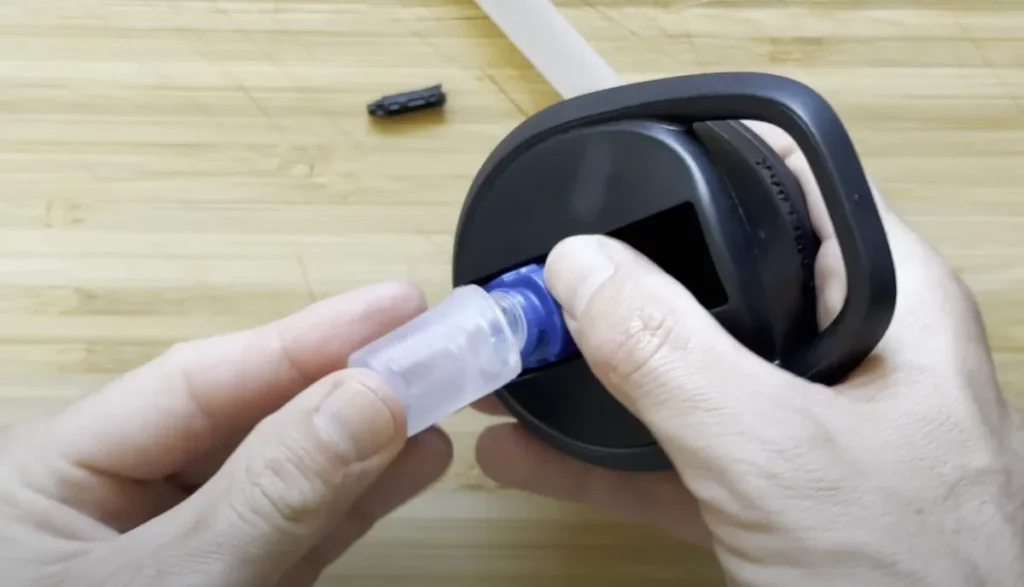
Step 6: Remove Bite Valve Attachment
You will need to remove the bite valve attachment next.
To do this, pinch the top of the rubber straw extension and push it into the hard plastic holder.
Once it is inside the hole, you should be able to pull the piece that holds your bite valve out of the lid.
You’ll need to pull it from the bottom. Use your pliers to get the bottom of the bite valve attachment out from the lid.
Then pull firmly with your hands and it should pop out.
Step 7: Clean Your Lid
Now that you have all the parts out of the lid, it is time to clean it.
I recommend soaking your lid and all the parts in cleaning vinegar and water overnight. Read more about removing mold from your water bottles.
After you remove the parts from the cleaning solution, use a bottle brush kit to get in all the nooks and crannies in the lid and remove any grime, dirt, and dust.
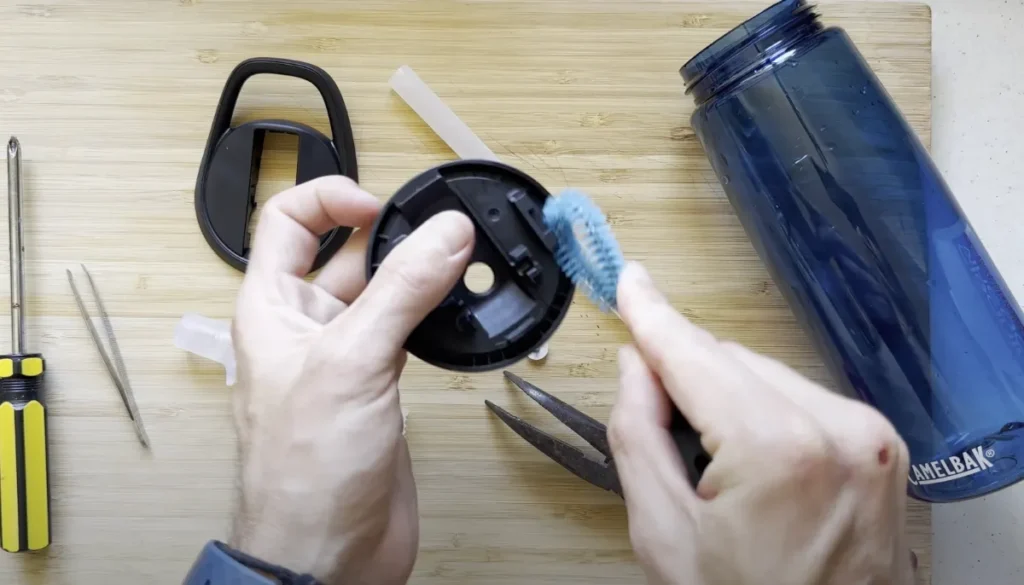
I personally like and use this 3-in-1 bottle brush kit from Amazon as it has a small brush which is perfect for the inside of the lid and the small parts plus it has a straw cleaner which is great for the straw, bite valve and bite valve attachement.
Be sure you let all the parts air dry completely before putting the lid back together.
How To Reassemble The CamelBak
Once you’ve cleaned your lid parts, treated them for mold and completely dried them it’s now time to put them back together.
The process is similar to the tear down in reverse but there are a few tips I learned to make things easier.
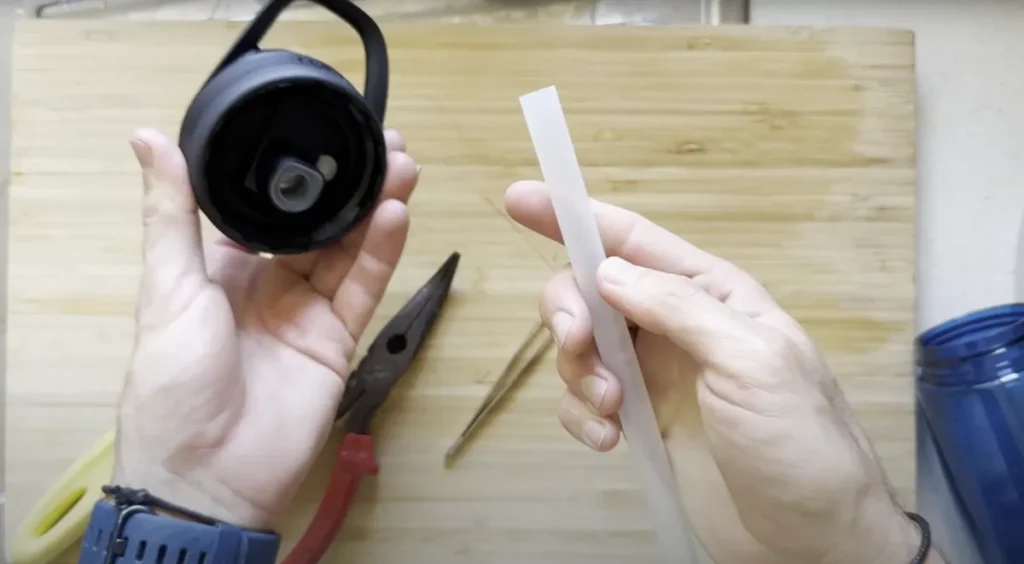
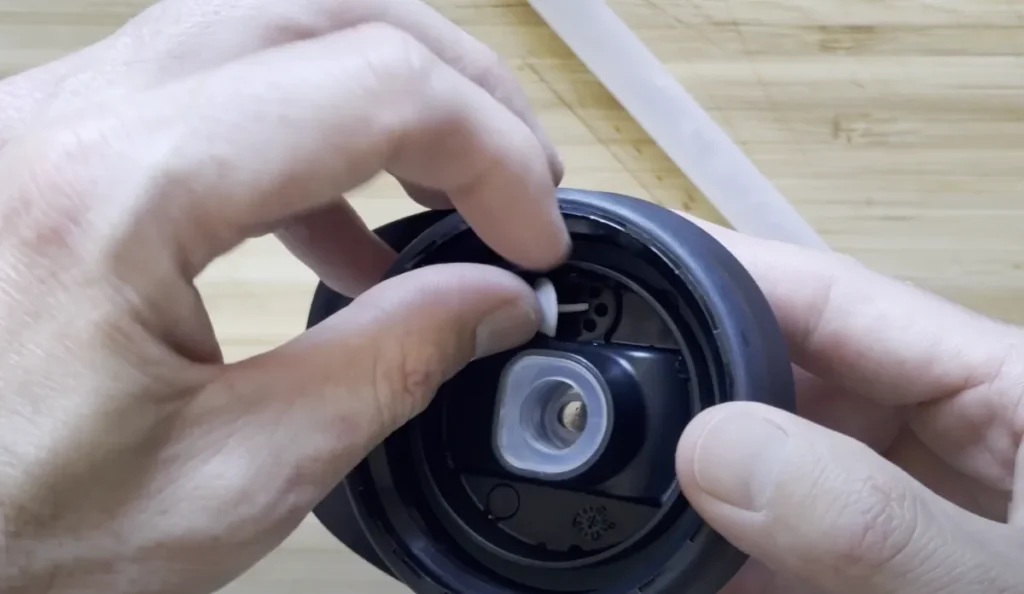
Step 1: Reinsert In The Inner Tube
The first thing you want to do is re-insert the inner tube.
To do this push the small round end through the bottom of the CamelBak lid.
Using your fingers push it into place. It should line up and squeeze into the bottom of the CamelBak lid.

Step 2: Pull Inner Tube Through Spout Hinge
This next part is the trickiest part of the re-assembly process. You need to get the inner tube through the spout hinge and this takes a bit of effort.
First, place the spout hinge over the inner tube.
Then using tweezers reaching through the top of the spout hinge, squeeze hard on the inner tube and pull it through.
For this to work for me I had to squeeze REALLY HARD on the tweezers and it took a few goes to pull it through.
Once this is compelte make sure you spin the bite valve hinge so it’s facing the right way.
Step 3: Re-Insert Top of Cap
Next put the top of the lid back on, making sure it’s offset from the bottom of the lid.
You want the handle of the lid away from the bite valve hinge. If you’re having trouble getting the top of the lid on you may have the handle around the wrong way.
Once on, slide the top of the lid back into place so the sides are now flush with the bottom of the lid.
Step 4: Replace Air Valve
Make sure to replace the air valve otherwise your CamelBak bottle will leak really badly.
Replacing the air valve is simple. Just push it back in making sure to line up the pointy bit of the air valve with the center hole.
If you have an older CamelBak lid then click here to learn how to re-insert the air valve as it’s a bit more difficult with older models.
Step 5: Replace Bite Valve + Straw
Next put the bit valve and straw back on using your hands.
Both of them should push into place fairly easily.
Step 6: Put Plastic Dowel Back In
Lastly put the plastic dowel back in so that the top of the lid doesn’t come off.
To put it in just slide it into place and push it in with your fingers.
Taking Apart an Older CamelBak Eddy Lid
If you have an older CamelBak Eddy bottle, the above steps will not apply. You can watch this video as an overview of what to do or use the step-by-step guide below.
Step 1: Gather Your Materials
For this lid, you need the following materials:
- T-10 security torque bit
- Knife
- File or tool to pry the lid apart
Step 2: Remove the Screw
Lift the bite valve of your bottle, and you will see a screw holding the lid together. This is a T-10 security screw and requires the right bit to remove it.
Step 3: Separate the Lid
Once the screw is removed, you can push the top portion of the lid back toward the handle to remove it.
Once the top part of the lid is off, remove the bite valve. You should be able to pop this off easily. You can pinch the straw extension and push it through the opening (like you did above) to remove it and easily clean all the parts and components of your lid.
At this point, you can clean your lid the same way you did in the step-by-step instructions for the newer lid.
FAQs
How often should you wash your Eddy lid?
Removing the lid from your bottle and letting it air dry daily is smart. You should also clean your lid well at least once a week – or if you’re lazy like me then maybe once a month.
While this is an extensive process, keeping it clean and free of gunk, grime, and dirt is necessary.
Can you purchase replacement parts for your lid?
Unfortunately, you cannot purchase replacement parts, like the plastic dowel or bite valve.
However, you can replace just the lid and straw of your water bottle if needed. This is a smart option if your lid is damaged or you lose a part or component while cleaning it.
Can you put your lid in the dishwasher?
CamelBak Eddy lids are dishwasher safe.
You can put these on the top rack of your dishwasher to clean them, too, if you prefer that to hand washing and cleaning.
However, I don’t advise putting all the small parts into your dishwasher as they can easily be lost.
Soaking them in vinegar and then handwashing is a better option.