I love my CamelBak water bottles and so do my kids. It’s been a great way for us to drink more water. My youngest is obsessed with the CamelBak Podium and my older son loves the Eddy+ Bite Valve bottle.
However, sometimes when cleaning the lids the air valves come off by accident or I take them off intentionally to remove any mold.
Sometimes they can be a bit tricky to get back on but if you know how to do it then it’s not too difficult.
To fix or reset a CamelBak Eddy+ air valve you need to simply reinsert the valve into the middle hole and push it down – it will click into place. The collection of holes looks like a hexagon, the only tricky part is making sure it slots into the middle hole.
For older CamelBaks, you’ll need to use the string or the pull-apart method.
The latest CamelBacks are much simpler to fix than the old lids, but if you have an older model bottle then it’s still possible to replace the air valve. It’ll just take a few more steps.
Things You Might Need
Depending upon how old your CamelBak is, you might need a few tools and items to help you fix it. But if you have the newest CamelBak bottle you won’t need anything at all.
- Some string
- T10 screwdriver
- Pliers
How To Fix The Air Valve On Newer CamelBaks
Luckily for me I have the newer versions of the CamelBak Eddy+ water bottles where the air valve is super easy to fix.
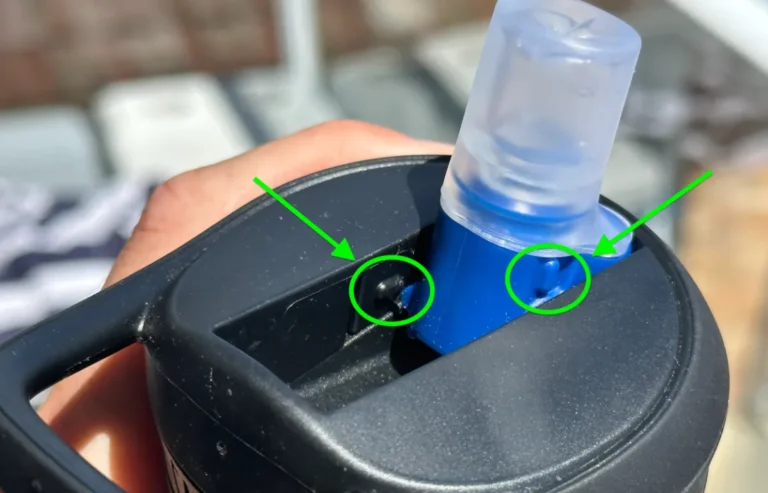
Step 1: Find The Air Valve and Connection Point
Turn the lid upside down to find where the air valve connects to – as mentioned, it should look like a hexagon (a six-sided shape) made up of 7 dots.
The valve itself is small and looks similar to a pin.
Step 2: Push The Valve In
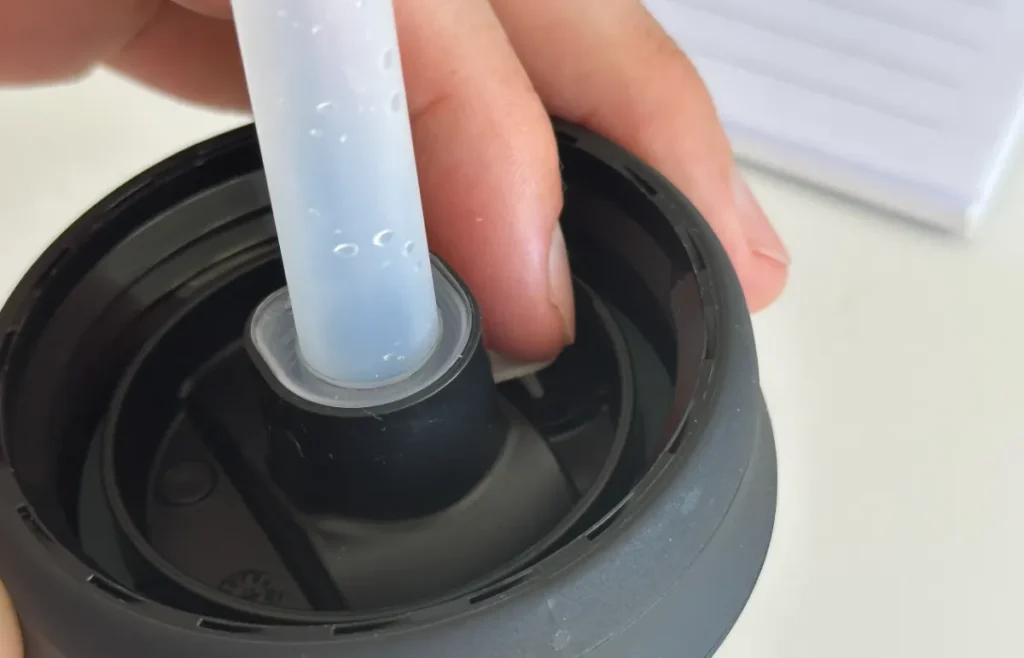
You’re going to want to make sure that the pointier side of the valve goes into the middle hole and then push it in until you hear a clicking sound.
Congratulations, your valve is fixed.
How To Fix The Air Valve On Older CamelBaks (Pliers Method)
CamelBaks are great bottles but the air valves on the older models can be tricky to fix.
Depending on how old your CamelBak is there a couple of methods you can try – this is for the older range where the air valve opening is to the side and not above.
If yours is above the spout, you have an even older model and should take a look at the next method below this one.
Step 1: Remove The Torque Screw
Get your screwdriver and remove the torque screw located just above the spout of the CamelBak bottle.
Step 2: Pry Open The Lid
Use your screwdriver to pry open the top half of the lid – lift the top part slightly and push forwards (towards the front) to minimize the chances of damaging the bottle.
Step 3: Position The Valve And Pull It Through
You’ll want to get the valve and position the pointier end toward the middle hole – this might take a few tries but you want to push it through the hole a little bit so you have something to work with.
Get your pliers and pull the stem of the valve through until you hear a little click. This click means the valve is secure and back in position.
Step 4: Reconnect The Lid To The Bottle
Take the top part of the bottle that you disconnected in step 2 and reconnect it to the bottle.
You’re going to want to push this until you hear a fairly loud cracking sound. This tells you that the disconnected part has completely sat into the grooves that hold it in place.
Finally, take your screwdriver and put the torque screw back in.
How To Fix The Air Valve On Older CamelBaks (String Method)
The oldest model CamelBaks also need a different method to repair them.
The old CamelBaks have an air valve that you can see the opening for if you turn the lid upside down – it’s just above the dirt cap.
This method is a little fiddly but will fix or reset the air valve on older bottles.
Step 1: Disconnect The Dirt Cap And Backing
Using a screwdriver, pry off the dirt cap at the top – don’t worry, it’s easy to reconnect later.
There is also a piece blocking the air valve opening on the surface of the lid. Use your screwdriver to disconnect these.
You’ll now have the hole where the spout comes from and be able to see the small hexagon-shaped holes that the air valve fits into.
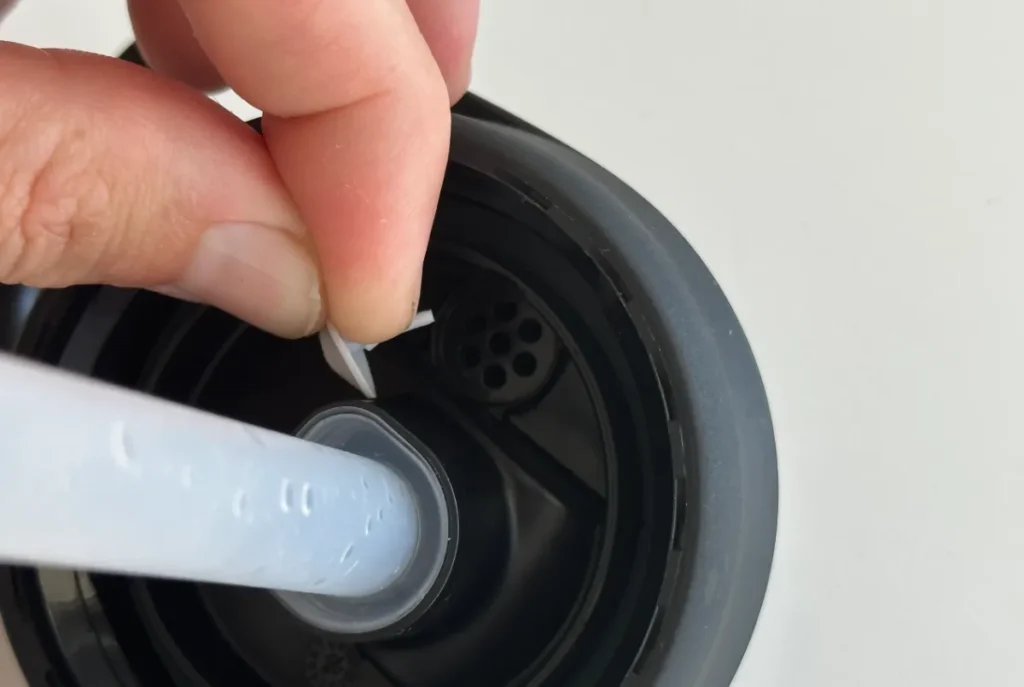
Step 2: Use String To Hook The Air Valve
Form a loop with the string and push it through the middle hole (take care that the string you have isn’t too thick).
Hook the stem of the valve with the string and then use the string to pull the valve back into position – you’ll know when it’s in the right position because they’ll be a popping noise when it’s back in place.
You can then unhook the string from the back of the valve.
Step 3: Reattach Everything
Slot the back piece that you disconnected back in – there should be some grooves to follow but it should click neatly into place. You might need to use your screwdriver as leverage as well.
Take the dirt cap and insert one side into one of the openings, use your screwdriver as a wedge for the other side – giving you enough space to click the dirt cap into position.
Recommended Products
The latest version of the CamelBak bottle range is much easier to clean and maintain than the older ones.