When I got my first CamelBak, I went a couple months without really washing it. After all, I was rinsing it out after every use anyway. Where’s the harm?
But I soon noticed that my water was starting to taste a little funky and the bladder had a musty smell.
Whoops.
As it turns out, bacteria and mold will find their way into a CamelBak — even if you only use it for water. Proper cleanings are needed regularly to keep your pack working and to prevent it from making you sick.
Luckily, with the right tools, cleaning a CamelBak bladder is actually pretty painless.
To properly clean a CamelBak bladder, rinse out the reservoir, soak for 20 minutes with reservoir cleaning tablets (or your cleaner of choice), disassemble and scrub all surfaces with a soft-bristled brush, rinse thoroughly, and hang to dry. If your bladder has a bad odor or taste, try soaking it with lemon juice or vinegar before washing.
Maybe it’s my imagination, but once I started cleaning my CamelBak properly, I started feeling a bit better too.
Maybe drinking slightly moldy water isn’t great for your health. Who’d have thought?
Things You’ll Need
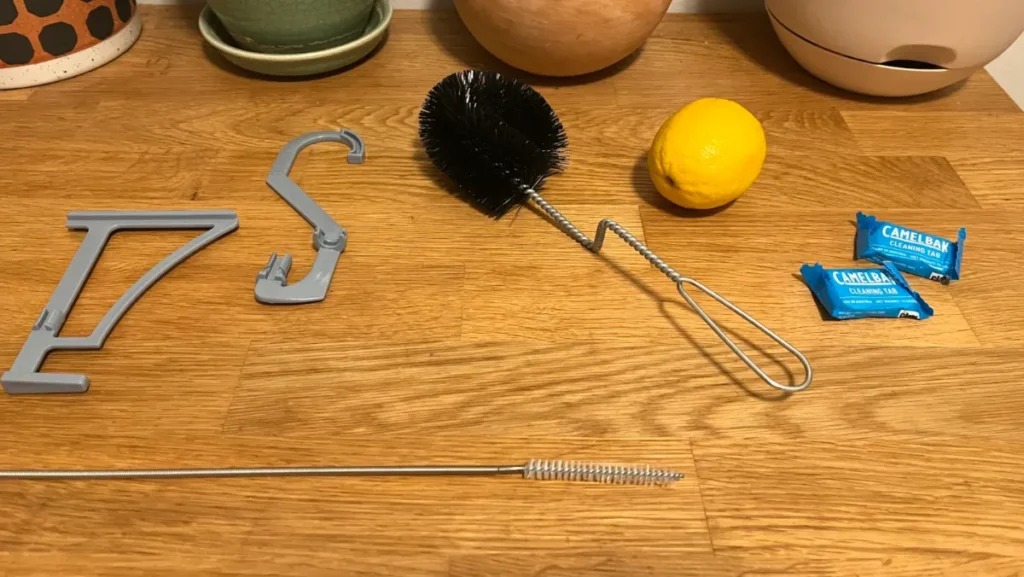
- Mild dish soap
- CamelBak cleaning tablets
- Soft-bristled brush
- Tube cleaning brush
- Reservoir hanger (optional)
- Lemon (optional)
I use the CamelBak Crux Cleaning Kit to clean my reservoir and it has almost everything you’ll need (lemon sadly not included).
Step 1: Remove The Bladder
The first step is to remove the reservoir from the backpack and set it aside. Don’t wash the bladder with it still in the pack, you’ll make a huge mess.
Now is also a perfect time to wash the backpack in the washing machine if it’s getting a little funky.
Step 2: Rinse Out The Bladder
If you drink anything other than water from your bladder, it’s important to rinse it out as well as possible before moving on.
Even if you only drink water, it’s still a good idea to give it a quick rinse.
- Fill the bladder with hot water, seal, and give a few vigorous shakes.
- Lift the reservoir, letting the tube hang into the sink.
- Pinch the bite valve and let water flow through for 15 or 20 seconds, allowing the tube and mouthpiece to get rinsed as well.
- Dump out any remaining water.
Step 3: Sanitize With Cleaning Tablets Or Your Cleaner Of Choice
CamelBak cleaning tablets are best for this step, though water bottle cleaning tablets, baking soda, vinegar, diluted bleach, or denture cleaning tablets work well too.
The goal here is to get rid of any scum, mold or residual smells that are hiding in your musty bladder.
- Fill the bladder with hot water.
- Drop in a reservoir cleaning tablet or your cleaner of choice (more on that below).
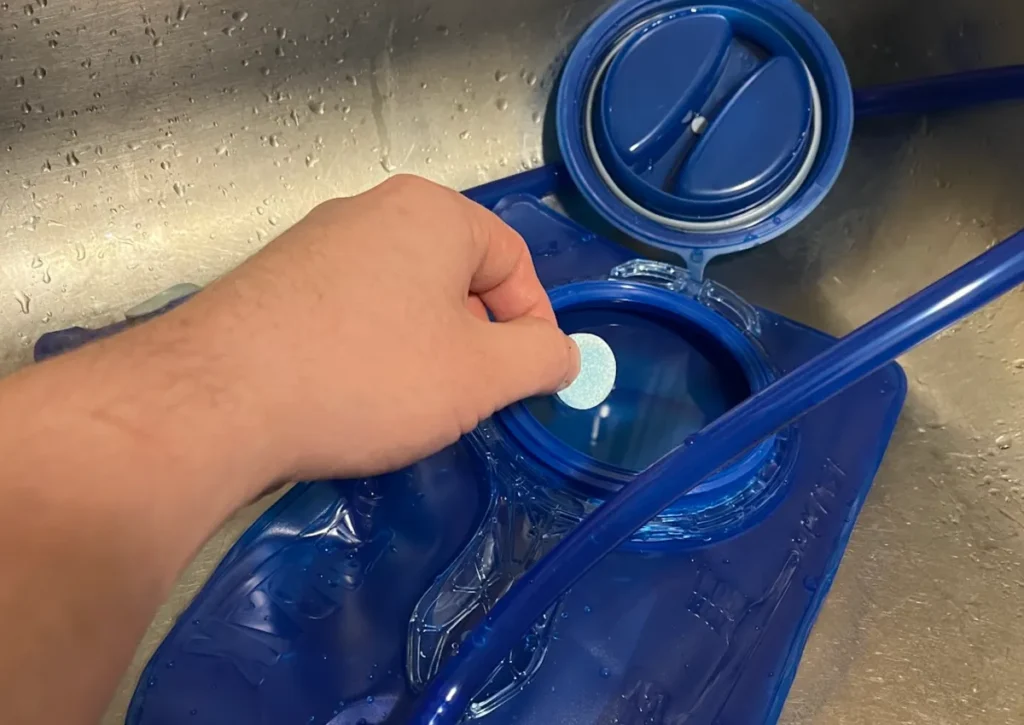
- Seal the bladder and give it a few vigorous shakes.
- Hold the reservoir over the sink and squeeze the bite valve until water flows through. This ensures that the cleaning solution contacts all surfaces of your bladder.
- Let soak according to the instructions on your cleaning tablets, or about 20 minutes if using another cleaner.
- Empty the bladder through the mouthpiece (my preferred method) or by dumping if you’re in a rush.
If you’re using reservoir cleaning tablets, follow the instructions on the package. If you’re using any other cleaning solution, follow the guidelines below:
- Baking soda: use roughly ¼ cup baking soda and ¾ cups water per liter of water.
- Bleach: use 3 or 4 drops of bleach per liter of water. If you use bleach, rinse the bladder again as instructed in step 2 before moving on.
- Distilled white vinegar: use a ratio of ⅔ parts hot water to ⅓ part vinegar (you don’t have to be too precise). If my bladder is suuuuper funky sometimes I’ll use 50% water and 50% vinegar or even straight vinegar to kill the mold.
- Water bottle cleaning tablets: use one tablet per liter of water.
- Denture cleaning tablets: use two tablets per liter of water.
Step 4: Deodorize With Lemon Juice (optional)
Lemon juice does a great job of removing stubborn odors from your CamelBak. If your bladder is brand new, it can also help eliminate that faint plasticy taste and smell some new reservoirs have.
If your bladder smells and tastes fine, you can go ahead and skip down to step 5.
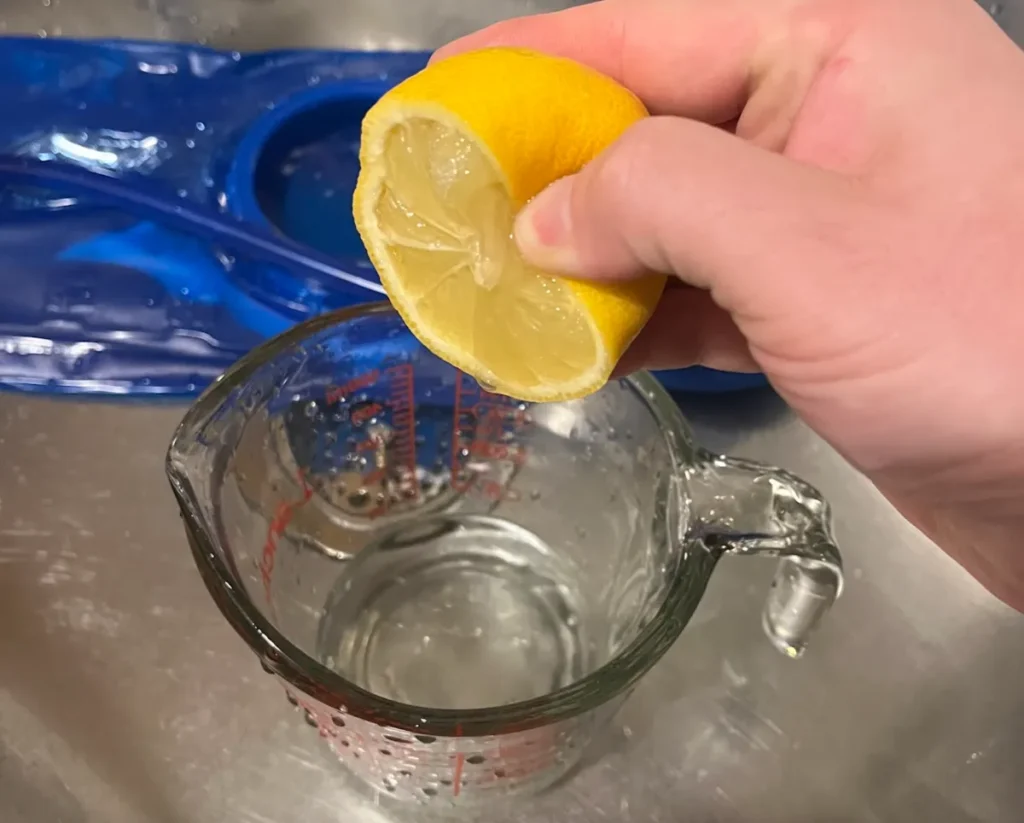
- Fill your reservoir with hot water and about ¼ cup of fresh squeezed lemon juice per liter of water.
- Hold the reservoir above the sink and squeeze the bite valve until water flows through.
- Let it soak for twenty minutes.
- Empty into the sink.
Step 5: Wash With Dish Soap
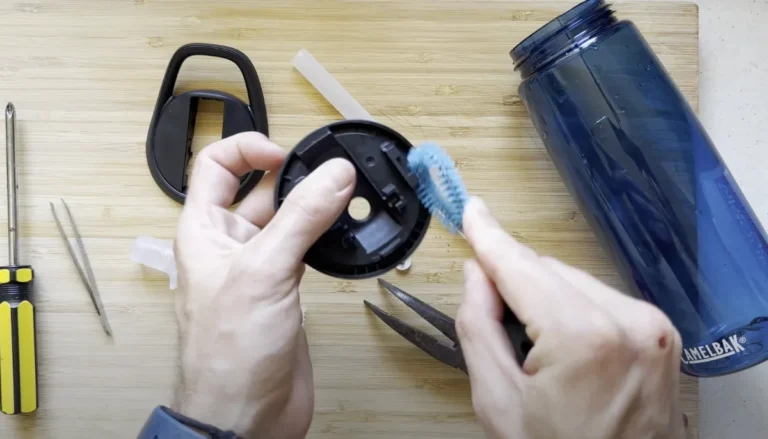
- Using a soft-bristled reservoir brush or sponge, scrub the interior of the bladder with warm water and a mild dish detergent.
- Slide off the mouthpiece and scrub the interior of the tube with a tube cleaning brush.
- Scrub the mouthpiece separately with a straw brush or the end of the tube cleaning brush.
Step 6: Rinse Well
Once every surface has been scrubbed thoroughly, rinse out the bladder, tube, and mouthpiece with warm running water — making sure to remove all remaining soap and cleaner. Squeeze the bite valve to allow water to rinse through the mouthpiece.
If you used bleach, give the bladder an extra rinse or two to ensure it’s all removed.
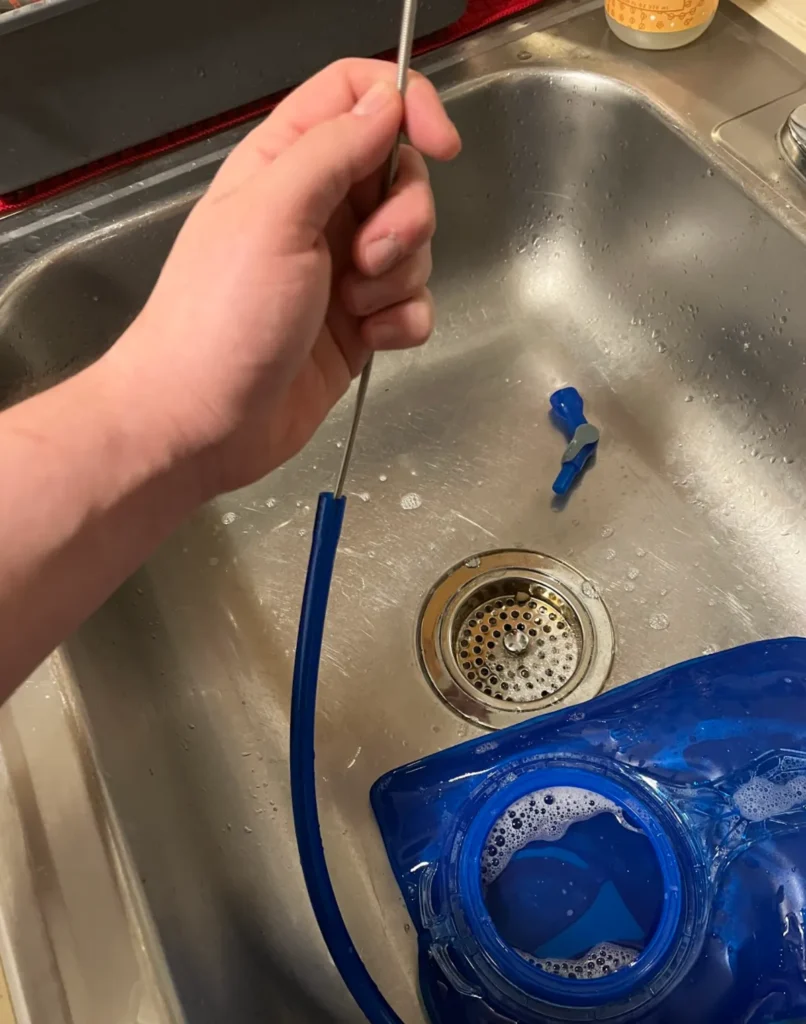
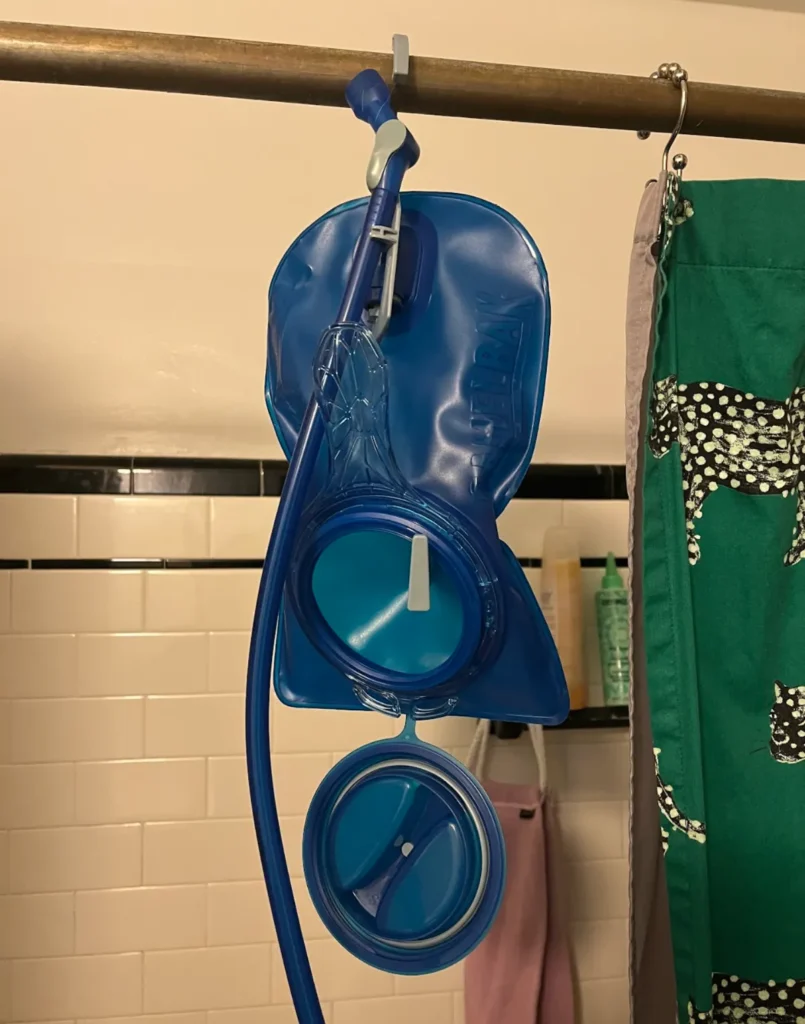
Step 7: Hang Dry
You can dry to hang it to dry yourself but it can be tricky to do. Luckily the CamelBak Cleaning Kit comes with a reservoir dryer that makes it easy to hang your bladder and keep it open so it dries perfectly.
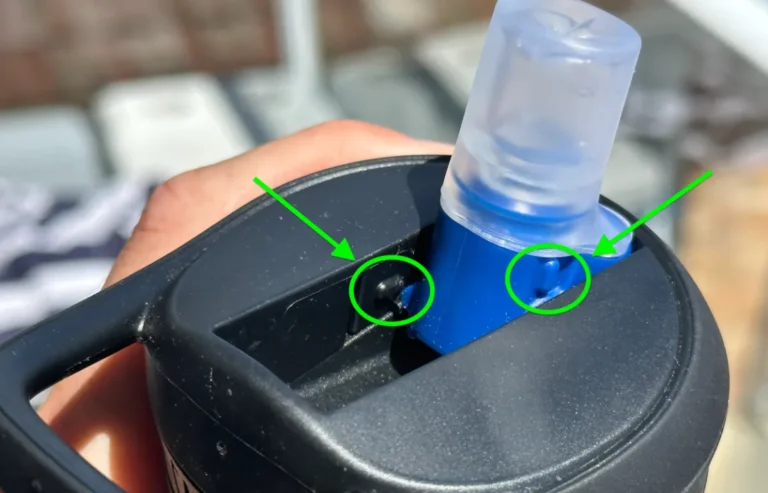
- Insert the rounded end of the hooked hanger into the attachment slot for the tube. To lock it into place, hold the release button as you slide it in.
- Wedge the second piece of the hanger into the bladder to hold the walls apart and allow airflow through the reservoir as it dries.
- Connect the tube (with the mouthpiece still off) to the slot on the hanger.
- Dry overnight in a room with low humidity.
If you don’t have a reservoir hanger (you should, they’re really helpful), you can rig the bladder to stand upright and open using a wooden spoon or spatula on a dish drying rack.
Make sure all parts are COMPLETELY dry before reassembling.
How Often Should You Wash Your CamelBak Bladder?
In a perfect world, you’d clean your reservoir after every use. But we both know, this isn’t a perfect world and that’s not always realistic.
If you only drink water from your CamelBak, you can get away with washing it after every second or third use — though you should still empty, rinse, and air dry it every time.
If you drink anything other than water from your CamelBak, it should be washed after every use.
A good tip is to store your CamelBak in the freezer between uses or if you’re unable to completely dry it.
This will slow the growth of mold substantially and keep your bladder fresh smelling, fresh tasting and ready to use at a moments notice.
You can even freeze water in a CamelBak bladder to keep your water cold for longer whilst on the trail.