Fully drying your CamelBak bladder after every use is just as important as washing it thoroughly. If you don’t, it’s very likely that at some point you’re going to have trouble with mold growing in your reservoir.
But the problem is, thoroughly drying a CamelBak bladder can be pretty tough if you don’t have the right tools or know the right techniques to do so.
The best way to dry a CamelBak bladder is to use a hydration pack dryer that circulates air throughout your reservoir, fully drying it in minutes.
Air drying with the walls of the bladder separated to allow increased airflow throughout the reservoir is the next best method. A reservoir hanger makes it easy, but you can also use a kitchen utensil to prop it open on a drying rack, drying pads, or a few paper towels stuffed inside.
Fully drying the delivery tube is just as important as drying the reservoir itself. Hanging it vertically on a reservoir hanger is the best method. Especially if you remove as much moisture as possible before hanging, to help it dry faster and more thoroughly.
Below are the eight best ways to make sure your CamelBak reservoir (and tube) are dried fully after every use to prevent mold and mildew from growing in your bladder.
Even though mold isn’t actually that difficult to remove from a CamelBak, prevention is still a much easier and much better approach.
1. Use A CamelBak Dryer

A CamelBak dryer is the fastest and most consistent way to fully dry a CamelBak bladder.
There are a few different types, but the process is pretty similar with all of them. Drain your reservoir, attach the dryer to the fill hole, and let it circulate air through your bladder for a few minutes until it’s dry.
My go to is the RiVern Hydration Bladder Dryer, which funnels warm air from a blow dryer throughout your bladder. Or check out this list of my favorite CamelBak dryers for one you might prefer.
2. Use A Reservoir Hanger
If you don’t want to fuss with a hydration pack dryer, you can hang dry your bladder instead.
But the problem is, if you’ve ever tried to just drape your reservoir over a clothesline or shower rod, you know it doesn’t work very well. The walls of the bladder tend to stick together and moisture gets trapped in the reservoir because there’s no circulation.
That’s where a reservoir hanger can help.
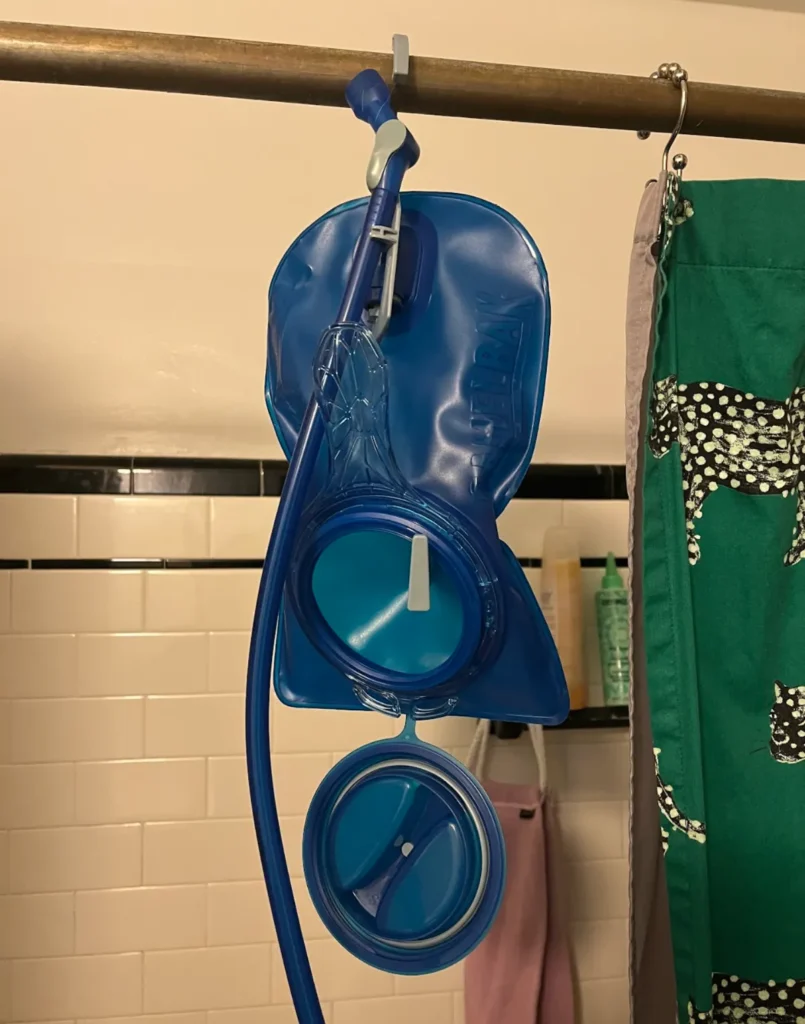
Reservoir hangers are designed to hang your bladder while also separating its walls to allow airflow throughout the bladder. A notch to hang your delivery tube vertically makes drying the hose painless as well.
CamelBak cleaning kits actually include a reservoir hanger for only a few dollars more than just buying the hanger by itself, and make cleaning your CamelBak so much easier.
3. Make A DIY Reservoir Hanger
Reservoir hangers are inexpensive and last pretty much forever but, if you really don’t want to buy one, it’s not that hard to make your own.
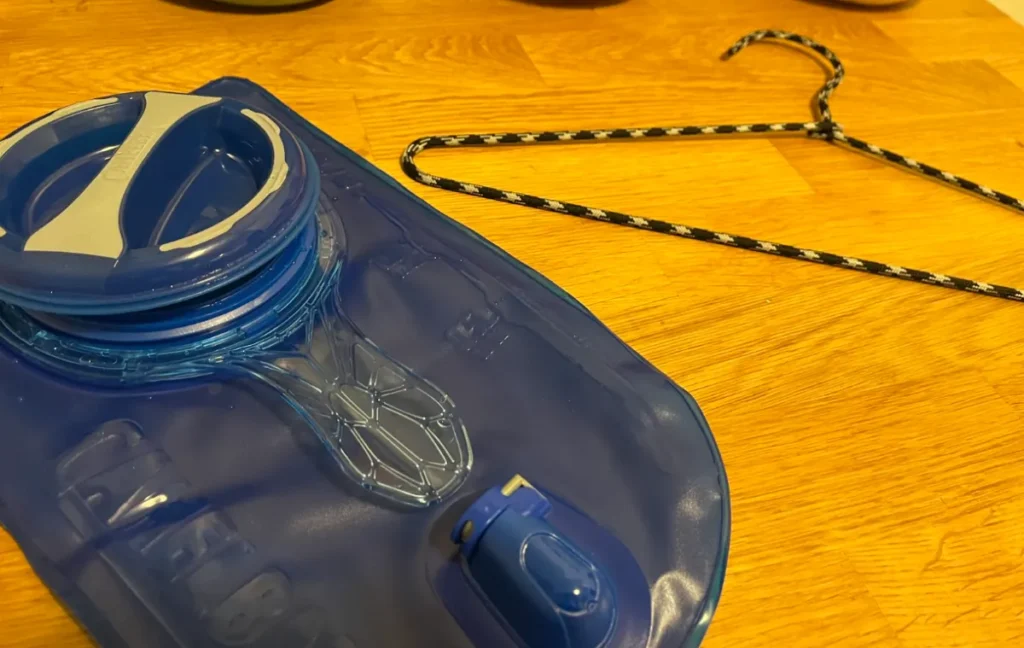
All you need is a wire hanger and a few minutes.
- Unwind the neck of a wire hanger, preferably one coated in plastic or nylon so it doesn’t tear your bladder.
- Bend the hanger in the middle, closer to the non-hooked end, a few times until it forms a small rounded frame that’s narrow enough to fit into your bladder’s fill hole but still wide enough to keep the walls of your bladder separated while hanging.
- Loop the non-hooked end around the neck of the hanger to help it keep its shape.
- If you used a plain wire hanger, wrap tape around the jagged end to prevent it from damaging your bladder.
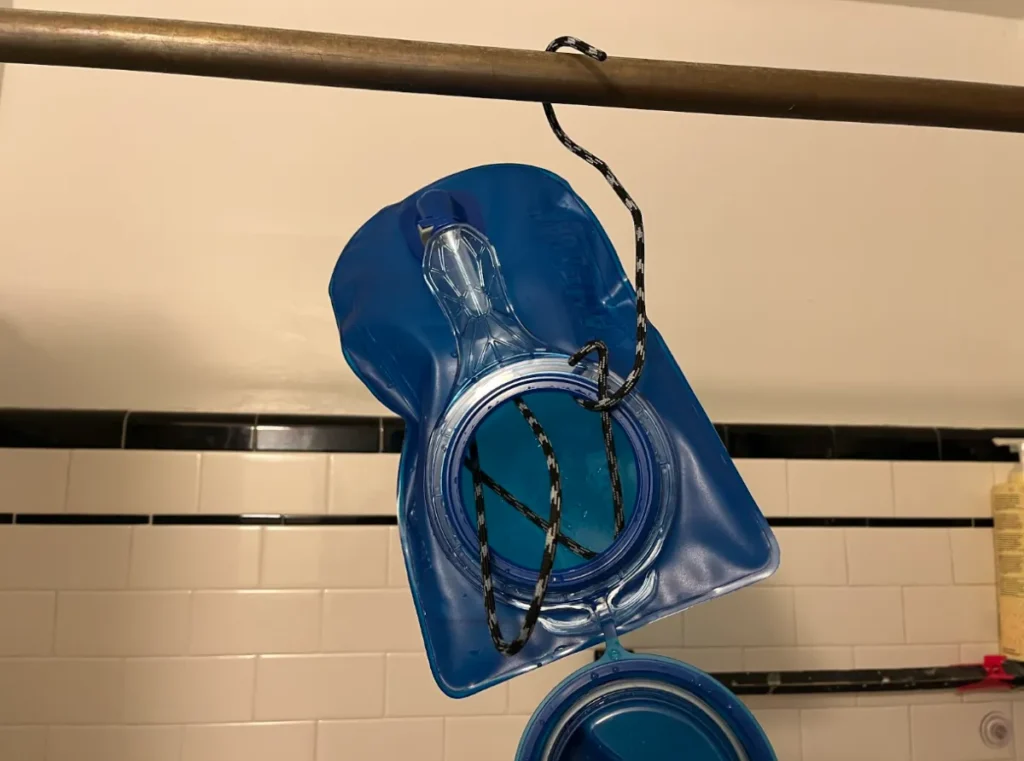
It’s not pretty, but it works.
4. Use Hydration Pack Drying Pads
U’Be Hydration Pack Dryers are designed to absorb and wick moisture from the interior of your reservoir, where it can evaporate quickly.
 - Created in the U.S.A. - Use with or w/out Hydration Pack Bladder Cleaning Kit & Cleaning Tablets - Camelback Cleaner - Camping & Hiking Kit")
All you have to do is stick one into your bladder, with one end sticking partially out of the fill hole.
Within minutes, most of the water will have been absorbed. And in a few hours, any remaining water droplets will have evaporated as well.
Whenever I hang my bladder on a reservoir hanger to dry, I also stick a U’Be dryer in as well to speed up the drying process significantly.
5. Stick Some Paper Towels Inside
On days that I’m feeling especially lazy, I’ll sometimes just stick a few loosely crumpled paper towels inside my bladder to dry it.
The paper towels work by separating the reservoir’s walls, allowing increased airflow, and absorbing whatever moisture is left.
This method works best if you arrange your bladder to sit upright, with one of the paper towels at the very bottom to absorb any water that begins to pool.
It also works great if you first dry out the bladder as best you can using a towel or using paper towels which you dispose of once wet and then refill the bladder with fresh paper towels to get any remaining moisture that’s left over.
6. Prop It Open On A Drying Rack
This is the method I used throughout college to dry my CamelBak. It’s kind of clunky and awkward, but works pretty well and doesn’t require anything you don’t likely have on hand already.
Use a wooden spoon, whisk, or any other kitchen gadget that fits into your bladder to prop it open and upright on a drying rack.
Wait a few hours, then wipe away any water that’s pooled at the bottom.
7. Dry By Hand (As Much As You Can)
Removing as much moisture as possible before using any of the above methods will make your reservoir dry much faster.
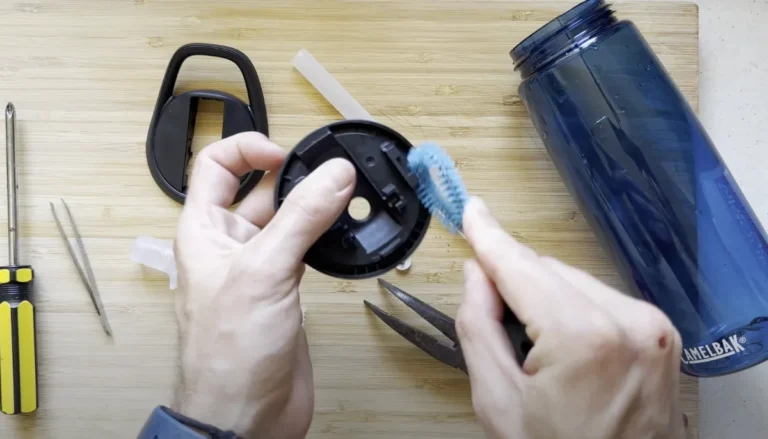
Simply use a clean dishcloth, tea towel, or paper towel to wipe away as much water as possible from the interior of your reservoir.
If your hands are too big to fit into the fill hole, you can wrap the cloth or paper towel around a wooden spoon or your reservoir brush to reach inside.
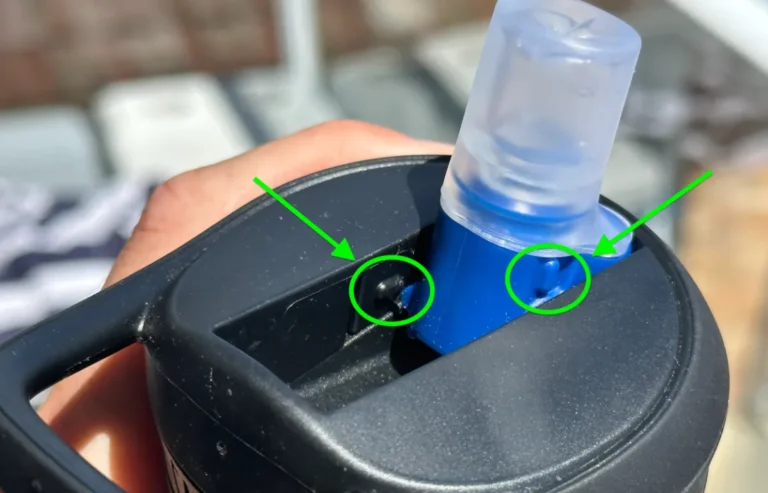
Pay special attention to water around the seams. Those are the areas that tend to dry the slowest.
8. Stick It In The Freezer Instead
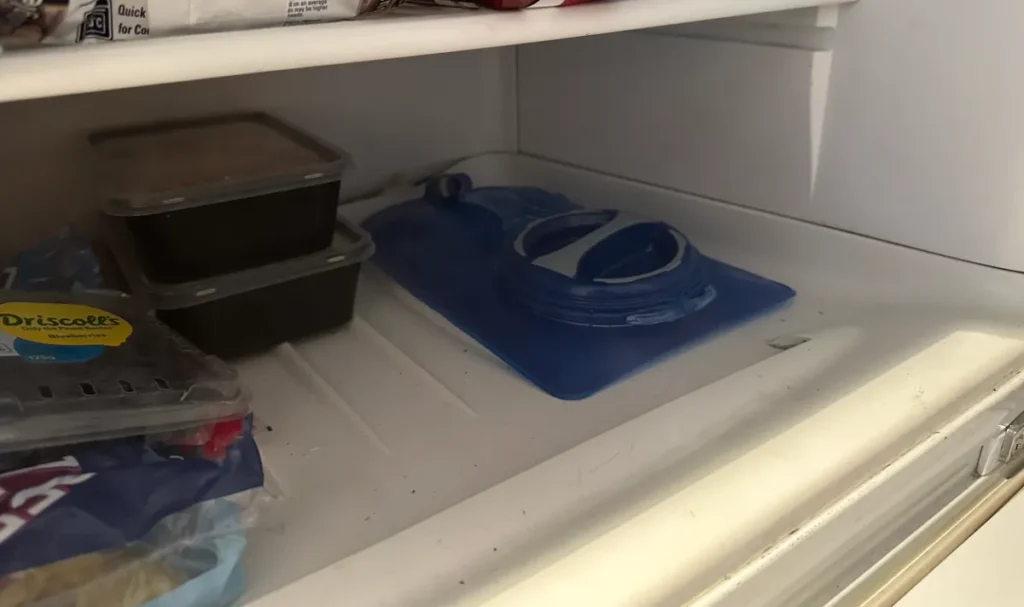
Fully drying your CamelBak bladder is really important to prevent mold from growing but, if you don’t have the time or patience to do so, storing it in the freezer is a reasonable alternative.
Most types of mold won’t grow in temperatures below 32°F/0°C, so your wet bladder can simply be kept in the freezer until you’re ready to use it.
The cold won’t damage your bladder and you can even pre-freeze some water inside to have a large chunk of ice that will keep your water cold longer the next time you use your CamelBak.
How To Dry A CamelBak Tube Faster
Unfortunately, drying the reservoir is only half the battle. Fully drying the delivery tube is just as important as drying the reservoir itself.
Hang Dry Vertically
The best way to dry a CamelBak delivery tube is to hang it vertically, with the mouthpiece removed, in a room with low humidity.
Vertical hanging works best because it prevents water from pooling in any bends, and allows it to just drip out instead.
A reservoir hanger makes it easy because it has a notch designed to hang the tube vertically. If you don’t have one, you may just need to get a little bit creative.
Use Centrifugal Force
Using centrifugal, or “spinning” force, to remove as much water from the tube as possible before hanging it will help it dry much faster.
Simply grab the tube by one end and spin it around in a wide circle a few times at a relatively high speed. Just be mindful of your surroundings…
Blow Through The Tube
Blowing through one end of the tube can also remove much of the excess moisture trapped inside.
I wouldn’t use this method before storing my CamelBak for the season because it does add some bacteria from your mouth back to the system, but if you’re using it again in the near future it’s really no big deal.
Make A Makeshift Tube Dryer
If you really want your delivery tube dried fully and quickly, you can make a DIY tube dryer out of a narrow funnel and a blow dryer.
Simply stick the funnel into one end of the delivery tube and use a blow dryer to blow warm air through for a minute or two.
Any funnel with a ¼ inch or smaller outlet should work pretty well.
Compressed Air
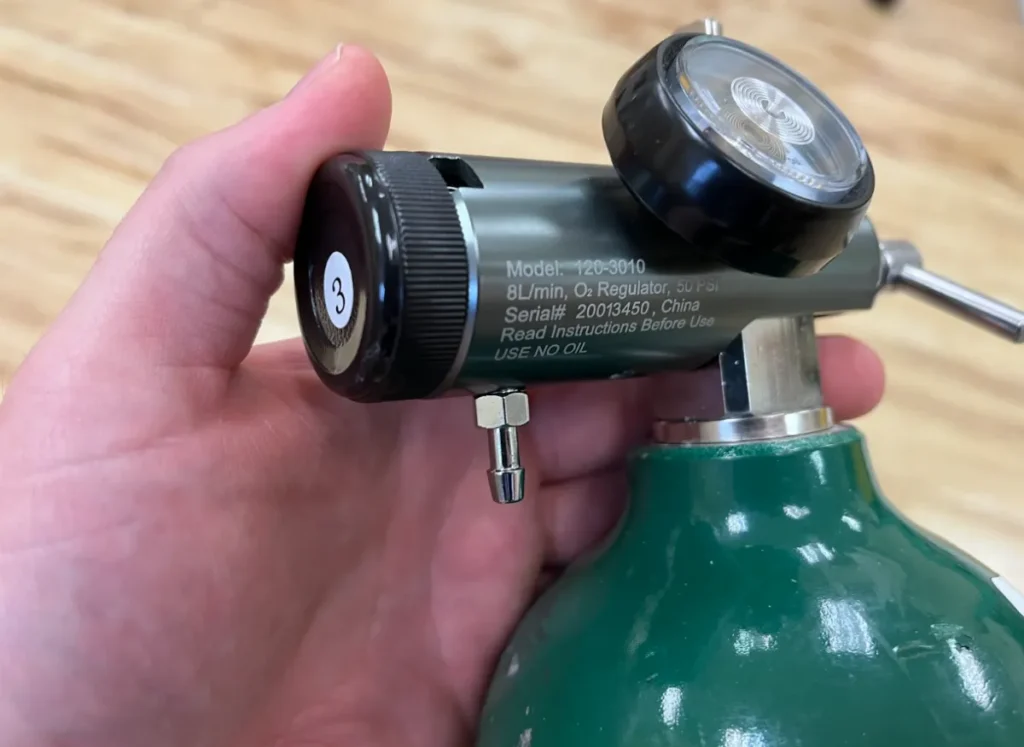
If you have a scuba tank or supplemental oxygen tank on hand, you can use it to blow compressed air through your delivery tube to dry it in less than a minute.
Just remove the mouthpiece, attach one end of the tube to the tank, and turn it up to full blast.
How NOT To Dry Your CamelBak
There are plenty of great ways to dry a CamelBak bladder, but leaving it out in direct sunlight isn’t one of them.
It’s commonly recommended because it is actually a really effective way to dry your reservoir fully and quickly. But it comes at the cost of shortening your bladder’s lifespan. It’ll mean you have to replace your CamelBak sooner.
UV rays degrade the TPU your bladder is made of, as well as the glue that binds its seams — making your bladder less elastic and more likely to fail.
Unless you’re in a pinch, sunlight is best avoided.