A moldy CamelBak isn’t only gross and annoying to clean, it can also make you pretty sick. And the worst part is, when mold starts to grow, we usually don’t realize it until we’ve already been sipping on moldy water for days or even weeks.
The most effective way to prevent mold from growing in your CamelBak’s tube is to make sure you’re drying it properly after every use.
But how exactly should you dry a CamelBak hose/tube to prevent mold and mildew? It’s impossible to get a towel in there to dry it and leaving it to dry doesn’t seem to work.
The best way to dry a CamelBak’s tube is to separate it from the reservoir, remove the mouthpiece, shake out as much moisture as possible, then hang it vertically to air dry in a room with low humidity. Don’t reassemble your CamelBak or store it until every part is completely dry.
Regular, proper cleanings will help to slow the growth of mold, but oftentimes won’t kill all the spores in your reservoir.
Mold or mildew in the tube is especially tough to notice because, unlike the reservoir, you can’t feel that the interior is starting to feel a little slimy and patches of mold are often harder to spot.
Even though removing mold from a CamelBak isn’t that difficult, prevention is still a better approach.
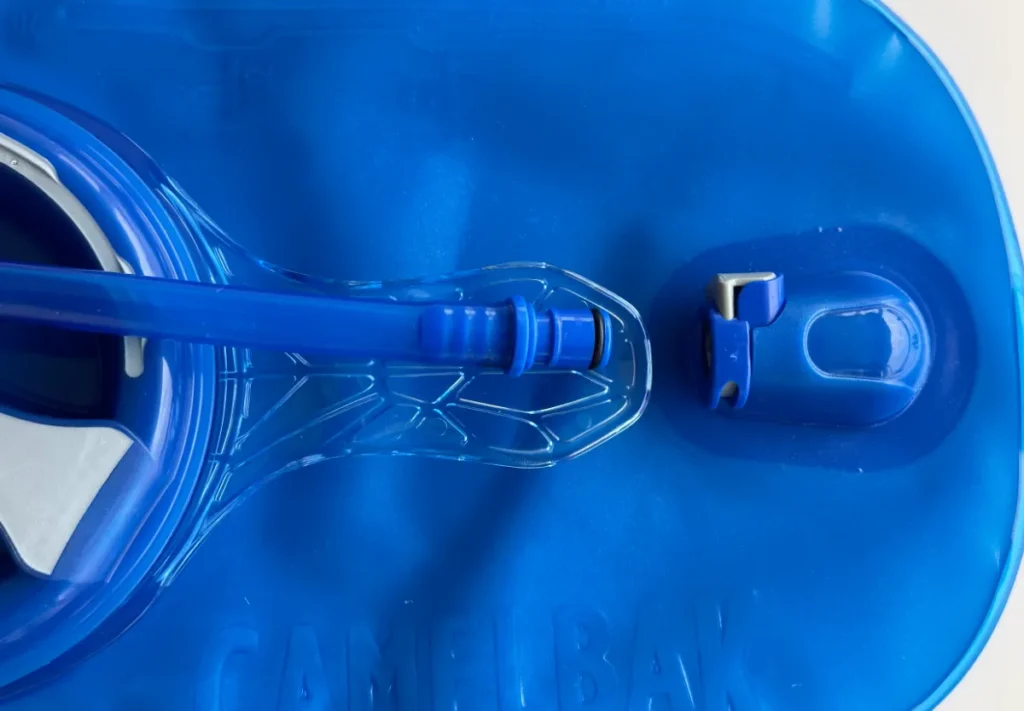
Step 1: Detach The Tube AND Mouthpiece
After washing your CamelBak, don’t be in a rush to put everything back together.
Leaving each piece separated will make your reservoir and tube dry much faster. So make sure the hose is detached from the reservoir and the mouthpiece from the tube.
The mistake I made in the beginning was I left the mouthpiece on when trying to dry the tube. This mean’t that air couldn’t flow freely through the tube and it wouldn’t dry.
By removing the tube from the main reservoir AND removing the mouthpiece the tube is able to get the airflow it needs to dry.
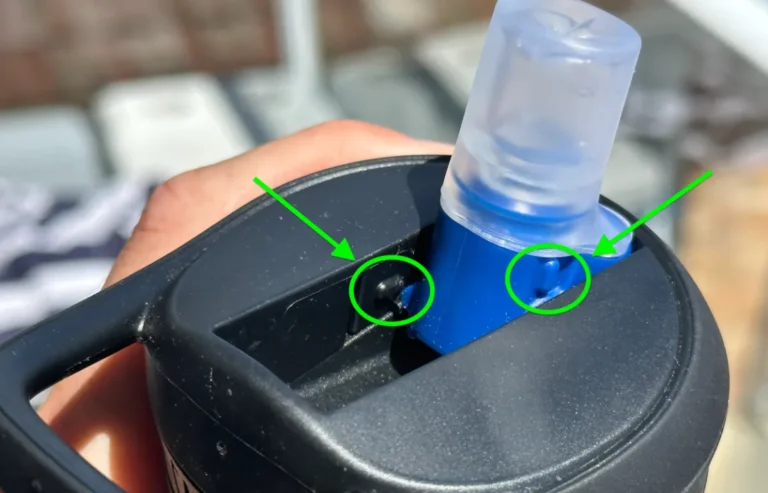
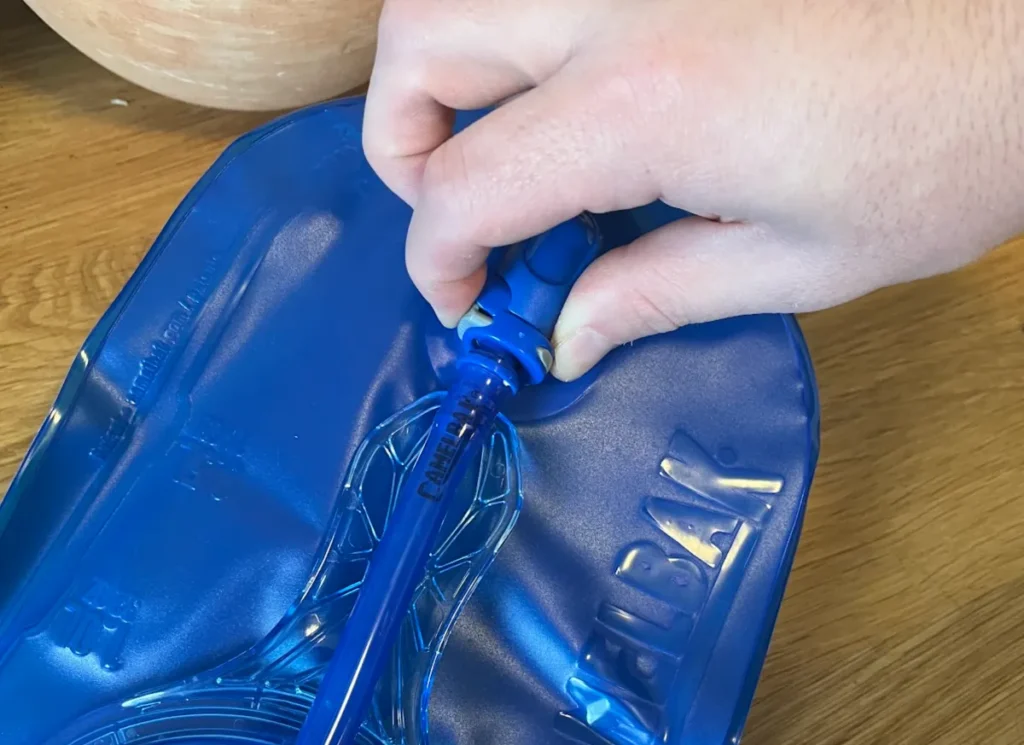
To remove the tube from the CamelBak reservoir, press and hold the release mechanism, then slide it out of its slot.
To remove the mouthpiece, firmly pull it away from the tube. If it’s being stubborn, you may need to twist as you pull.
Step 2: Remove As Much Water As Possible
The more moisture you can remove from your tube before hanging it, the faster it will dry.
While simply moving on to step 3 will usually work well enough, a little bit of extra effort now can make it dry much faster and further reduce the risk of mold growing in your tube.
Use Centrifugal Force
The method I usually use is to use centrifugal force, or “spinning force”, to shake as much water loose as possible.
Simply hold the tube by one end and swing it around a few times at a high speed. Centrifugal force will pull most of the moisture from the tube.
Just make sure no one is around you when you’re doing this or you might end up clobbering your hiking buddy in the face.
Blow Out As Much Water As You Can
Blowing through one end of the tube can also help remove excess moisture.
This works fine if you’re going to use your CamelBak again relatively soon, but if it’s going to be put away for the season afterward, it’s best avoided.
Blowing with your mouth introduces bacteria to the system, which can multiply over the months spent in storage.
Step 3: Hang Vertically To Air Dry
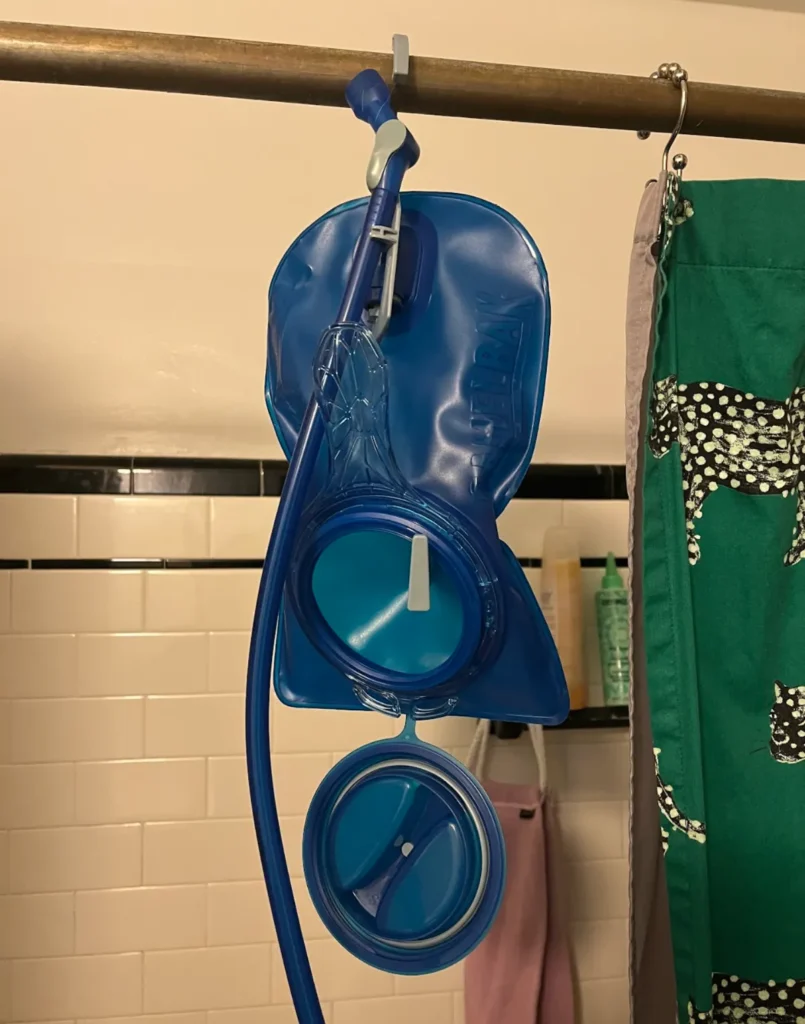
Your tube will dry faster when hung vertically, with the mouthpiece off, in a room with low humidity.
A vertical hang allows increased airflow through the tube, ensures that no moisture can pool in any bends, and allows some water droplets to fall to the floor instead of needing to evaporate.
It’s easy to do if you have a reservoir hanger like this CamelBak one at Amazon — you just snap it into place and hang. I highly recommend it as it makes cleaning and drying much easier.
If you don’t have one of these cleaning kids, you’ll need to get a little more creative.
Hanging in a room with low humidity (the bathroom probably isn’t your best bet) will also help, but isn’t mandatory. The less humidity in the air, the faster the water in your tube can evaporate.
For even faster results, hang your tube in a room with a dehumidifier or have a fan on pointing directly at your CamelBak.
Alternative Faster Method: Use A Reservoir Dryer
A reservoir dryer is designed to blow air through your hydration system to dry it quickly, either with a small fan or this adapter for a blow dryer at Amazon.
I’ve never used one, and honestly it seems a little excessive, but from what I’ve heard they work really well and are the fastest way to completely dry a CamelBak.
Step 4: How To Store A CamelBak Tube So It Doesn’t Grow Mold
Before you reassemble your CamelBak, make sure each part is completely dry. If any part of your system is put away wet, mold can grow throughout.
A dry reservoir and mouthpiece mean nothing if you attach them to a damp tube, much like a dry mouthpiece and tube mean nothing when connected to a wet reservoir.
If you don’t want to wait, storing a wet CamelBak in the freezer will prevent mold from growing and bacteria from multiplying between uses.