If you have just purchased an Ember mug, then only a few simple steps are required to get going. In this guide you’ll find everything you need to know – from powering on your mug for the first time to adjusting the temperature you want.
Turn on your ember mug using the bottom button. After that, it turns on automatically when you pour in hot liquid. Connect the mug to the app, and you can control the temperature. Charge the mug on the coaster – it’ll show a pulsing red light when charging and a solid green when it is done.
The LED light on the ember mug tells you a lot about its functioning. Different colors with pulsing or solid light give you information and guide you to use the mug correctly. Click here for the full Ember Mug light colors explained.
Powering On Your Ember Mug
Turning on your ember mug is as easy as pressing and holding a button on the mug. You only need to turn the ember mug on the first time you use it. After that, you can continue to use it only by filling it up.
Due to the technology, the ember mug goes into sleep mode when you do not use it. The sleep mode activates when it is empty but will turn on automatically when you pick it up.
1. Press The Bottom Power Button To Turn On
The way to power on your ember mug is simple. Press the bottom power button once. You’ll see a smart LED white light underneath the ember logo.
2. Fill Up With Hot Liquid And It Will Automatically Turn On
The smart technology of the ember mug detects when you pour liquid into the mug. The mug will turn on when you pour in the liquid and begin heating.
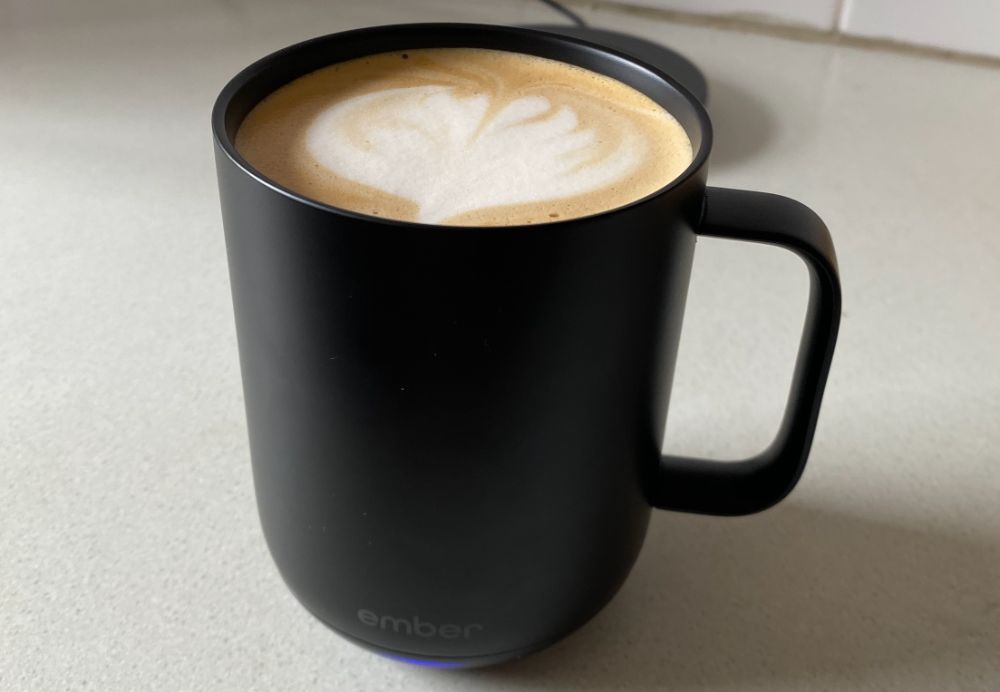
The LED light will start to pulsate, showing that the mug is working to reach the set temperature. You have reached the desired temperature when it changes to a solid white.
How To Adjust The Desired Temperature Of Your Ember Mug
The ember mug aims to control the temperature of the liquid and precisely adjust it to the perfect temperature you want.
After downloading and launching the app, adjusting the temperature will take only a few seconds.
1. Download The Ember App
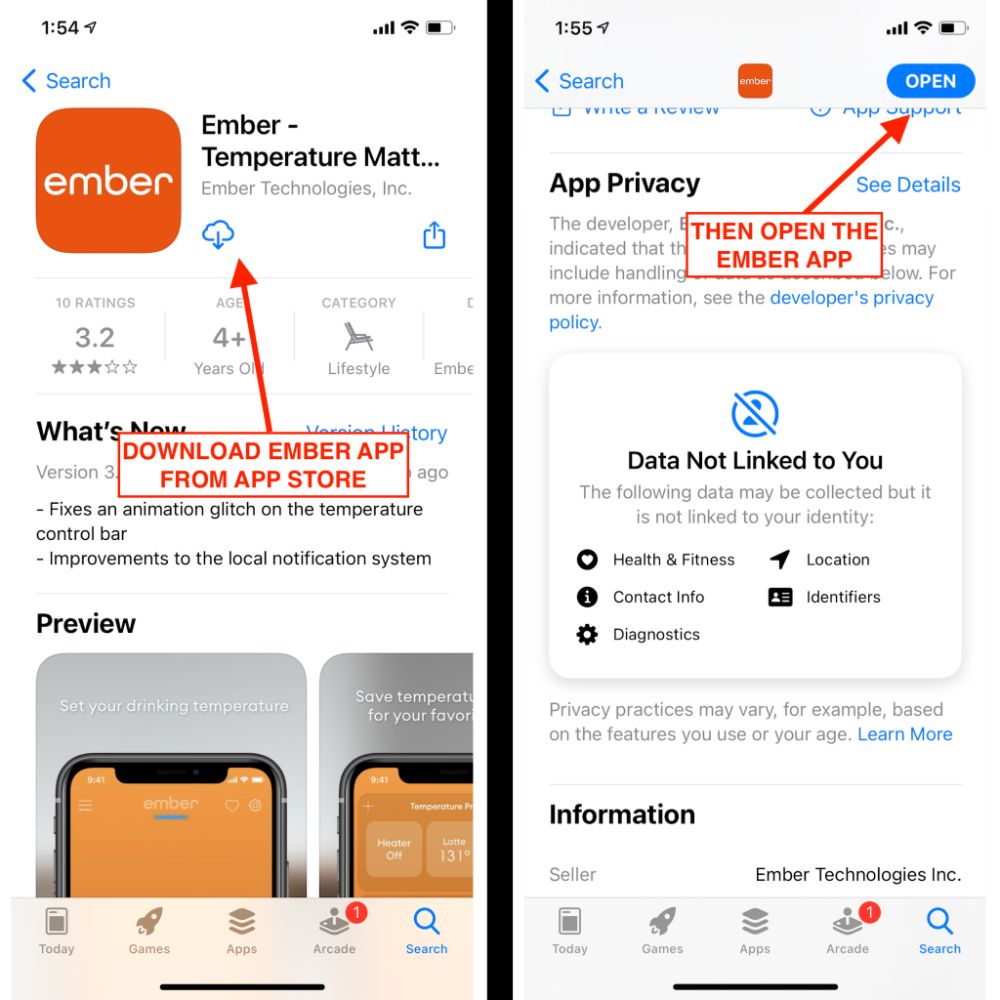
Once you’re in the App Store or Google Play Store, search for the Ember Mug App. Download the app and launch it on your phone.
It is possible to use the Ember Mug without the app and I actually recommend this. One of the problems with the Ember Mug is the app collects a lot of data about you.
If you never connect your Ember Mug to the Ember app then your mug will keep your drink at a temperature of 135ºF (57ºC) – which is honestly a great temperature.
2. Sign In To Access Your Mug
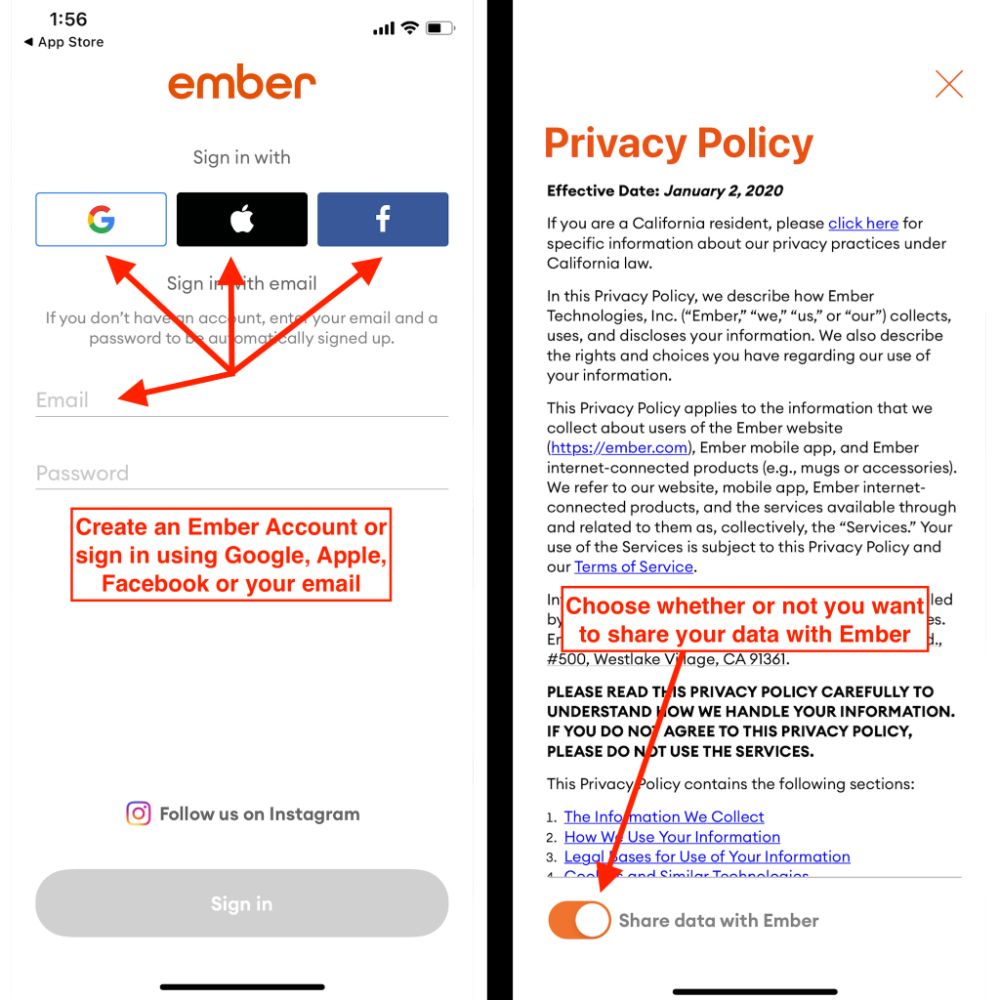
Create an account first to use your ember mug. The app will allow you to sign in using your Google, Facebook, or Apple accounts.
You’ll have to accept a privacy policy and indicate if you are willing to share any data from the app with Ember.
2. Connect Your Phone To Your Ember Mug

Once you have launched the app, you must pair your phone to the mug. The connection happens via Bluetooth.
You must now select your device – either the ember mug or the ember travel mug.
Click on “Next” to proceed.
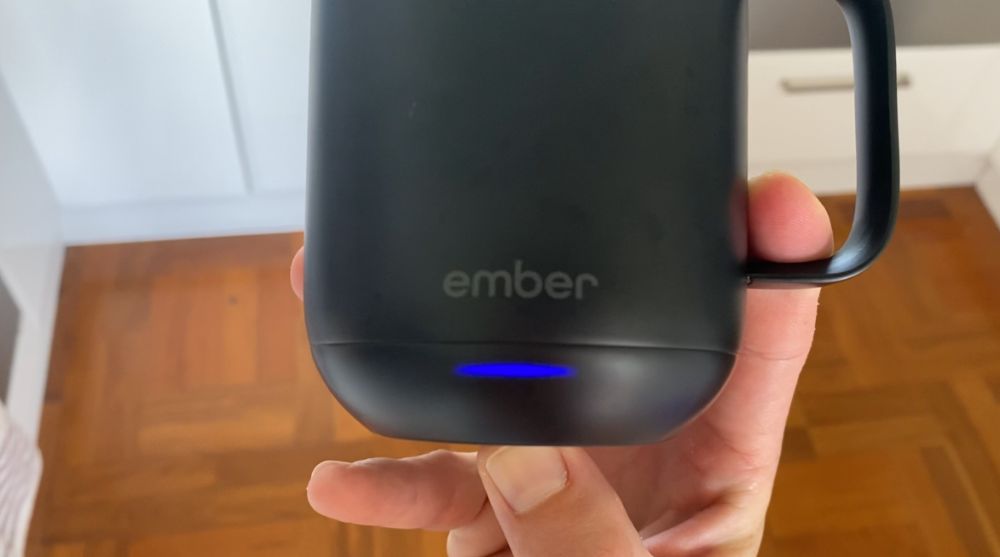
To connect, press the power button at the bottom of the mug for 6 to 8 seconds until you see the flashing blue LED light.
The blue indicates the mug is ready to pair. The blue light is for the Ember mug, but with the travel mug, you’ll see the display showing the word “PAIR”.
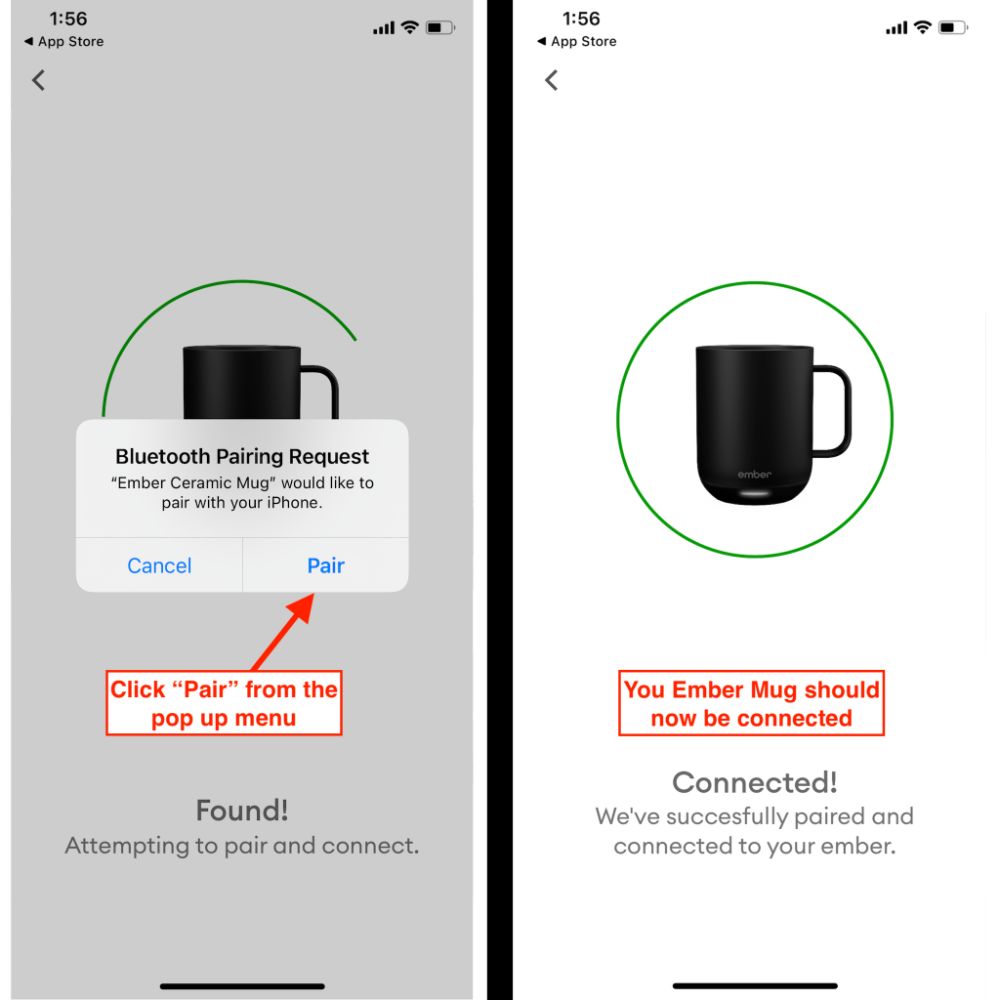
Now click on “Next” again, which will allow the app to find your ember mug and try to pair it with it. You’ll see the searching process on your screen and when you find your mug, choose “Pair” from the Bluetooth pop-up menu.
And voila! You have paired your phone to the mug, and there should be a message on your phone showing this.
4. Use The Bottom Slider To Adjust Your Desired Temperature
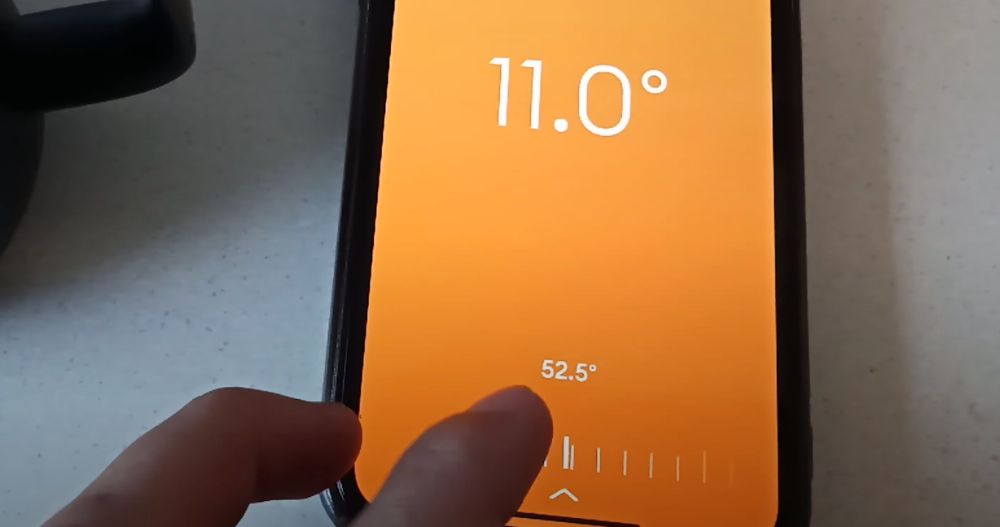
After a successful sign-in and pairing, you can now change settings in the app and adjust the temperature. In the app, you’ll find a slider at the bottom of the screen to set the temperature.
The travel ember mug can adjust the temperature using the + and – symbols. These symbols are displayed after you press on the ember logo.
How To Charge Your Ember Mug
As the Ember mug is battery-powered, it must charge to work correctly. Put the mug on the charging coaster, and the different colored lights on the mug will guide you through the charging process.
1. Empty, Clean And Dry Your Ember Mug
Before charging your ember mug, ensure it is empty, clean, and dry. The bottom of the mug must be dry to protect the charging coaster, which is not waterproof. Any water getting past the charging points may damage the coaster.
2. Place On The Charging Coaster
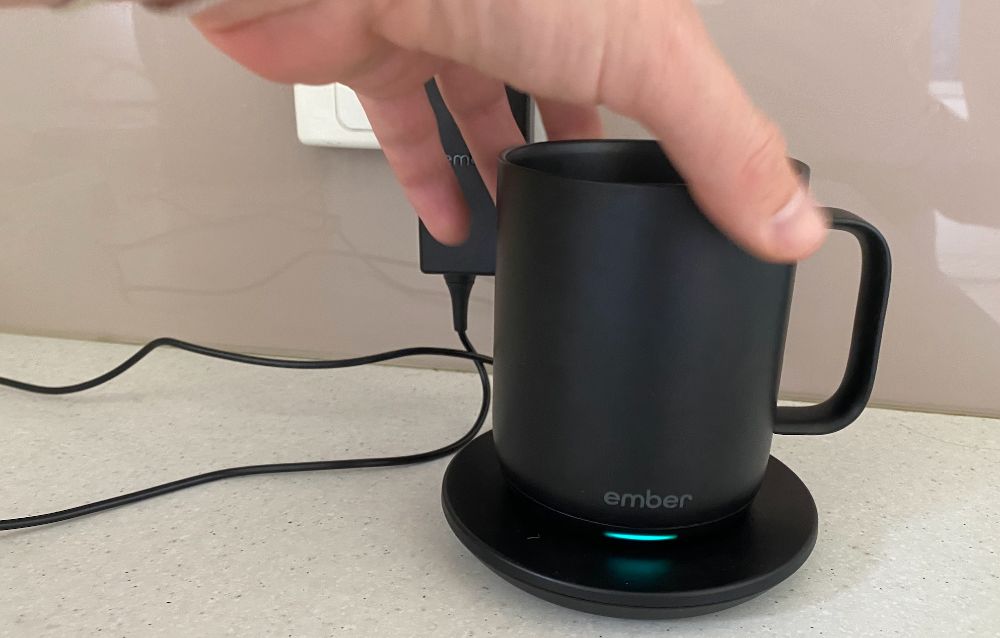
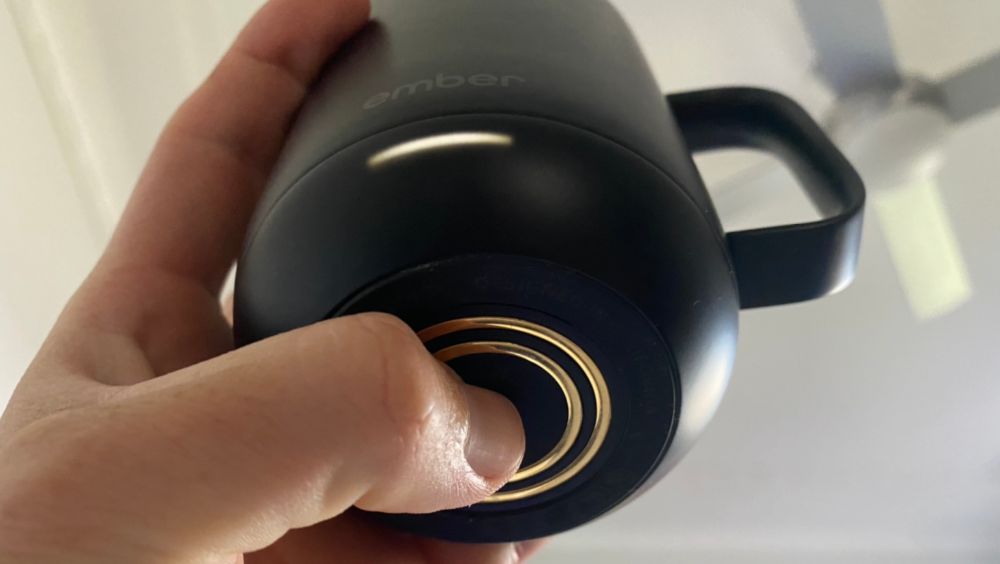
Firstly, make sure the charging coaster is plugged in and turned on. The cord at the bottom of the coaster also needs to be attached correctly. Secondly, place the ember mug on the charging coaster.
You’ll notice two gold rings at the bottom of the ember mug. These rings line up with the gold prongs on the coaster. As long as they make contact, your mug will charge.
3. Light Will Turn Red When Charging And Green When Fully Charged
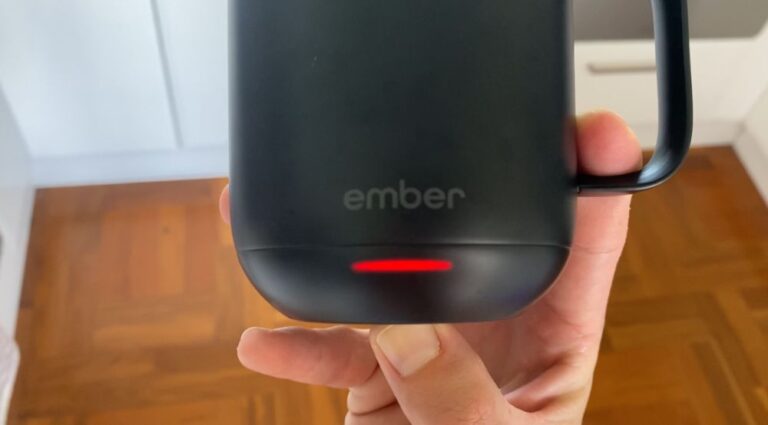
The LED light underneath the ember logo will be red while charging. The light will pulse red during the charging process.
When you see the LED light being solid red, the mug is low on battery and needs to charge.
Once the ember mug is fully charged, the light will turn to a solid green.
It’s ready to be taken off the charging coaster, and you can now take it around with you.
4. You Can Also Check Status Of Battery In The Ember App

The Ember app on your phone can show the mug’s battery level.
Go to Settings and look for the Battery Level section, which shows it as a percentage.
Usually, the ember mug takes about 2 hours to charge fully from an empty battery (indicated by the solid red light).
The ember travel mug can take slightly longer, about 2 to 3 hours, and you can also check the progress of the battery level on your app.
How To Turn Off Your Ember Mug
The technology of an ember mug detects when it is empty, and then it automatically turns off.
However, you can manually turn it off too.
The first way is to press and hold the power button at the bottom of the mug. Press it down for 3 seconds, and you’ll see the mug power off by the dimming white light.
The second way is to go via the app. Using the slider to set the temperature, you can slide it down until the heat shows off. Then the mug is turned off. Lastly, you could also pour cold liquid into the mug to power it off.
Conclusion
A temperature-controlled mug, the Ember mug, is easy to set up. It includes smart technology that automatically allows the mug to turn on when you pour liquid in. You can set the temperature in the app once you have paired the device.