My family and I go camping as often as we can, and a good cooler is always a necessity. These days you can buy high-end coolers with all kinds of options, but you can also apply helpful camper hacks yourself.
Whether you have a cheap cooler or a high end cooler these hacks will help you get more value out of your cooler and will make using your cooler more convenient too.
1. Plan for a Water Balloon Fight
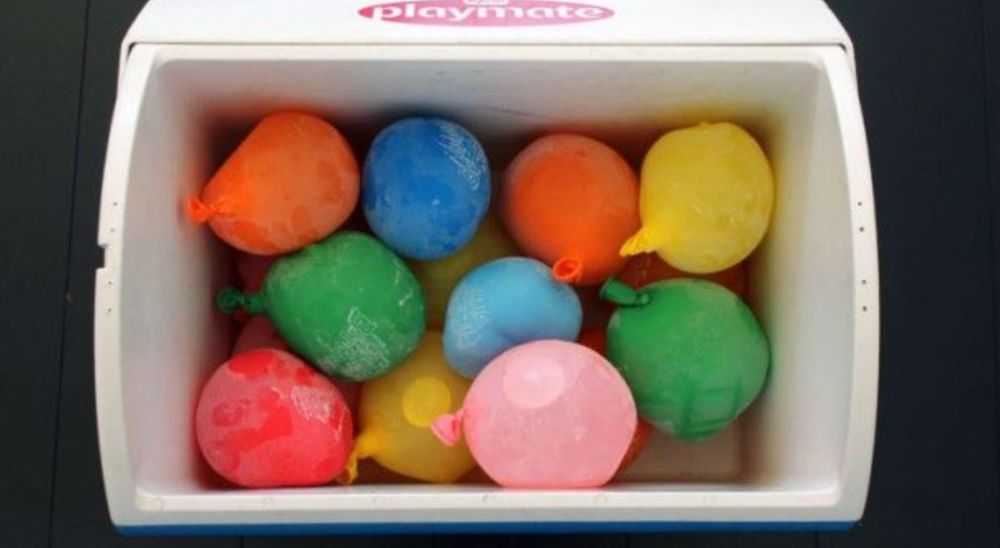
Bigger chunks of ice will keep your drinks and food colder and will take longer to melt. A cool hack is to fill up a bunch of water balloons and then freeze them overnight.
Place the balloons in the cooler with your drinks and food. These are great because they are super cheap ice packs and as they thaw they don’t make your cooler all wet and food all soggy.
Then once they all melt you are ready for an epic water balloon fight. Alternatively, keep them a refreeze them and use them again next time.
Something I like to do is to use larger balloons and make a couple of big water balloon and freeze them. Then I put them in my cooler and use smaller balloons or loose ice to fill in the space.
The larger balloon lasts longer (see my article on block ice vs loose ice) and when you’re done you can pop the balloon somewhere convenient so you don’t get water in your cooler.
2. Save the Bladder from your Boxed Wine
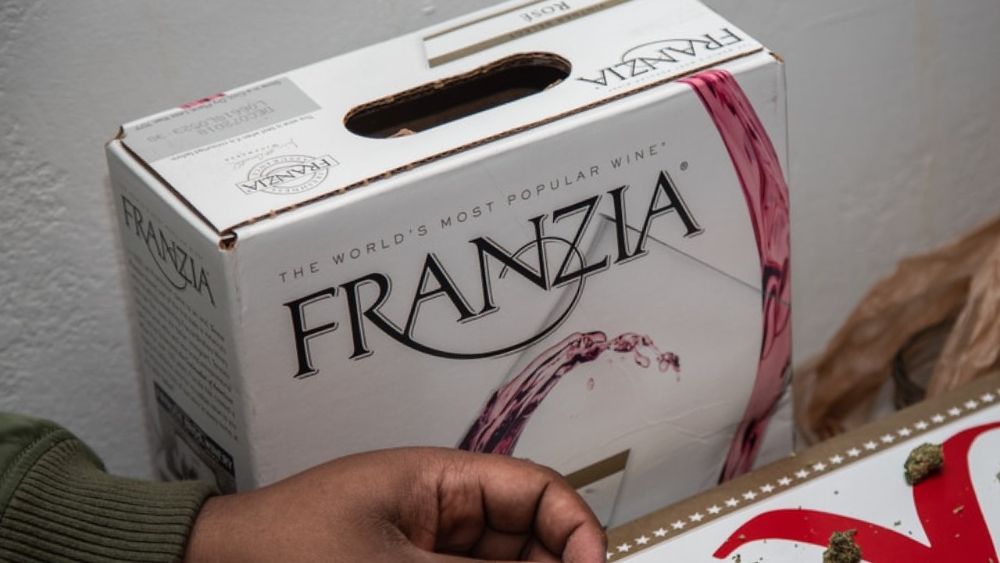
If you like to indulge in cheap wine from time to time, you may have a few boxes in the garage. If you don’t then maybe it’s time to go out and buy some, they are super cheap anyway even if you tip away the wine.
Remove the bladder and throw away the box.
You can then fill the bladder with any adult beverage and freeze it overnight. Place the frozen bladder in your cooler to keep other beverages cold. Once it thaws, you have a handy spout to pour your drinks.
Alternatively you can fill it with something the kids will love. I love filling them with orange juice or apple juice and freezing them. The kids love orange slush when we are camping or at the beach.
3. Create a Dry Level for your Cooler
One issue I find with big coolers is that the sandwiches and other dry foods end up with the drinks at the bottom. This is a recipe for a soggy disaster.
My worst moment was opening my cooler so excited to eat my half eaten chocolate only to have had it sunk to the bottom of my cooler and water got into the packaging.
Once you have your drinks and ice packs loaded up, separate the other foods.
Put down cooling racks across your drinks and then place everything else on top. You can buy kitchen cooling rates for pretty cheap, just make sure to get one that’ll fit in your cooler.
For extra floatation adding some empty or half filled water bottles to the bottom of the cooling rack can serve as floatation devices. As the ice in your cooler melts and things start to sink the water bottles will keep your dry rack afloat.
If you don’t have a kitchen rack I’ve used everything from plastic tubs, to foam rolls and even cardboard as a platform for my dry food when I was stuck.
Your dry foods will stay dry as long as your cooler doesn’t slosh around too much.
4. Put Liquid Foods in Plastic Bottles
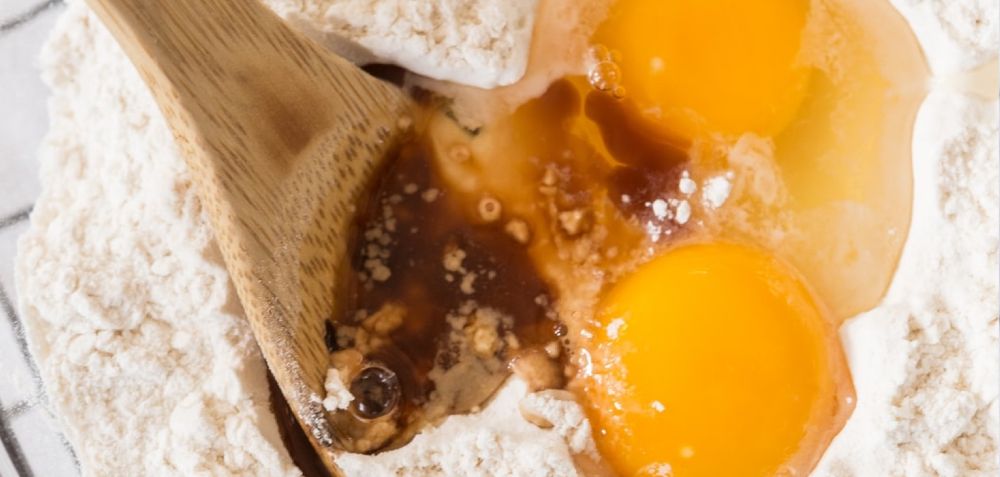
Campout breakfasts over the fire are always the best. However, scrambling eggs or mixing pancake batter is a pain without a kitchen.
Save some plastic bottles and wash them out. Crack eggs into a bowl at home and use a funnel to pour them into the bottle.
I’ve seen people do this 2 eggs at a time and mark the level on the outside of the bottle so they know how much eggs they are using when they pour it out over the camp stove.
You can do the same thing with pancake batter. Mix it up at home and use a funnel to move it to a plastic bottle. Just make sure to put it in the fridge or in a cooler with ice otherwise it’ll go off.
It will make cooking breakfast much easier and also saves on a lot of storage space compared to bring the raw material along.
5. Monitor the Temperature of your Cooler
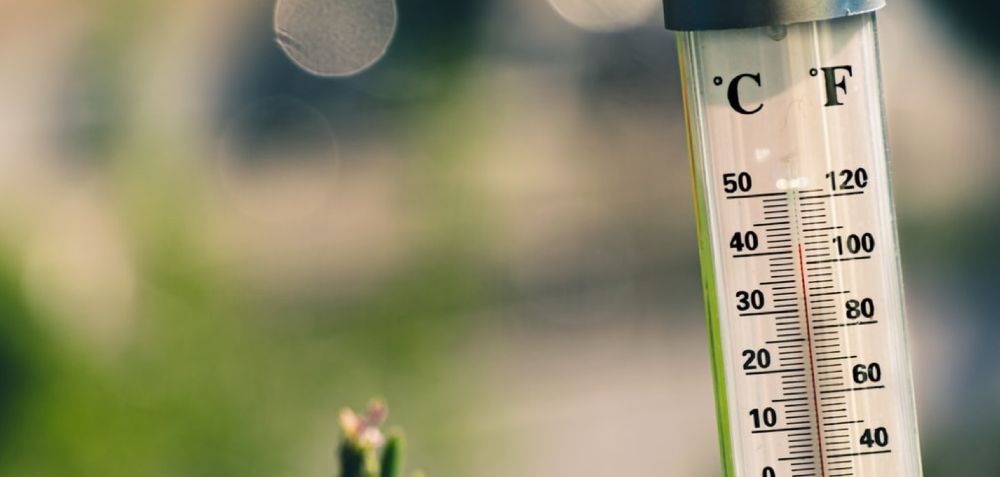
As your ice packs melt, it can be tough to tell exactly when your cooler is getting too warm. Foods can spoil and drinks can become undrinkable if your cooler doesn’t stay cool.
Milk, rice, cheeses and meats are usually the first to go.
Once your cooler gets above 40ºF (4ºC) then bacteria can start to grow at a rapid rate so you want to consume things pretty quickly. But knowing if your cooler is still below that temperature can be tricky, especially as the ice starts to melt.
Use two-sided tape to install a small thermometer in your cooler. This will tell you when you need to get more ice in there immediately.
I like to leave the thermometer towards the top of the cooler as this area gets the warmest. It also makes it easy to see when you open the lid of your cooler.
6. Freeze your Drinking Water
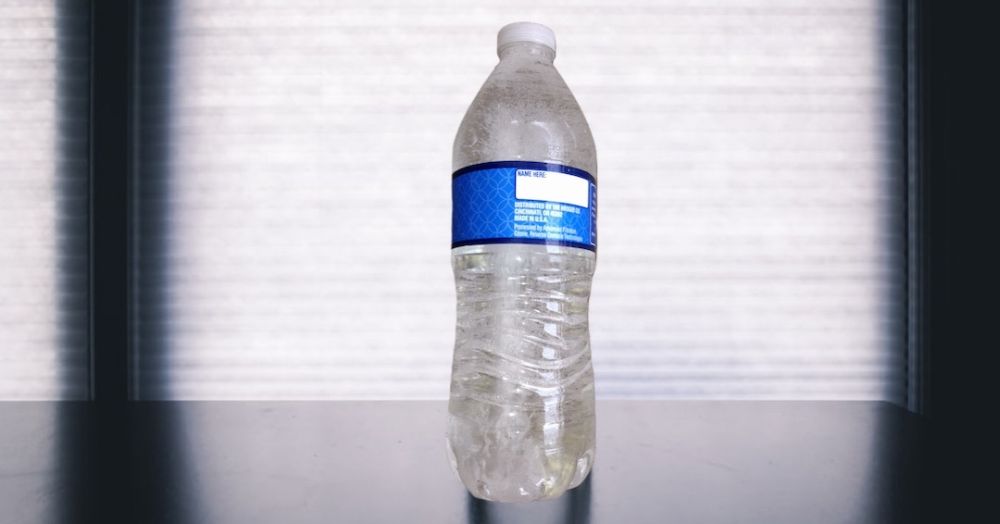
This is one of the easiest hacks out there but also one of the absolute best cooler hacks possible. If you aren’t already doing this you’re doing something wrong. This is a no-brainer.
If you are like me, you never trust water sources at campsites. Even if they have reliable drinking water, it often means a long hike in the middle of the night.
Since we are bringing water anyway, why not freeze it to double as ice packs. Fill up two Liter bottles or Gallon jugs with water and freeze overnight.
The bigger the bottle the longer you want to give it to freeze and come down to the coldest it can be (usually most freezers are 0ºF or -18ºC). I like to give my bottles at least 24-48 hours to freeze.
Put them in your cooler to keep everything else cold. Then when they thaw you have ice-cold drinking water.
7. Float your Cooler
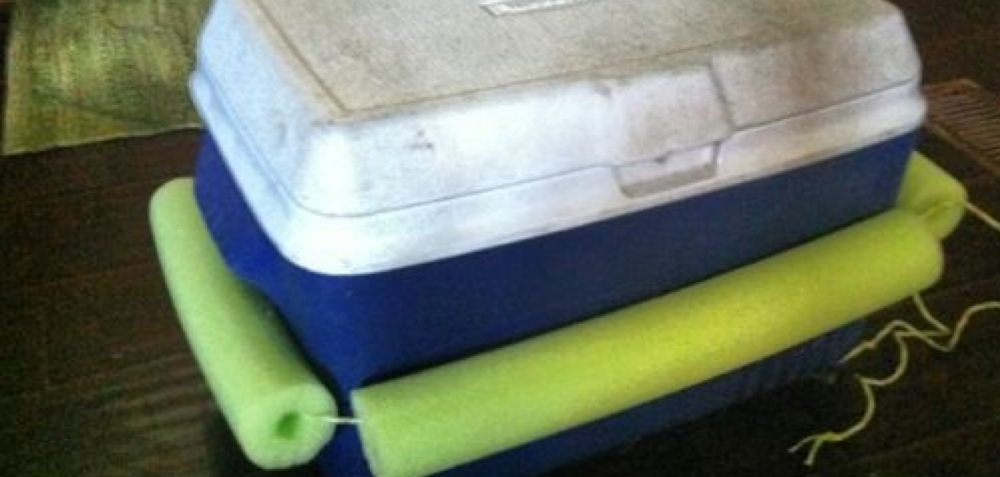
Getting out of the water to get a drink is always such a pain. Instead, hack your cooler to make it float.
Just get some pool noodles and cut them to the length and width of your cooler. Then use zip ties to attach them all the way around. Your cooler should float by your side so drinks are handy at all times.
8. Modify your Patio Furniture

If you have wooden or plastic benches on your patio, why not integrate your cooler. With a few simple cuts in the middle, you can add hinges for a trap door.
Just drop your cooler in the hole under the trap door and you have cold drinks right next to you.
9. Go Big or Go Home
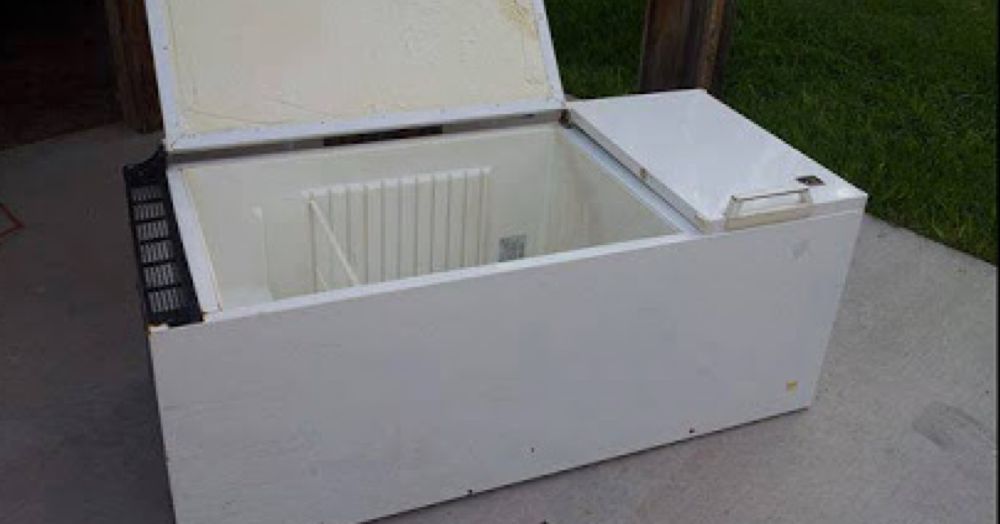
If you can find an old refrigerator or freezer that no longer works, it can make a great cooler. Turn it on its side and fill it with ice or leave it upright.
Fridges are actually just big insulated cooler boxes with a compressor to make things cold. When turned off (or broken) they still work just like a cooler. The insulated walls keep ice cold for a long time.
And given how expensive a big Yeti 350 cooler is (over $1,000!) this is a great cheap way to get a large volume cooler.

You can even add a wood frame to make it look like it belongs on your patio.
The downside to this cooler hack is it takes A LOT of ice to fill these bad boys up which can get expensive.
If you’re doing this I suggest owning a deep freezer and freezing a whole bunch of old mulk jugs or old soda soda bottles filled with water to save you money.
10. Add a Top Seal
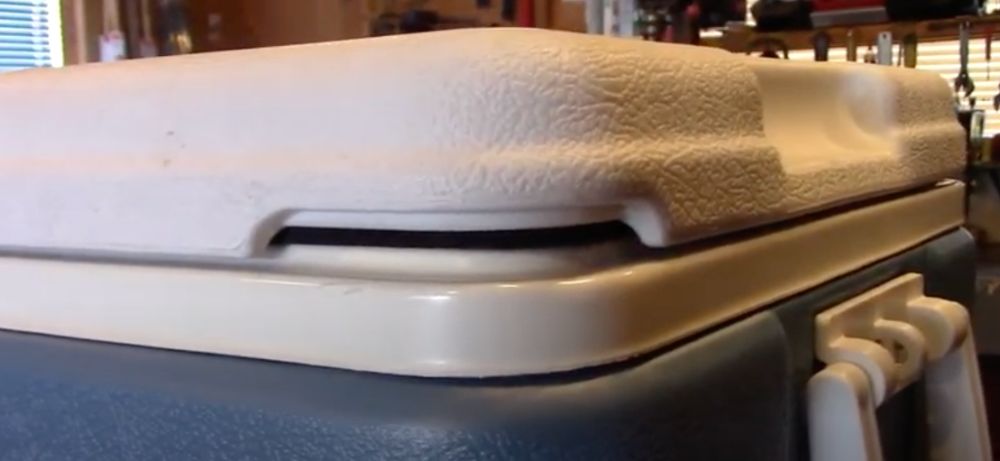
There are several ways you can make the ice in your cooler last longer. One way is to add a layer of insulation over the top of everything.
You can use any type of thin foam insulation for this. It will make a huge difference, especially if you open your cooler every few minutes.
I’ve got more details on exactly how to do this in my article on how to
11. Don’t Forget the Lid

On the underside of your cooler lid, you can attach plastic bags or other thin containers. This will allow you extra space for condiments or any other small items that need to stay cool.
You can also purchase this cooler dry bag at Amazon for an affordable price that works on almost any cooler.
12. Add Some Light
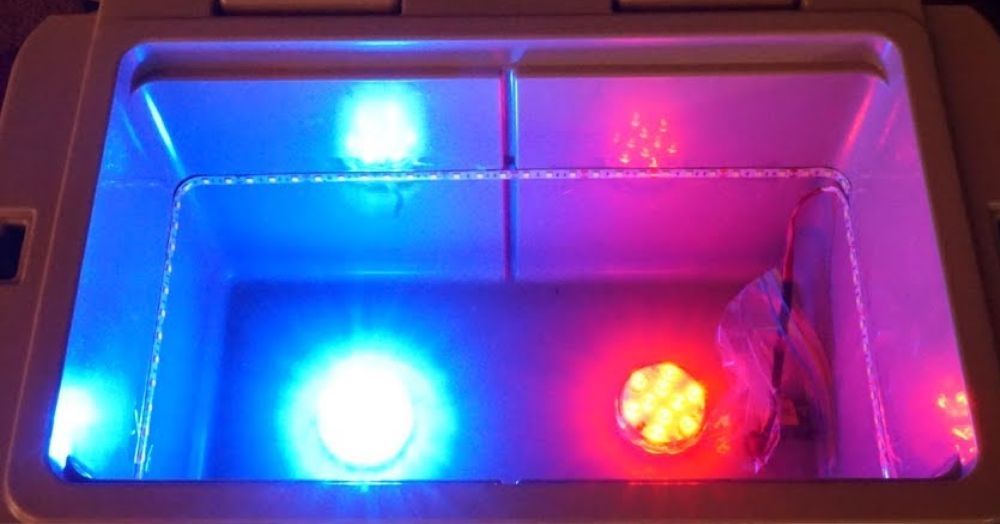
Rig up your cooler with a waterproof LED light attached to the lid or even thrown into your cooler. This will allow you to see what you are grabbing after the sun goes down.
I prefer it on the lid as it’s easier to turn on and off when you open the cooler. I don’t like to leave the light on all day/night
You can also use glow sticks for this. Just crack a few and throw them around the edges to shine the light back towards the center of your cooler. This is an epic solution for parties
13. Swap out Features Like Wheels or the Handle
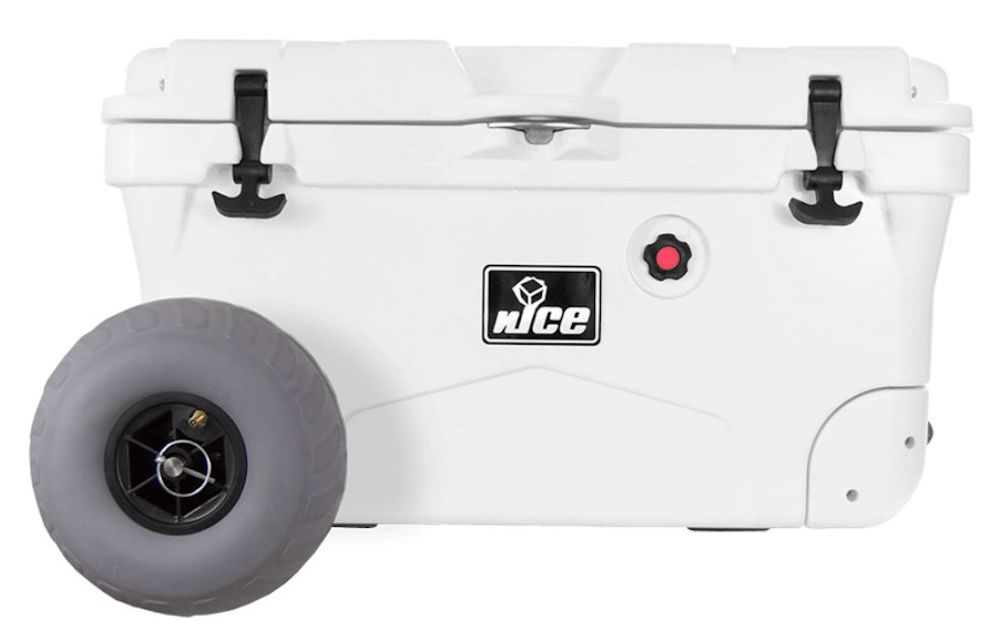
You can purchase larger wheels for coolers that have them. This will make for a smoother ride when pulling your cooler across bumpy surfaces.
If the handle on your cooler is too short, you can swap that out too. This is harder to do for cheap coolers with plastic handles, but expensive coolers with rope handles you can easily swap out the rope.
By doing this you won’t be straining your back when you pull your cooler.
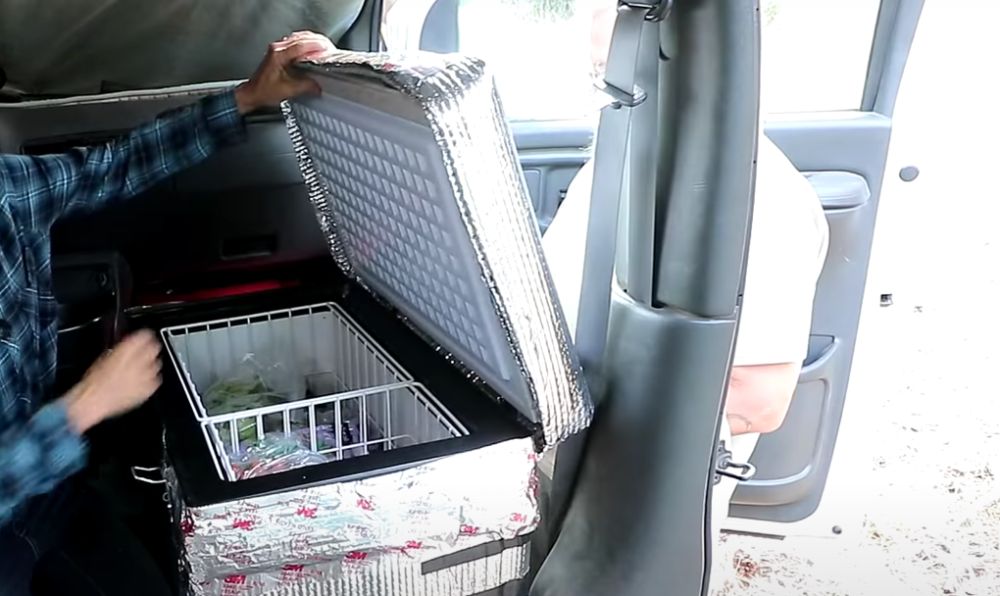
14. Insulate the Whole Cooler
There are so many different ways to add extra insulation to your cooler.
You can insulate your cooler lid if you have a cheap hollow one or even add styrofoam to the inside of your cooler.
At hardware stores, you can find sheets of aluminized bubble wrap. The reflective coating reflects back around 90% heat radiation (more on how aluminum works as an insulator), and the air pockets help insulate even more.
Cut pieces to size and use double-sided tape to attach it to the inside of the cooler.
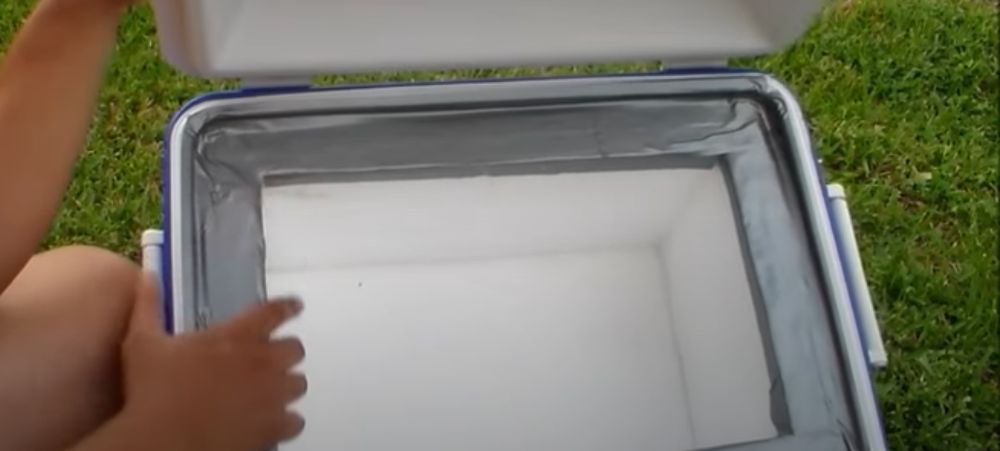
15. Create a Reflectix Cooler Cover
Instead of lining the inside of your cooler you can create an external cooler cover with the same aluminum bubble insulation mentioned above.
It’s super easy to make and will keep your cooler colder and keep ice longer. It especially works well when your cooler has to be in direct sunlight and you can get it into the shade.
I’ve done a full write up on exactly how to make a reflectix cooler cover where you can get step-by-step instruction.
16. Prep Everything in Advance To Save Space and Time
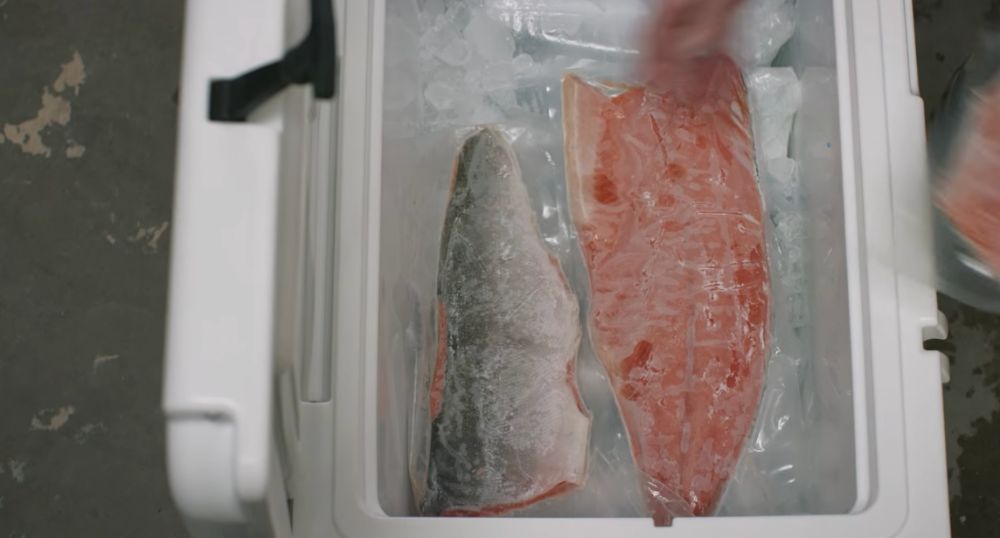
You can make top-notch meals in the wilderness if you prep in advance. Chop all fruits and vegetables in advance. Precook meats or par-cook them so they take less time to cook over a fire.
Mix marinades or rubs in advance so you don’t have to take the whole spice cabinet. Then transfer condiments into smaller containers to take with you.
You’ll often want to fill your cooler 1/2 to 2/3 full of ice to get the best ice retention so any space you can save in your cooler can give you more room for ice or other things.
Pre-chilling and pre-freezing items will also mean they stay frozen and your entire cooler stays colder longer.
17. Add a Cheap Bottle Opener To The Side Of Your Cooler
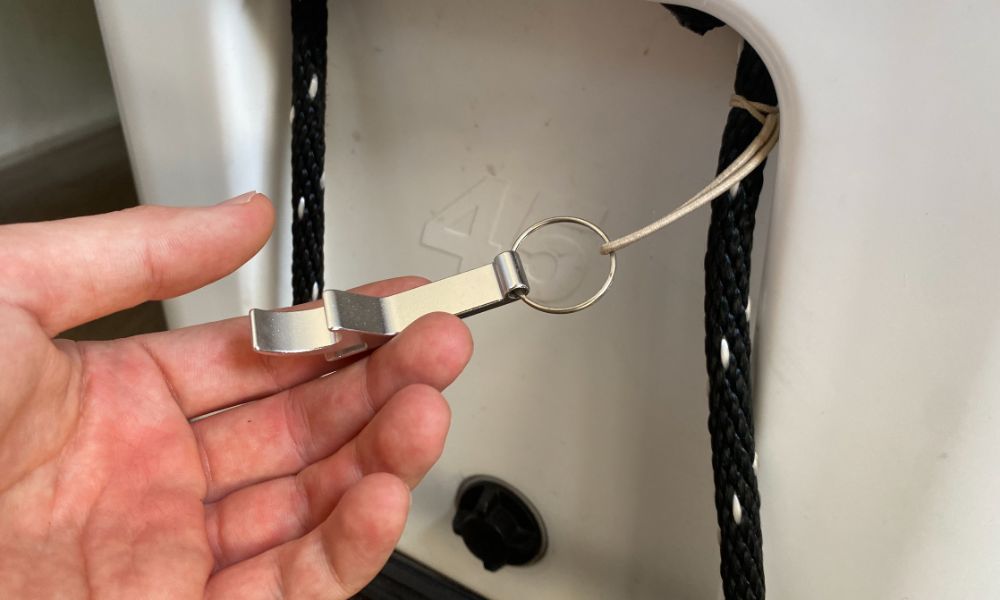
This is such a simple tip and so under-rated. If your cooler doesn’t come with a build in bottle opener then get a cheap bottle opener from your local Walmart or bottle shop and used some string to attach it onto your cooler.
I’ve even used a hair elastic to attach one onto my Yeti cooler in the past and it work perfectly for years and only cost me $2.
I can’t tell you how many times I’ve been out with people camping or adventuring and everyone is hunting around for a bottle opener or everyone forgot one.
It always feels good to be the person who just says “I’ve got a bottle opener here on my cooler”. Spend $2 and 2 minutes to do this and you and all your friends will be forever thankful.
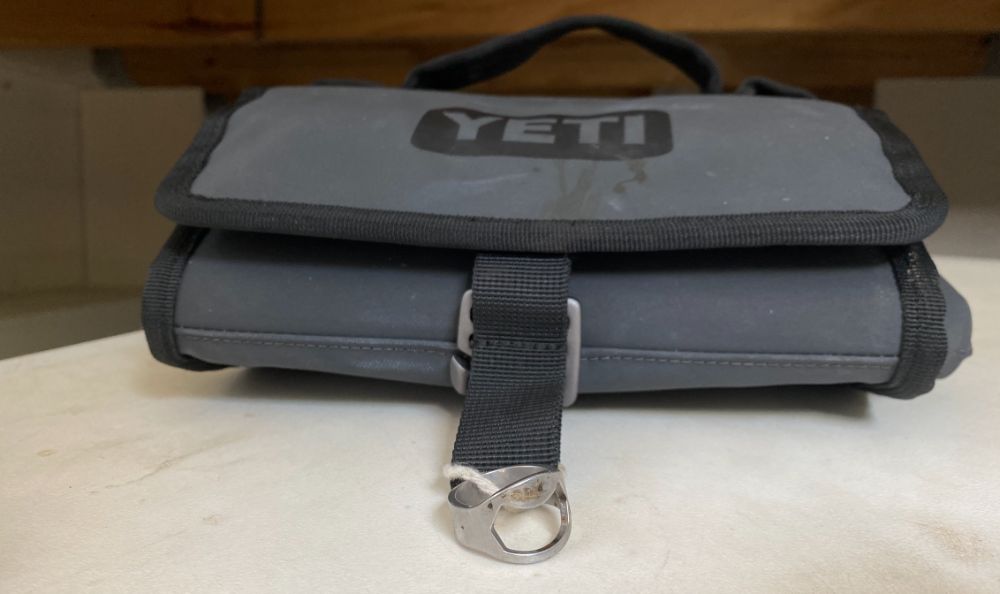
I’ve even add a tiny bottle opener onto my Yeti DayTrip Lunch Bag with a piece of string and it’s proved invaluable many times already.
18. Add a Layer Of Foam To The Top Of Your Cooler
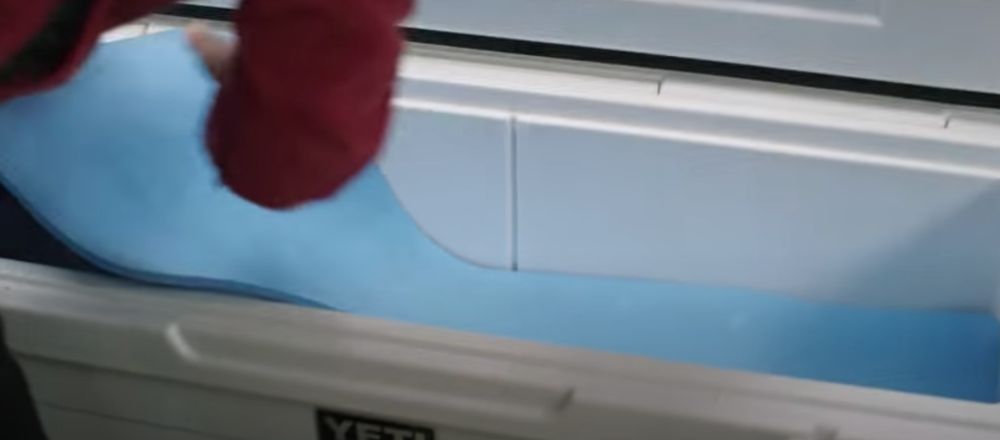
Every time you open the lid of your cooler warm air comes in and replaces the cold air in your cooler. When this happen it melts you ice and thaws your food faster.
This is especially true if your cooler isn’t completely full to the top (which is often isn’t half way through a camping trip).
Get some foam and cut it to the size of your cooler and place it on top of your ice. It’ll act as an extra barrier insulating your ice from the warm air and everything will last longer.
If you don’t have any foam then cardboard or plastic or even a towel can also work.
19. Make a Cooler Map On The Lid of Your Cooler
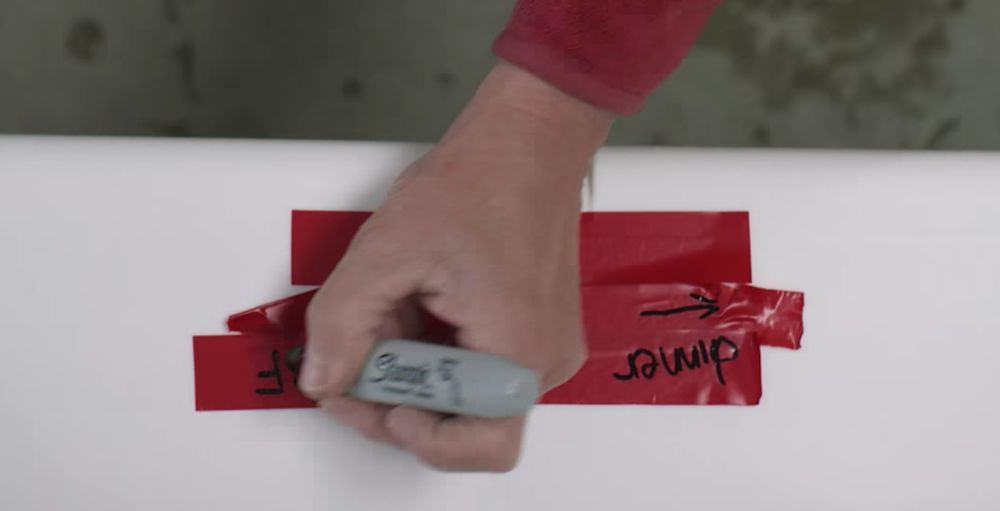
Using some masking or electrical tape put some on the lid of your cooler and using a pen to write where things are in your cooler.
You want to minimize how long a cooler stays open so this allows people to open the cooler, find what they need and then shut the cooler quickly.
As you can see, there are all kinds of hacks you can use to improve the efficiency of your cooler. With just a few supplies and a little time, your newly hacked cooler can make your camping trip less stressful and more fun.