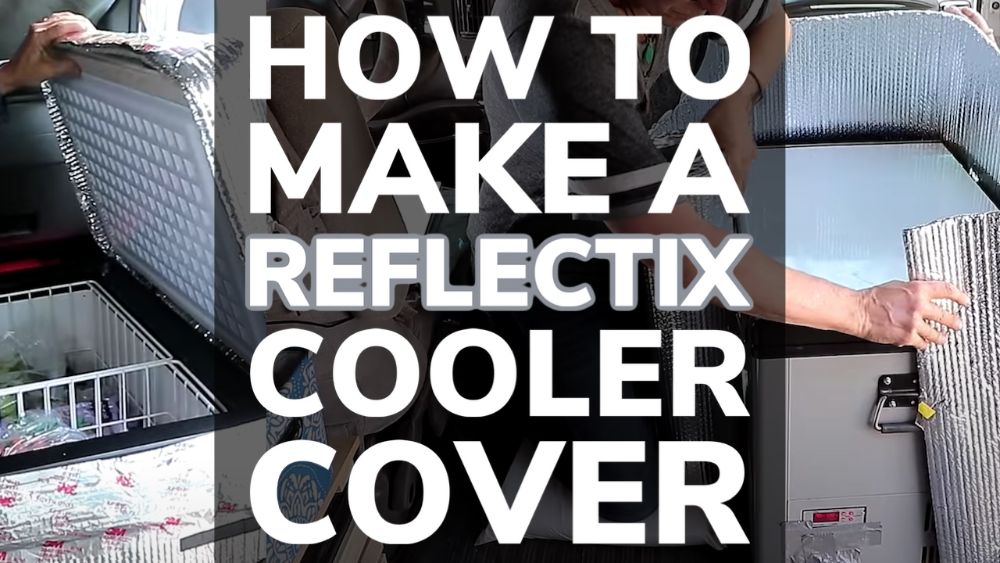
One of the best ways to keep your cooler or fridge colder for longer is to create a reflectix cooler cover. This cover goes on the outside of your cooler/12v fridge and reflects thermal radiation keeping everything colder.
While it is possible to purchase cooler covers for some 12 volt fridges you can easily make a reflectix cooler cover yourself for cheap.
What Does A Reflectix Cooler Cover Do?
Coolers and fridges are insulated with foam to protect them against heat transfer and to stop the warm outside air getting into the cooler or fridge and warming everything up.
On thing they aren’t great at stopping though is heat radiation. This is especially true if you place them in direct sunlight.
The sun’s radiation can pass through a vacuum (it passes through space to get to earth) and can also pass through your cooler walls.
Reflectix insulation protects your cooler from heat radiation by reflecting it back, usually using 1-2 layers of aluminum.
In my article on Is Aluminum a Good Insulator we explain that aluminum is one of the best reflectors of heat radiation.
So a reflectix cooler cover works by reflecting the sun’s heat radiation away from your cooler keeping it colder for longer.
Reflectix also usually has insulation in the form of plastic air bubbles which also work similar to the walls of your cooler/fridge and they stop heat easily moving through it.
So the combo of reflective aluminum and insulating air bubbles helps to keep your cooler or fridge colder for a lot longer than it would without a reflectix cooler cover. This is especially true if your cooler is going to be in direct sunlight.
How To Make a Reflectix Cooler Cover?
So how exactly do you make a reflectix cooler cover? Well it’s actually pretty easy to do and should old take you 5-15 minutes to create and should only cost around $20-$50 in supplies.
What Supplies Do You Need?
First, you need to gather your supplies, which include the following:
- Cooler or fridge to wrap
- Insulated foil bubble wrap (reflectix) – See latest price at Amazon
- Foil-backed tape – I recommend this one from Amazon
- Measuring tape (optional)
- Scissors
The supplies shouldn’t cost you much. Likely around $20-$50 maximum depending on how big your cooler is and how much tape and reflectix you need to buy.
You can also use duct tape instead of foil backed tape to hold everything together. But being black duct tape with absorb more heat so reflective tape is recommended.
Once you gather all your items you are ready to start making your Reflectix cooler cover.
You can watch the instructional video below or read the instructions with images from the video:
Watch The Video: Covering Your Refrigerator/Cooler with Reflectix
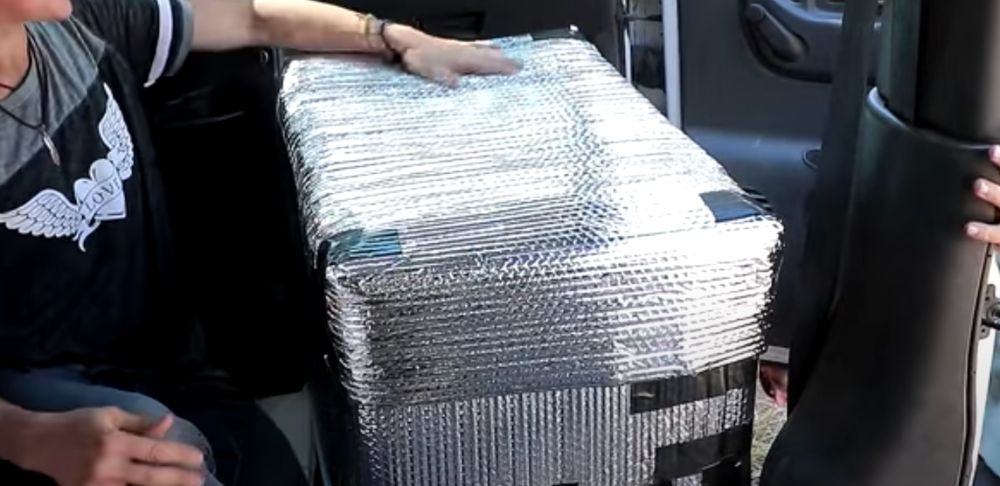
Step 1: Wrap Reflectix Around Cooler and Cut To Size
The first step is to cut the Reflectix wrap to fit around cooler.
You will want to cut one piece to wrap around the four sides. You can manually measure this out by wrapping the reflectix around your cooler/fridge.
Make sure to have some overlap so you can easily tape it all together.
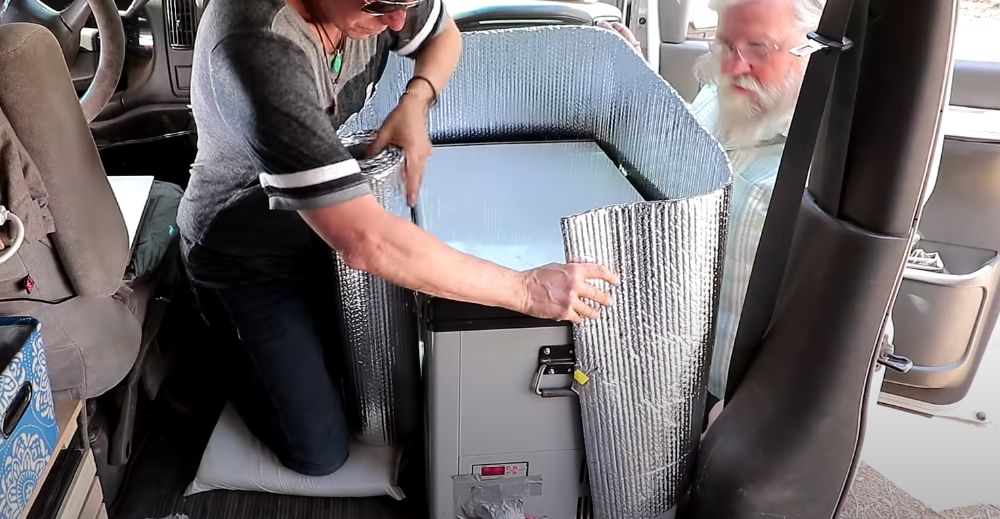
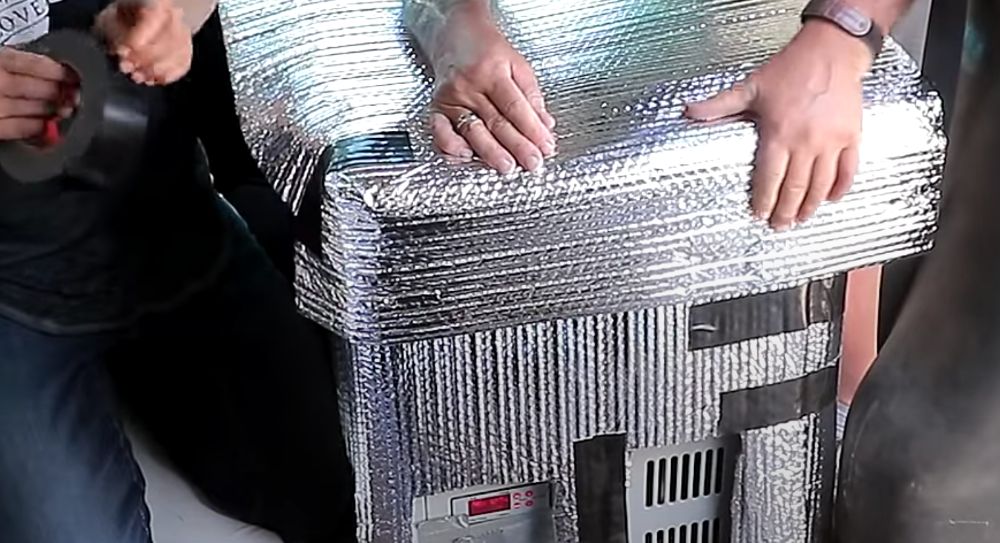
Step 2: Make Note of Vents and Cut Out Vents
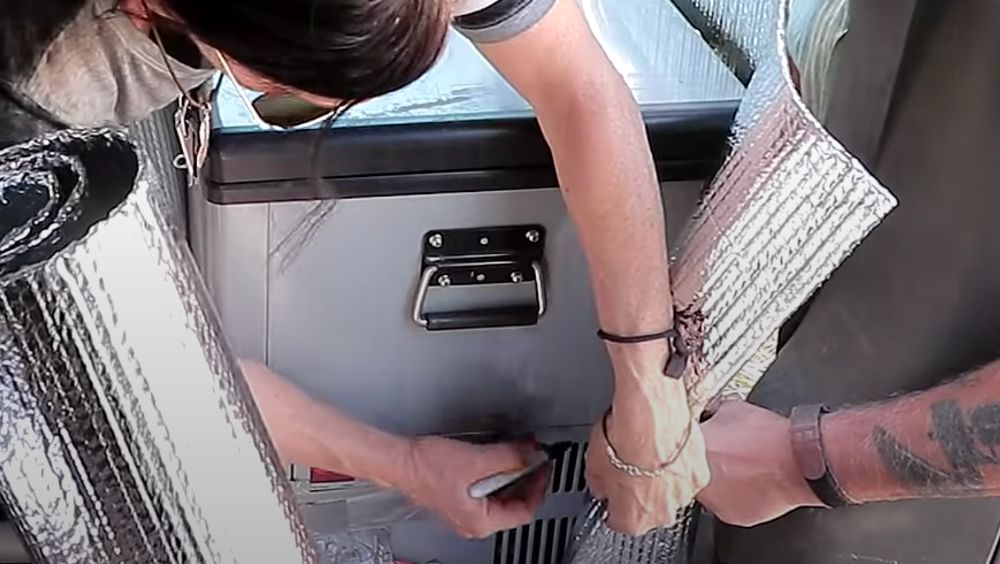
This isn’t required if you are just wrapping a cooler but if you’re wrapping a fridge then you’ll want to make note of the air vents and mark them with a marker.
Then cut holes for the air vents so air can still flow freely.
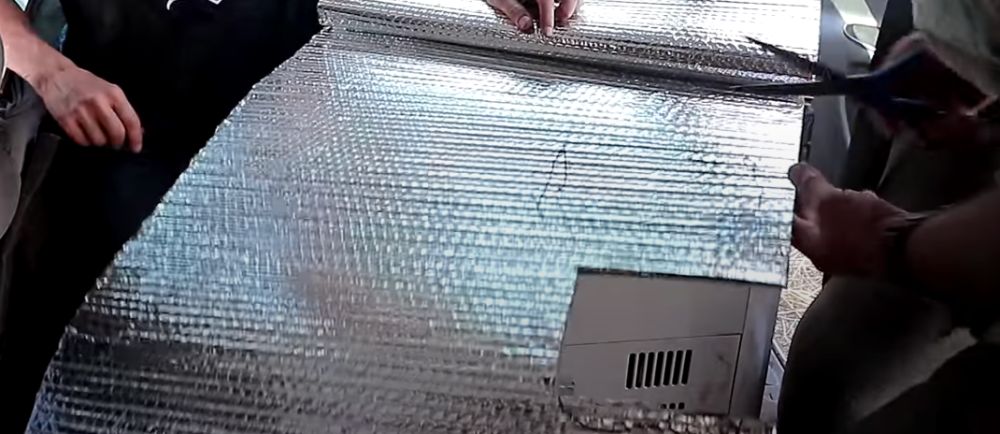
Failure to do this can result in your fridge overheating and breaking.
I recommend making the holes a little too small and then cutting them larger later. However, if you make the holes a bit too large it’s not a big deal.
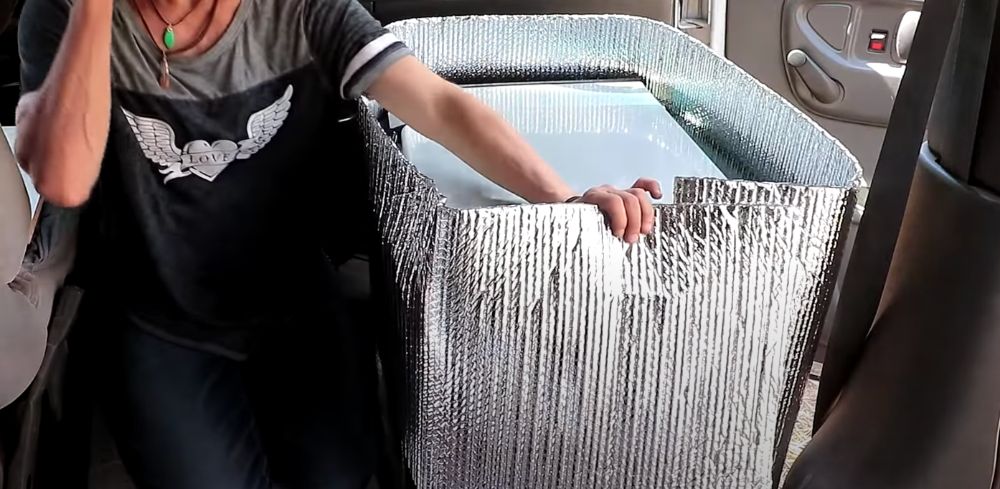
Step 3: Tape Outside Reflectix Together Leaving Space For Lid To Come On/Off
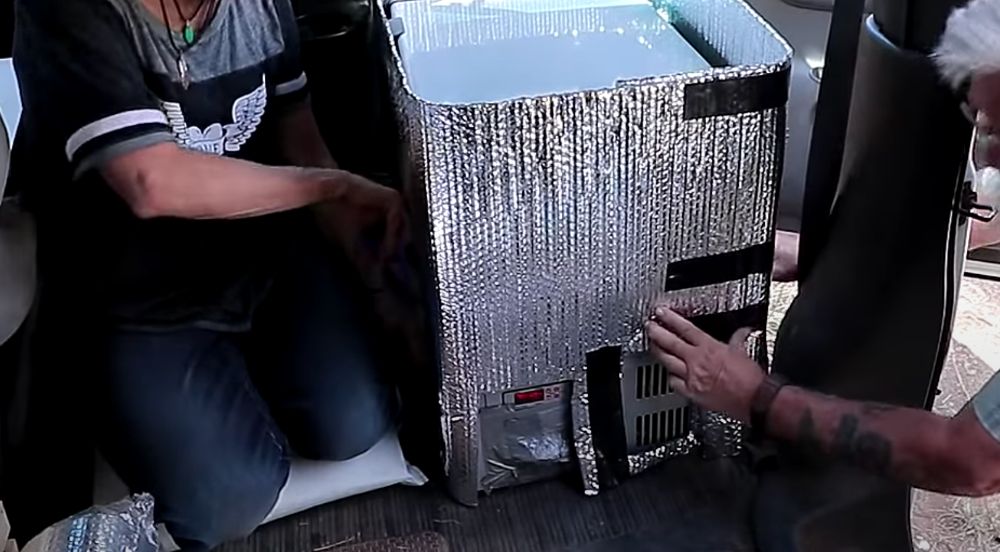
Now you want to go ahead and tape the reflectix wrap together using your duct tape of reflectix tape.
Before you do make sure to leave a bit of slack and confirm that the cooler cover can come on and off easily.
If you make it too tight it’ll be too difficult to get on and off so leave a little bit of space for this.
Step 4: Cut Off The Excess
If your reflectix is taller than you cooler/fridge then you’ll want to go ahead and cut off the excess reflectix.
You want the reflectix to be in line with the top of the main body of your cooler (where the lid touches the cooler).
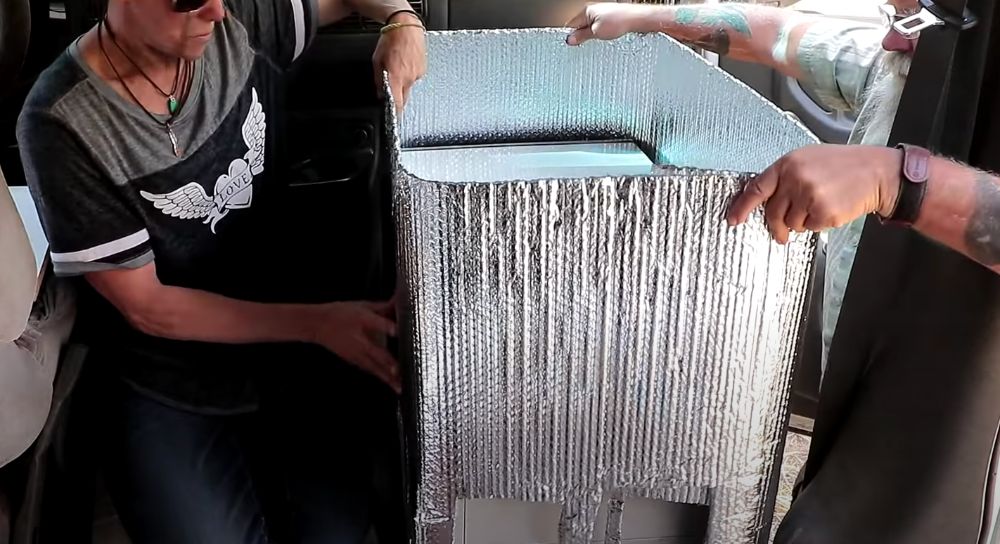
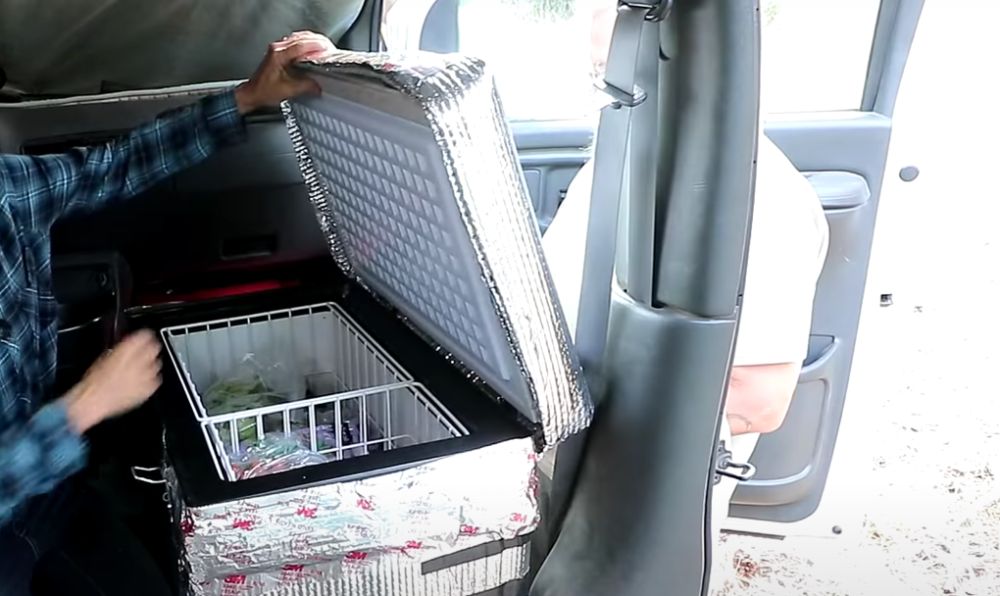
Next we are going to make a lid so your cooler/fridge can still open even with the cover on it.
Step 5: Cut Reflectix Piece For Lid
Now you’ll want to make your lid.
Cut a piece of reflectix for the lid leaving some overhang on all sides.
Step 6: Cut a Slit In Side So You Can Fold and Tape Lid

Using scissors cut a slit in the overhang of the reflectix for the lid as shown.
This will allow you to easily fold and tape your lid creating a nice corner.
Make sure when measuring this you leave the reflectix on the main body of your cooler. You want to lid to be able to go over the reflectix cover you have made.
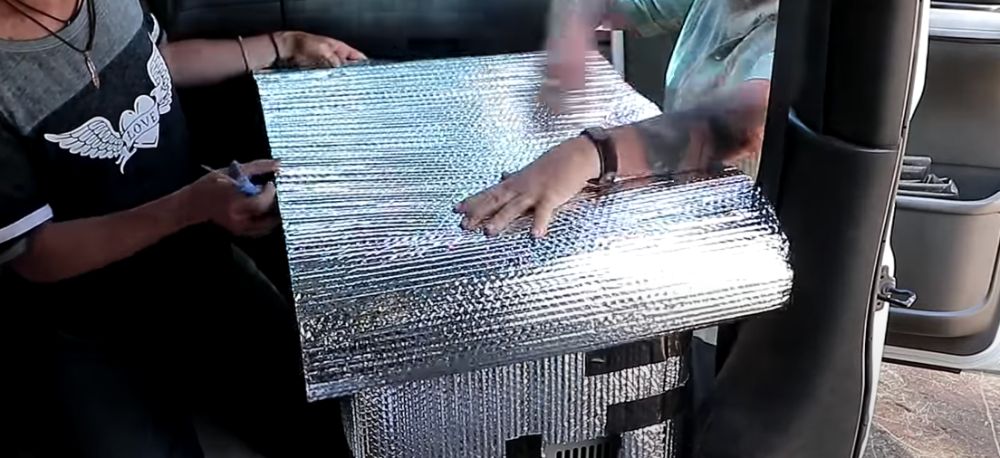
Step 7: Tape Lid Corners
Fold the corners of the lid reflectix and tape them together so you’ve got a lid that fit’s nicely over your cooler.
Step 8: Cut Lid Depth and Tape On One Side
Lastly if you’re finding your lid is too deep you can cut off the excess to make it a shallower lid.
You want the reflectix to be a similar thickness to the lid of your cooler/fridge.
Then you can tape the lid to the one side of your cooler cover where the hinge on your lid is.
This will allow you to still open the lid of your cooler whilst leaving the cover on.
Final Words
Making a Reflectix cooler cover is a simple and affordable way to get more out of your cooler.
It will take twenty to thirty minutes and you can use your cover every time that you head out for an adventure.
This simple DIY cooler cover helps to keep the heat and direct sunlight out of your cooler so that you can have a cold drink whenever you need one.
You can make a few covers out of one roll of the wrap so you can bring a few coolers with you and keep them insulated.