Making homemade ice cream is super fun, and you have complete freedom over what flavors you want to use, but sometimes it can be tricky to know exactly when to stop churning.
I’ve made the mistake where I haven’t churned long enough and my ice cream was too soft and runny and I’ve also made the mistake of letting it churn too long and it’s become icy and all frozen to the sides and bottom.
There are some key ways to know exactly when to stop churning your homemade ice cream and I have compiled the four best ways to know exactly when that is.
You know it’s time to stop churning your ice cream based on the labored sounds of the ice cream machine plus the consistency and the way the ice cream looks. Your ice cream should look and feel similar to soft serve ice cream. Once you reach this point stop churning and transfer your ice cream to the freezer to set.
Churning too little will result in runny unfrozen ice cream that will be sloppy and instantly melt on your spoon. Churning too much will result in ice cream that resembles butter or ice cream that is really icy and hard and not the smooth fluffy texture you want.
Why Is Churning For The Exact Right Time Important?
Churning your ice cream for the correct amount of time is the only way to get that perfect silky and fluffy ice cream. One of the biggest mistakes people make when making homemade ice cream is they over or under churn the mix.
While manufacturer instructions give you a time you should churn for this is just a recommendation and should be taken as such. There are a lot of factors that will determine the perfect churning time for your ice cream.
Everything from ingredients to the machine you use to the ambient temperature and volume of ice cream you’re churning all have significant affects on the churn time.
You usually only have a window of a few minutes to get the churning just right.
Churning too little and your ice cream will:
- Be too runny and not yet frozen
- Won’t have enough air in it so when frozen it’ll be hard
Churning too long will result in your ice cream:
- Getting too much air into it
- The ice crystals becoming bigger, making your ice cream icy and hard
- Get stuck to the sides and bottom of the churner making it hard to get out
To understand the exact right time you need to learn exactly what this looks like.
This will take some trial and error based on your machine and the ingredients you are using but with time it becomes obvious when you should stop churning. Below are some tips to help you.
The Four Best Ways To Know Exactly When To Stop Churning
Churning is the most critical part of making ice cream. This is what makes your ice cream fluffy and scoopable. Churning ice cream also prevents hard ice crystals from forming, and trust me, they’re not something you want to form in your ice cream.
Here are my best tips for know exactly when to stop churning
1. Start With a Timer, But Don’t Rely on It
Setting a timer for the churning process is an excellent first step in ensuring you’re stopping churning at the right time.
Your ice cream machine will come with a recommendation. This is usually somewhere between 15-25 minutes depending on the machine. But how long you churn ice cream for will depend on a variety of factors so this recommendation is just that…a recommendation and not an exact time.
Usually I’d recommend setting a timer for 15 minutes and checking your ice cream after 15 minutes. The only exception to this is if you have a smaller machine as smaller quantities of ice cream will churn faster.
Do NOT set a timer for 25-30 minutes. This is too long and you might overchurn your ice cream.
Once the timer has gone off, you should check the ice cream using the tips below.
You should never rely on the timer alone. You should listen out for the sounds the machine is making and what the consistency of the ice cream feels like.
Check out my article on how long does homemade ice cream take to make to learn more about the process.
2. Listen To The Machine
The sounds that the ice cream machine makes can be a good indicator to let you know exactly when you should stop churning your ice cream.
If you have ever sat and listened to your ice cream machine, you will have noticed that while the dasher, this is the part that spins in the machine, begins churning, it emits a high-pitched whine.
This noise has a tinny sound and when you are hearing this sound it usually means you need to keep churning.
After 15-20 minutes or so, you will hear that the loud whine will be replaced by a deeper tone. The dasher will start to sound labored like it’s like slugging against the ice cream.
Once you hear this change in the ice cream machine, you need to turn the machine off immediately and check the consistency. The ice cream likely has been churned for long enough.
Each machine is different but over time you’ll get to know the sounds your machine makes and how it changes when the ice cream is ready (or nearly ready).
If you really want to make sure you’re getting it right, you can always periodically check the ice cream, just be as quick as possible.
3. Check the consistency
The consistency and texture of the ice cream is the biggest indicator to determine if you have churned your ice cream for the right amount of time.
Before you check your ice cream, just remember that it will not look like the ice cream you buy in a tub from the supermarket just yet. It still needs to be stored in the freezer to set before it looks like store bought ice cream.
A great trick to use to see if your ice cream has been churned enough is to press the bottom of the spoon into the surface of the ice cream.
If the spoon leaves an indent, this means that the ice cream has been churned enough and is ready to be placed in the freezer.
If there is no indent, it may mean that you need to churn the ice cream for longer because the mixture is still too thin and will not freeze correctly. If you happen to spot this problem halfway through the churning process, there is still a way to fix it.
You’ll first need to work out why your homemade ice cream isn’t freezing properly, but one quick fix for runny ice cream is to do the following:
- Pause churning
- Add one teaspoon of cornflour. Don’t add too much all at once.
- Resume churning
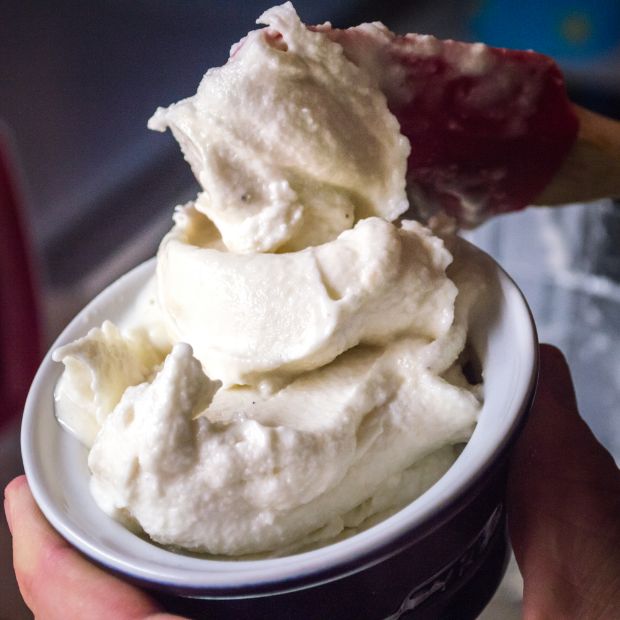
If your ice cream looks like soft serve ice cream while it is being churned, it means you have churned your ice cream enough and churning it past this point will result in overchurning.
Over churning can change the taste of the ice cream as well. Goodbye to light, fluffy ice cream, and say hello to waxy, buttery ice cream. Yuk!
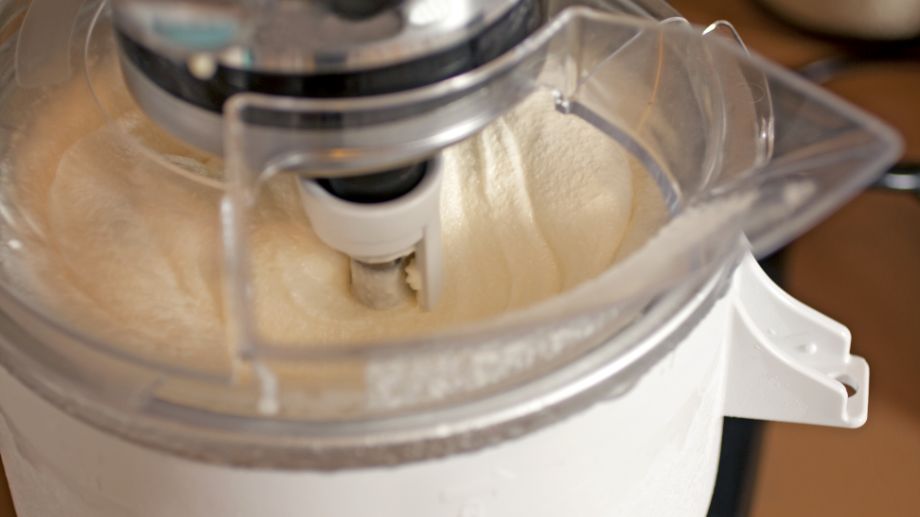
4. The Way it Looks
You can tell if your ice cream has been churned for just the right amount of time by just looking at the appearance of the ice cream.
The churned ice cream should look a little thick, and like soft serve ice cream, you will notice that it looks fluffy but doesn’t quite look like ice cream from the supermarket.
If you can see ice crystallization on the surface of your ice cream, this means that you have over churned the ice cream.
Things That Can Affect How Long You May Need To Churn For
While your machine may have a recommended time for churning there are SO MANY FACTORS that can affect how long a particular batch of ice cream takes to churn.
You Should NOT just rely on the time given alone but use the steps above to know exactly when to stop churning.
Blow are some of the things that can affect how long your ice cream will need to churn for.
The Ambient Temperature
The outside temperature plays a big role in how long you need to churn your ice cream for.
Ice cream will churn 5-10 minutes faster on colder days than it will on hot summer days.
Ice cream will also churn faster during the early morning or evening when it is cooler than during the middle of the day when it is hotter.
Generally speaking faster churning times leads to fluffier and nicer ice cream so aim to make your ice cream on cooler days or during the morning or evening for the best results.
How Cold Your Outer Bowl Is
The outer bowl is what does the actual freezing of your ice cream and the colder it is the faster your homemade ice cream will freeze.
This is why it’s important to put your bowl in the freezer for a full 15-48+ hours so it fully gets down to temperature.
For best results keep the outer bowl towards the back of your freezer, turn the freezer down to it’s lowest possible temperature and only get the bowl out right when you are ready to begin making ice cream.
The Strength of The Machine
Not all machines are made equal and newer models of machines are generally designed to churn faster than older models of the same machine.
Different ice cream machines have varying motors and speeds. Newer high-end models will be able to churn ice cream at a much faster and more powerful speed. This is when knowing what consistency to look out for is handy.
Below are some machine specific tips:
Using a Warm Ice Cream Base
I know the idea of homemade ice cream is pretty exciting, and waiting can be a drag, but your ice cream base needs to be pre-chilled before you pour it into the ice cream machine.
Pre-chilling the ice cream base both cools it down meaning it’ll freeze faster in the churner, but it also gives time for the drops of fat to partially crystalize and for other proteins coating the surfaces to be displaced.
Allowing your ice cream base to cool and set results in the ice cream being able to more easily and quickly trap air bubbles and will result in a softer creamier texture.
If you don’t allow your ice cream base to cool down and you try to make ice cream starting with a warm base you’ll often find the ice cream won’t set at all.
The Volume of Ice Cream You Use
The larger the volume of ice cream you’re trying to make the longer it will take.
1/2 quart of ice cream vs 2 quarts of ice cream will each take a different amount of time to completely churn.
Learn More About Churning Your Ice Cream
Below is a great video on some extra tips about churning your ice cream. I personally found it really helpful.
If you want to learn more about churning your ice cream and other useful tips, then you should check out my article to know precisely how long to churn ice cream for.

