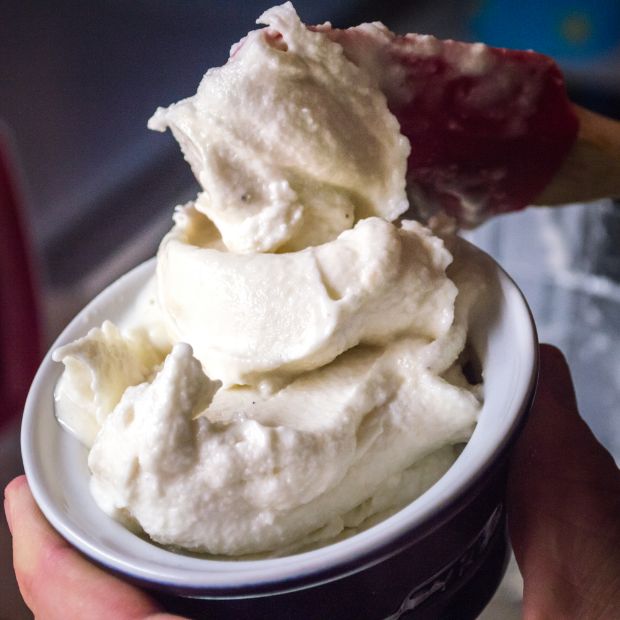
Whether your making a healthier, preservative free alternative or you just love the way it tastes, homemade ice cream really can be better than the store bought stuff and as someone who doesn’t do well with dairy it’s almost a necessity for me.
But one of the downsides of homemade ice cream is that it can have a tendency to go either soft and runny or hard and icy. It can be difficult to get that fluffy ice cream like consistency, but it is possible.
There are a few simple tips and tricks you can do to keep your homemade ice cream super soft and delicious.
1. Place Your Ice Cream Base In The Fridge Before Making It
Often when people are making homemade ice cream they are in an rush to make it. I get it, it’s really exciting and you want your ice cream NOW.
But patience really is a virtue if you want that smooth, scoopable ice cream. Homemade ice cream takes longer to make that you might think.
Letting your ice cream base sit in the fridge for a while before making it is a key step towards getting a better ice cream consistency. You can see why described in the video below:
Leaving your ice cream base in the fridge for a few hours does a couple of really important things.
Firstly it gives the ice cream time for the drops of fat in the cream to partially crystallize and for other proteins coating the surface to be displaced. This leaves patches that will stick together easily during churning which allows for more air bubbles and a fluffier texture.
The second thing is it lowers the temperature of your ice cream base very close to freezing.
It your try to make ice cream using a room temperature or hot base then your ice cream machine might not actually be able to fully freeze the ice cream, leaving to a runny messy and rock hard ice cream once it sets in the freezer.
By starting with a cold base your ice cream will freeze faster which will lead to smaller ice crystals and a smoother consistency.
2. Make Your Ice Cream Machine EXTRA Cold
A lot of people underestimate how important it is to make your ice cream machine’s outer bowl super cold. The colder the better!
You need to leave it in the freezer for at least 15-24 hours and if you try to rush this your ice cream won’t freeze as well or won’t freeze properly at all.
A good tip is to turn your freezer down to it’s lowest setting and put the outer bowl at the very back of your freezer near the air vents so it gets as cold as possible as quickly as possible.
If you’re using a traditional ice cream maker where you put ice and salt in the outer section then don’t skimp on the salt. Salt lowers the temperature of the ice for making ice cream so the more salt you use the colder it will be and the faster (and better) your ice cream will freeze.
See during the churning process the dasher (or blade) of your ice cream machine scrapes tiny ice crystals off the walls of outer bowl. Those ice crystals, mixed with air, is what makes up the consistency of your ice cream.
The colder your outer bowl (and leaving your ice cream base to sit in the fridge as discussed) the faster the ice cream freezes and the smaller the crystals.
Smaller crystals = creamier ice cream.
Ice crystals are their smallest right after churning so you want to make sure you are churning ice cream for the exact right amount of time and not any longer. Over-churning ice cream leads to larger ice crystals and a gritty, crunchy, icy texture.
Click here to learn how to know when to stop churning your ice cream.
3. Tweak Your Ingredients and Experiment With Your Recipe
I’ve got a bunch of other tips that will help you make fluffier ice cream with the same recipe you’re using. However, sometimes the recipe is the problem and you need to adjust it in order to get the best results.
There are a variety of things you can try to add or change about your ice cream recipe that can improve it’s consistency.
Full Fat Creams and Milks
While it can be tempting to make a healthy ice cream alternative the fact of the matter is lower fat milks contain less fat (duh) but also more water. This leads to an icier consistency.
The fat is needed to make ice cream as creamy as it usually is so if you’re using a low fat alternative consider switching back to the full fat variety.
Alcohol
Alcohol has a lower freezing point than water (which is why you vodka bottle stays liquid in the freezer even though it’s 0ºF/-18ºC).
By adding a little bit of alcohol to your ice cream just before churning can make the ice cream have an overall consistency and be less hard once frozen in the freezer.
Try adding roughly 44ml of 40 Proof vodka (approximately 3 tablespoons) per liter of the mixture before churning. The advantage of vodka is that you achieve a less boozy taste, and it doesn’t affect the flavor much.
You are free to experiment with various alcohol brands and flavors. This can enhance the taste and entice the palate.
Look for a recipe that calls for booze to be used. But, try not to go overboard since we aren’t trying to get wasted.
Sugar
Sugar also lowers the freezing point of ice cream helping to make it smoother and the type and quality of the sugar you use also plays a role in the end result of your ice cream.
We recommend using granulated sugar, but we can substitute this with a liquid sweetener such as corn syrup. Moreover, for those who are health conscious and don’t want any processed foods, go for honey. These will soften the ice cream and reduce the formation of ice crystals.
Salt
Just like sugar, salt lowers the freezing point of your ice cream and while it might sound weird to add salt into something sweet a little bit can actually enhance the flavor and consistency of your ice cream.
Just make sure you don’t use too much or it can ruin the entire batch and make it taste disgusting.
Other Additives
I tend to stay away from additives wherever possible but there are a variety of different additives you can use to improve the softness of your homemade ice cream. Some of these include:
- Gelatin
- Corn syrup
- Xanathan gum
- Guar gum
4. Transfer Your Ice Cream To The Freezer As Quickly As Possible
While it’s normal to want to enjoy the ice cream right away (and you can) it tends to be not quite cold enough and will melt on your spoon quickly.
In fact, as soon as the ice cream has done churning it will begin to start melting. When ice cream melts and refreezes it forms larger ice crystals making it harder and grittier.
If you don’t plan on eating your ice cream right away then as quickly as possible get your ice cream out of the ice cream maker, into a storage container and into your freezer.
Place it right at the back on the freezer near the air vent to make it as cold as possible as quickly and possible and to stop any melting from happening. This will help keep your ice cream fluffier.
5. Enjoy Your Ice Cream As Quickly As Possible
Once your ice cream has been made and then allowed to set in the freezer you want to enjoy it as quickly as possible.
Within just a few hours of making it your homemade ice cream will be at it’s best but you definitely want to eat all the ice cream within a week, two weeks absolute max. Homemade ice cream doesn’t last nearly as long as store bought ice cream as these have preservatives in it to keep it from spoiling.
While your tub of Baskin Robbins ice cream might last months homemade ice cream goes bad a lot quicker. First it will lose it’s softness and become hard but give it a week or two and it’ll start to taste bad and can even make you sick.
6. Keep Ice Cream In An Airtight Container
One of the worst things that you can do for the softness of your ice cream is to put it in the freezer without a lid on it.
this will cause ice crystals to form on your ice cream, will make your ice cream dry out and go harder than it otherwise would and it can even cause your ice cream to absorb flavors from your fridge or freezer (you don’t want your ice cream tasting like garlic do you?).
after making your homemade ice cream make sure to put it in a airtight container before placing it in your freezer. Ideally you want a container specifically designed for ice cream as this makes scooping so much easier.
I like these Sumo Ice Cream Containers at Amazon as they are long which makes them perfect for scooping and their airtight lids help keep your ice cream fresh and soft for as long as possible.
7. Place Wax Paper or Cling Wrap Over Your Ice Cream To Protect It From The Air
Even if you have an airtight container, chances are it won’t be full to the brim of ice cream which means your ice cream’s being exposed to a certain amount of air.
This can cause the ice cream to go icy and can also cause it to lose moisture and get harder.
It’s a good idea to place wax paper or cling wrap over the ice cream which protects it from the air and will keep it soft and fresh longer.
8. Store Your Ice Cream In Single Serve Containers
Rather than storing your ice cream in one big storage container it can be a good idea to store it in individual scoops that a ready to go.
This means every time someone is having a bit of ice cream they are exposing the rest of the batch to the outside air and ruining it’s texture.
These 8 oz containers with screw lids at Amazon are a great size for 1-2 scoops of ice cream and kids absolutely love them.
9. Be Careful With Substituitions
I can’t consume a lot of dairy and so for me I like to make ice cream using plant based alternative milks or creams, but this changes things dramatically.
Don’t just think you can swap out full cream milk for low fat or plant based milk or think you can swap out sugar for a sweetener, the ice cream won’t end up the same.
Ideally don’t use substitutions, or if you do try to find a recipe specifically suited to your substitution or your ice cream might be extremely hard and icy.
10. Re-Think (and Refrigerate) Your Mix-Ins
One of my absolute favorite things about homemade ice cream is the fact that you can add in a variety of mix-ins that would usually cost you a lot of money at the store.
However, if you’re finding that your ice cream is too hard then you may need to rethink your mix-ins. Large chunks of fruit or chocolate seem like a great idea when they are at room temperature but once I completely frozen they can be like biting into hard rocks.
Cut up your mix ins into smaller pieces to avoid this problem.
Also when adding your mix-ins to your ice cream during the churning process you want to make sure you do it towards the end of the churning process or it can stop the ice cream forming properly.
You also want to make sure you refrigerate your mix-ins before putting them into your ice cream otherwise they will begin to melt your ice cream once you put them in.
11. Avoid The Use of Wrong or Old Ingredients
Always use fresh and quality ingredients! Occasionally, we lose track of how long things are lying around in our pantry. This also adds blemishes to the mix and reduces the shelf life of the ice cream.
Using substitutes may help break the bank, but let’s stick to the recipe. There’s a reason they weren’t recommended.
Some recipes call for the use of gelatin and stabilizers – make sure you use the correct ones.
12. Use Your Machine Properly
For the absolute best results and the softest homemade ice cream do you want to make sure that you are using your machine correctly.
You need to make sure that the outer bowl is completely cold (as we have already discussed) and you want to make sure that you choose the right speed setting for your ice cream maker.
What speed setting should you use for a KitchenAid ice cream maker.
ideally you want to use the slowest speed possible to add as much air into the mixture as you can and you want to make sure that you churn your ice cream for the exact amount of time.
Many ice cream makers have a suggested churn time. But depending on your specific recipe and how much ice cream you’re making it may take longer or it may take less time.
Listen for a deeper and more labored sound coming from your ice cream maker and look for a soft serve consistency of your ice cream to know that it’s time to stop churning.
13. Adjust Your Freezer Temperature
While I suggest that you lower the freezer temperature when preparing the outer bowl of your ice cream maker, a colder freezer temperature can lead to harder ice cream when you’re trying to store it.
If you are finding that your ice cream is too hard to scoop then try lowering your freezer temperature a couple of settings which will hopefully make your ice cream softer.
14. Keep Your Ice Cream Container In A Plastic Bag In Your Freezer
One really cool hack to help keep your ice cream softer in your freezer for longer is to place your ice cream tub inside a resealable plastic bag.
The plastic bag will stop any air from reaching your ice cream but it will also help to insulate your ice cream so it won’t get as hard.


