Ice is a great way to cool down your beverage or keep items cold in your cooler but often it feels like the ice melts way too quickly.
However, it’s possible to make slow melting ice cubes that last longer and melt at a slower rate than regular ice cubes and heres how to do it.
You can use just one of the tips below to create slow melting ice cubes or if you combine multiple tips then you’ll get ice cubes that last much longer than regular ice cubes and you may even be shocked at how slowly they melt.
1. Make Clear Ice
One of the best ways to make slow melting ice cubes is by making them as clear as possible.
Did you know that ice is white in the middle because it has trapped air bubbles in it that make the ice opaque? These trapped air bubbles also make the ice less dense and increase it’s surface area as it melts causing it to melt faster.
Not only this but regular ice contains impurities like dissolved salts and minerals which cause the ice to melt earlier than it otherwise would.
Clear ice on the other hand melts slower because it has no air bubbles making it less dense. It also often uses distilled or filtered water to make the ice as clear as possible and this in turn causes it to melt slower than regular ice with impurities.
It’s a bit of extra effort to make clear ice, but it’s worth it as you’ll get ice that lasts longer and melts slower. I’ve got a full guide on how to get clear ice or you can read the steps below.
Here’s how to make clear ice:
- Get distilled water. Although it’s not entirely necessary to use distilled water for clear ice, it works best. Since regular tap water has chemicals and impurities, distilling helps eliminate almost all of these.Keep in mind, some bottled water is distilled, but not always. When buying bottled water for clear ice, verify it’s distilled.
- Place water in an ice tray that is insulated. To get clear ice you need your ice to freeze omni-directionally (in one direction). Having an insulated ice tray like the Tovolo Clear Ice Sphere Tray will stop ice freezing in all directions and ice will only freeze from the top down.
Not only does clear ice take longer to melt, but it also tastes and looks better. Cloudy ice can often have a stale or musty flavor, so making it as clear as possible is the best thing you can do.
One of the best clear ice cube tray molds it the True Cubes mold which is used by many bar tenders as well as thousands of people at home to great success. You can check it out using my affiliate link below:
See the latest price of True Cubes at Amazon
2. Turn Your Freezer to the Coldest Setting
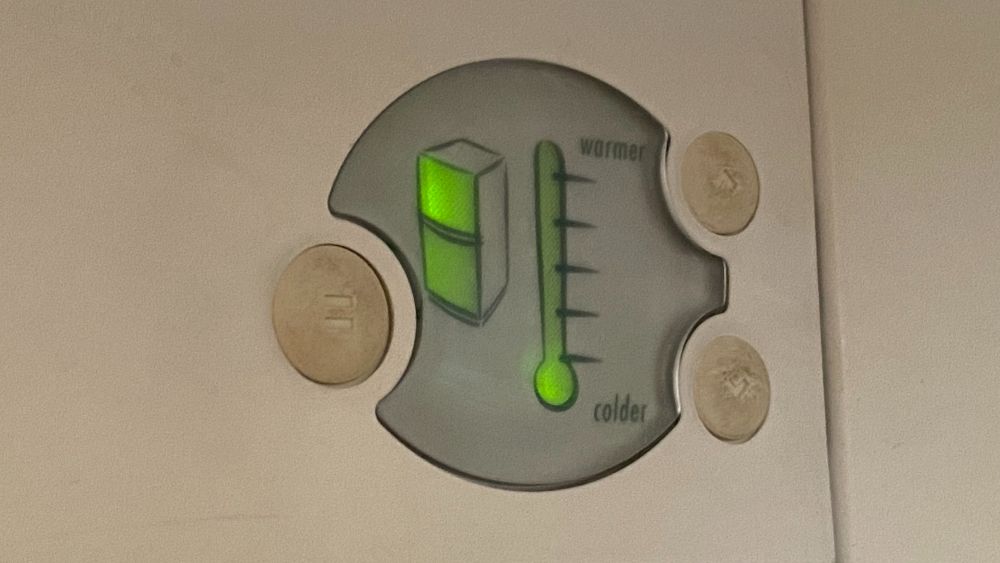
Another way to make slow melting ice cubes is to turn your freezer to the coldest setting. Quite simply, if the ice cubes are colder, they’ll take longer to melt.
While we all know that ice freezes at 32ºF/0ºC a lot of people don’t realize that the temperature of ice can be a lot lower than this. In fact, the ice will lower to the exact temperature of your freezer if you give it enough time.
A standard freezer is usually kept at around 0ºF/-18ºC but if you have it on a warmer setting it may be higher than this.
The colder the ice starts out the more heat energy is required before it starts melting. So putting your freezer on the coldest setting will make your ice cold and thus will cause it to melt slower.
Although this option is effective, it has its downsides. For instance, lowering your freezer setting may impact other food in your freezer in a negative way.
Certain foods are supposed to remain at certain temperatures when in the freezer, so make sure this step won’t affect any food in your freezer before you try it.
3. Make Larger Blocks Of Ice
A large block of ice will melt a fair amount slower than lots of smaller blocks of ice, even if overall they add up to the same weight.
This is because large blocks of ice have less surface area thus insulating the ice in the middle of the block from the heat of the outside world.
If you want to make the slowest melting ice possible make clear large blocks of ice that start out extremely cold. Check out my guide for making block ice at home.
The great thing about block ice is it’s pretty easy to cut to the size you want so it can still fit in your cups or water bottles. Alternatively you can get a large ice cube tray that is specifically designed to make big ice cubes that melt slower.
4. Place Your Ice in the Coldest Part of the Freezer
The coldest spot of a freezer is the rear back. This is where the cooling fan is and it’s also furthest from the door where the warm air gets it. So the back of your freezer is the best place for your ice there if you want slow melting ice.
However, don’t leave it at the back of your freezer for too long because it may accumulate unwanted frost, which can impact the taste of your ice. You can get around this by storing the ice in your freezer properly by using ziplock bags or tupperware containers.
You should avoid placing the ice near the front of the freezer because this is generally the warmest spot.
5. Keep the Ice Insulated
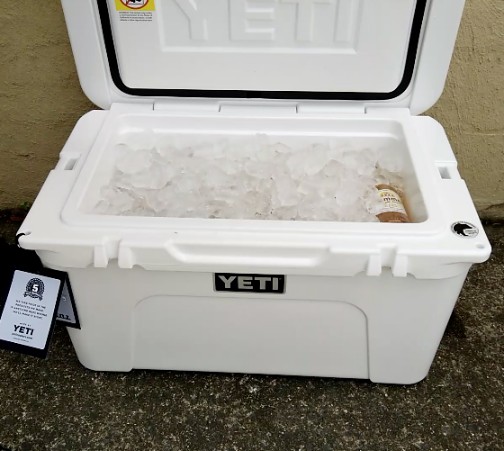
Another great way to make your ice last longer is to keep it insulated. It’s as easy as placing the tray inside a freezer bag, which keeps it cold for longer or inside a high quality cooler or an insulated tumbler or water bottle.
Below you can see that ice lasted a whopping 3 days! inside a Hydro Flask water bottle.
Alternatively, you could make your ice normally, and when you remove it from the freezer, cover it with an insulating material, like bubble wrap. If you’ve a large amount of ice, use a bucket or cooler and cover it with bubble wrap.
This is a great trick for a hot summer’s day to keep your ice cold for as long as possible!
Bubble wrap is the best thing to use because it’s full of air pockets, and air is an excellent insulator. You can use it to insulate many things, and ice is no exception.
Keep Your Drink in the Fridge Before Using Ice
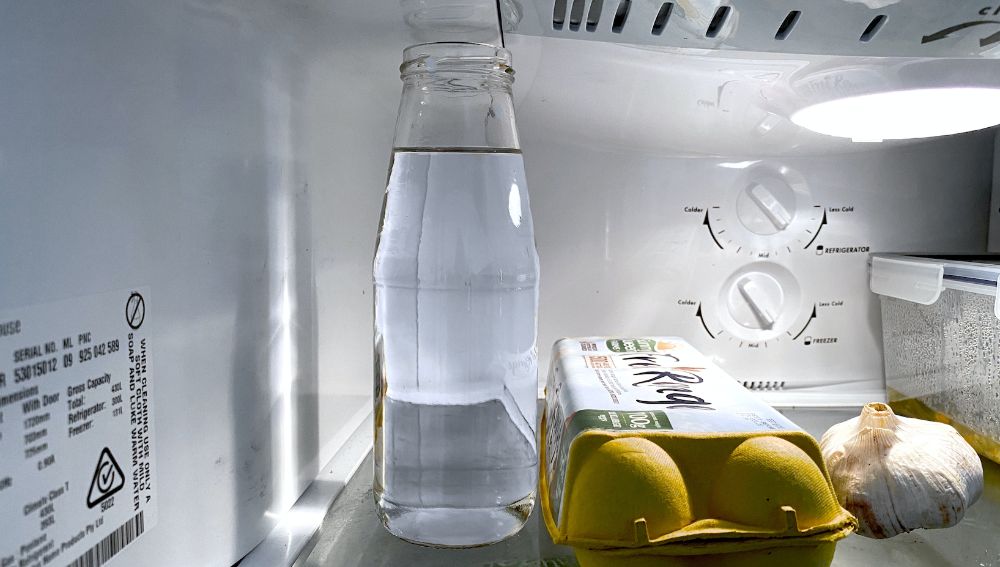
If you’re planning on using the ice for some drinks, it’s an excellent idea to place the drinks in the fridge. So when you put the ice in the glass, it’ll be met with a cold drink and won’t melt as quickly.
If you place ice in a drink that has been sitting out at room temperature for a while, the ice will melt a lot quicker. If you don’t have much time, you could even place your drink in the freezer for a few minutes. But don’t forget about it! You certainly don’t want a frozen drink.
6. Freeze With Dry Ice
Dry ice is much colder than regular ice. At -109.3ºF/-78.5ºC it’s much much colder than your freezer ever is.
If you place dry ice on top of your regular ice it’ll lower the temperature of your regular ice significantly making it extremely cold, even colder than ice in your freezer. This will cause it to melt slower than regular ice would.
However, you must be careful when handling dry ice because dry ice can be dangerous. Additionally, it can cause breathing difficulties if there isn’t enough ventilation, so make sure you don’t use it in a small room. This is because dry ice is solidified carbon dioxide, and breathing in too much of it can be extremely dangerous and dry ice has even killed before.
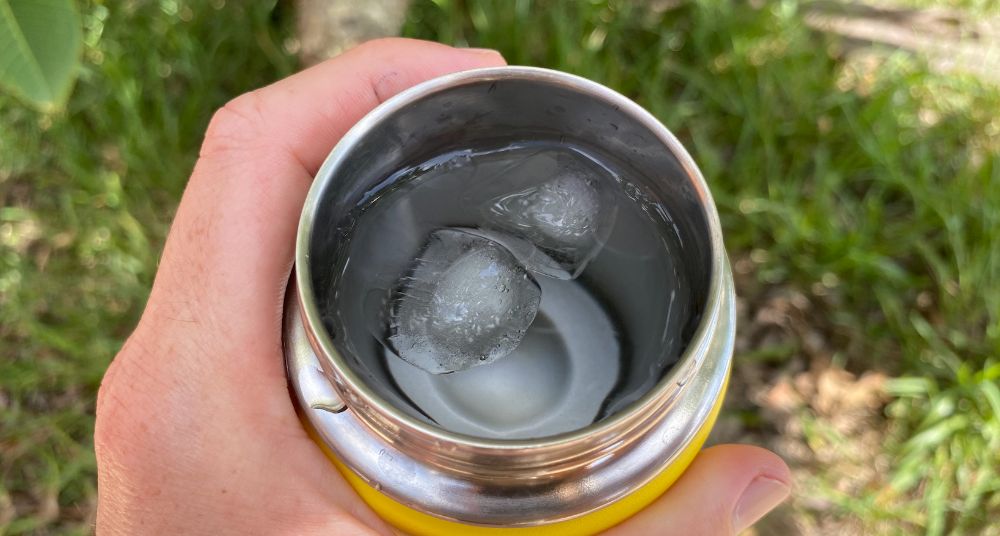
7. Make Sphere Shaped Ice Cubes
Many bartenders and homemakers alike have experimented with various shaped ice cubes to the result of slower melting ice, in some cases. In particular, circle shaped ice cubes seem to be the most successful for this.
This is because spherical ice cubes have the least surface area of any shape and this leads them to melt slower.
You can check out my list of the best sphere ice cube makers for some good products that’ll make perfect ice balls. I personally use and recommend the Tovolo Clear Sphere Ice Maker.
It’s affordable, isn’t too big and makes decently ice spheres that are almost completely clear (minus a few tiny bubbles).
See the latest price of Tovolo Clear Ice Sphere Trays at Amazon
Conclusion
There are several ways to make your ice melt slower than usual, including using bubble wrap for insulation or dry ice to keep your ice cool.
You can also keep your ice at the back of the freezer or freeze ice into slower melting shapes. If you’re using ice for drinks, it’s good to keep the drinks chilled beforehand so the ice won’t melt as quickly.
Here are seven tips on how to make slow melting ice cubes:
- Make clear ice.
- Turn your freezer to the coldest setting.
- Make large blocks of ice
- Place your ice in the coldest part of the freezer.
- Keep the ice insulated.
- Freeze with dry ice.
- Make sphere shaped ice cubes.