Clear ice is free from impurities and pollutants, it also contains no air bubbles making it melt slower than regular ice. It also looks amazing in your drink or cocktail. But how do you make clear ice?
It’s the filtration and freezing process that removes all air bubbles and minerals that could be in the water that is the secret to making clear ice at home.
To make clear ice freeze distilled, filtered or pre-boiled water inside a cooler. This forces the ice to freeze from the top down, pushing air bubbles down as it freezes making the ice clear. Once frozen cut away the white ice and cut the large block of clear ice into smaller more manageable cubes.
To get clear ice isn’t as difficult as it may sound, especially if you’re a beginner and not familiar with it. Stay reading with us to get clarity and learn precisely how to make clear ice!
How To Make Clear Ice: Using The Cooler Method
There is one basic idea behind how to successfully make clear ice. Typically, your common ice cubes are frozen from all sides at the same time.
This means ice freezes from the outside in and as it freezes it pushes the air bubbles into the center of the ice cube where it gets trapped and gives ice it’s white looking color.
By freezing the water in a cooler, you will be forcing the water to freeze omni-directionally, from the top down. This will push the air bubbles down allowing for the majority of the ice to form and be crystal-clear, without any trapped bubbles.
Any dissolved air and particles will end up beneath the clear ice block and can be cut away leaving just clear ice.
Take a look below as we take a more in-depth look at how you can achieve clear ice by using the cooler method:
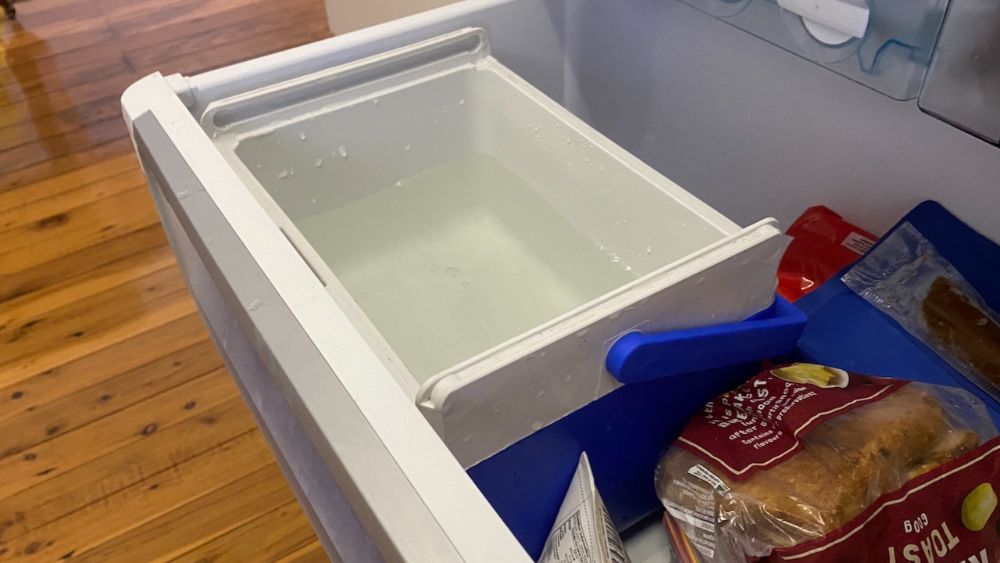
Step 1: Freeze Water In Your Cooler For 18-24 Hours
Choose a tiny cooler that is compact enough to fit inside your freezer. I personally like to use the Coleman 5-Quart Flip Lid cooler as it’s cheap, small and does the trick.
Fill the cooler about 2/3 to 3/4 full with distilled or filtered water. If you don’t have access to this type of water then boil your water twice to remove impurities, leaving it to cool each time. Once cool after the second time then pour it into your cooler.
Avoid pouring hot water into your cooler as this can cause the plastic to leech flavors and chemicals into your ice making it taste terrible.
By using distilled water, you will achieve slightly more clear ice. You can use tap water but results may not be as clear.
Place the cooler inside of your freezer, leaving the lid off. And you are done!
Freeze the cooler for 18-24 hours until several inches of the water at the top have frozen. Do not open your freezer during this process.
You will still want to have some water left under the ice, which will work to prevent your ice from getting cloudy!
You can leave the cooler to completely freeze like I talk about in how to make block ice for your cooler. However, this leaves large sections of white ice which need to be cut away and it can also force bubbles back down into your clear ice…so avoid fully freezing the ice block if you can.
Cloudy ice is an indication that your ice has some impurities and gasses. These gasses and impurities are trapped inside the ice, leading to a cloudy appearance.
Step 2: Remove The Ice From Your Cooler
When you see that the block of ice is ready after thoroughly inspecting it, remove it from your cooler and get ready to change it into cubes!
To change this block of ice into clear ice cubes, you will need to place the cooler upside down in your sink or empty bathtub for 5 to 10 minutes.
The block of ice may fall out of the cooler on its own, or you can give it a gentle shake to make it fall out quicker.
Step 3: Cut The Block Of Ice Into Cubes With A Serrated Knife
This is where things seriously get fun! You can choose to either use a serrated knife or an ice pick to cut or pierce the block of ice into the preferred size of chunks.
When using a serrated knife, it will be less cutting and more about scoring the ice in order for it to snap off.
When using a serrated knife, here is what you should do:
- Hold the block of ice with a towel or an oven mitt.
- Cut out one strip of ice and lightly score the top of the ice by sliding your knife back and forth until a strip of ice completely snaps off.
- Use the same method continuously to cut every strip into cubes.
Step 4: Shape The Clear Ice Chunks With An Ice Pick or Ice Press (This Is Optional)
If there is ice you need to want to serve immediately, you can use an ice pick to help with the final shaping.
There is a whole art around shaping ice, but you can choose the basic square shapes. Using an ice pick to shape your clear ice isn’t required, but it makes for perfectly shaped cubes!
You can also use an ice press which quickly melts the ice into your desired shape. Ice presses can make ice cubes in the shape of spheres, diamonds and even hearts.
Read next: Should You Use Round Or Square Ice Cubes For Whiskey?
Step 5: Store Your Clear Ice Correctly
Make sure that you store all the ice you are not planning to use immediately. Please place it in your freezer in a sealed container.
How To Make Clear Ice: The Clear Ice Maker Method
If you are lucky enough to get your hands on a professional high-quality ice maker, such as the ones they use in bars and restaurants, it will be easy-peasy to get crystal clear ice, even if you are a beginner.
If you do not own a clear ice maker, don’t stress! You don’t have to break the bank and spend hundreds or thousands of dollars for a commercial-grade clear ice maker.
You get several affordable and budget-friendly clear ice makers that can make up to 40 pounds of clear ice in a single day!
This is still more than you would be able to make using the cooler method.
A clear ice maker works by moving water over chilled coils in order to remove any impurities and air bubbles mechanically!
Therefore, you can skip the water distillation and boiling steps and add water to the ice maker.
Why Is Clear Ice So Popular?
Clear ice has gained a lot of popularity in the modern world, and it is a modern invention! Clear ice simply just looks cool and much more appealing with a craft cocktail or more sophisticated beverage.
People have also found out that clear ice melts much slower than your traditional ice cubes. If you cut them into spheres, they will melt even slower because spheres have fewer surface areas, making for a slower melting process.
If you have taken a lot of your time and effort to produce a homemade cocktail, you will probably want to savor it without there being a chance of your ice watering it down.
Transparent ice spheres will not only reduce the chances of watering down your drink, but they will also keep it exceptionally cold when you’re using the correct type of glass.
Conclusion
Clear ice makes for a stunning and aesthetically pleasing drink. It is the perfect type of ice if you have guests over or maybe even colleagues to discuss business.
If you are looking for a stable and constant supply of clear ice, it is advised to buy a permanent kitchen appliance. If you’re only looking to have some fun with clear ice occasionally, it would be better to make use of the cooler method.