Me and my kids love the Contigo bottles and their lids. However, without taking them apart they are impossible to clean properly and over time they can become smelly and even begin to grow mold.
Taking Contigo lids apart is a little bit tricky, but if you know what you’re doing and have the right tools it’s well worth doing to keep your bottle clean, hygienic and free from bad smells
You can take a Contigo water bottle lid apart but how you do it depends on the Contigo bottle type you have. All methods involve using your fingers, tweezers, and micro screwdrivers to loosen and disassemble the parts.
It’s not easy but it’s 100% worth it to ensure you don’t end up with mold in your Contigo lids. The only other alternative is to buy a replacement lid for your Contigo, but unfortunately the company doesn’t sell replacement lids so you’d need to buy a different brand.
How to take apart a Contigo water bottle lid involves a few steps and having the right tools, but it doesn’t take too long.
The following steps will help guide you so you don’t make any mistakes and break your Contigo lid or be unable to put it back together.
Things You’ll Need
Before you begin, you’ll need a few tools to dismantle your Contigo bottle lid for cleaning or repair.
You’ll need the following items (some of which you’ll need to purchase):
- Mini triangle screwdriver set with triangle screwdriver 1.8 mm. I personally recommend this Fixinus triangle screwdriver set from Amazon as it’s affordable, high quality and has the small sizes you need for Contigo water bottle lids.
I originally made the mistake of getting a kit with triangle screwdriver bits only down to 2mm and it didn’t fit. Luckily there was also an alternative option that I found worked.
- Alternatively a 2mm Tri-Wing Screwdriver also works
I found this out when I bought a screwdriver kit that came with 4 sizes of triangle screws that unfortunately only went down to 2.0 in size which was too big for the Contigo lids.
Luckily the 2.0 Tri-Wing in this Speciality Screwdriver Set from Amazon worked to be able to unscrew the Contigo bottle lids just fine so I didn’t have to buy another set of screwdrivers just for this job.
I recommend this set if you have other bottles or electronics that you might need weird shaped screwdrivers for. Plus it comes with tweezers and other tools that can make pulling apart your Contigo lid easy.
You’ll also want to have:
- Pliers or a pair of tweezers.
- Small flathead screwdriver or butter knife
- String or a rubber band.
- Saucer or container to store the tiny parts while you work.
How To Take Apart The Different Contigo Water Bottle Lids
Every Contigo bottle is different and requires a slightly different process to pull it apart and put back together.
Find your Contigo water bottle type below, and follow the guide.
There are also instructional videos that will help you to know exactly what to do.
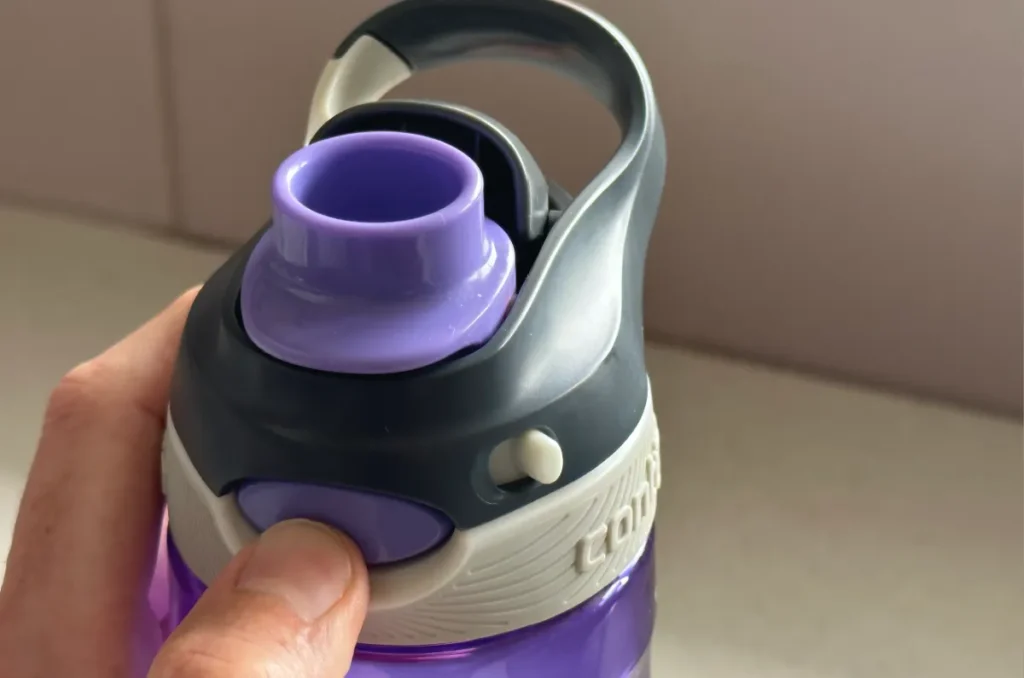
Contigo Autospout Straw Lid (Kids and Adult Version)
1. Remove the straw
First take the lid off the bottle and then remove the straw from underneath.
The straw will simply unscrew and can be taken off.
2. Unscrew the 2 triangles screws on the lid

Pop open the spout and you will see 2 triangle screws on the top of the lid.
Undo these with a 1.8mm triangle screwdriver and store the screws in a bowl so you can reassemble the lid once it’s clean.
3. Remove top section of the lid from the bottom section
Now it’s time to remove the top section of the lid from the bottom section.
They won’t just come apart easily as there are 2 sets of plastic tabs keeping them in place on each side of the bottle.
These tabs are located just to the right of the locking mechanism and in the same place on the left of the lid.

Use a butter knife to get between the two sections and to pry the top section from the bottom section. Once one side is off the other side should come off fine.
4. Take out the push button and locking mechanism
Next take out the locking mechanism and the parts of the push button and store them in your bowl.
Be careful here as these are small parts and the push button mechanism has 2 pieces both with small springs that can easily go flying and get lost.
5. Push the spout out from the bottom
Using your fingers push on the silicone spout from underneath the lid and push it through the hole. It should come out fairly easily.
6. Pull out the air valve
Next you want to pull out the one way air valve. You can do this easily with your fingers
7. Remove the rubber gasket
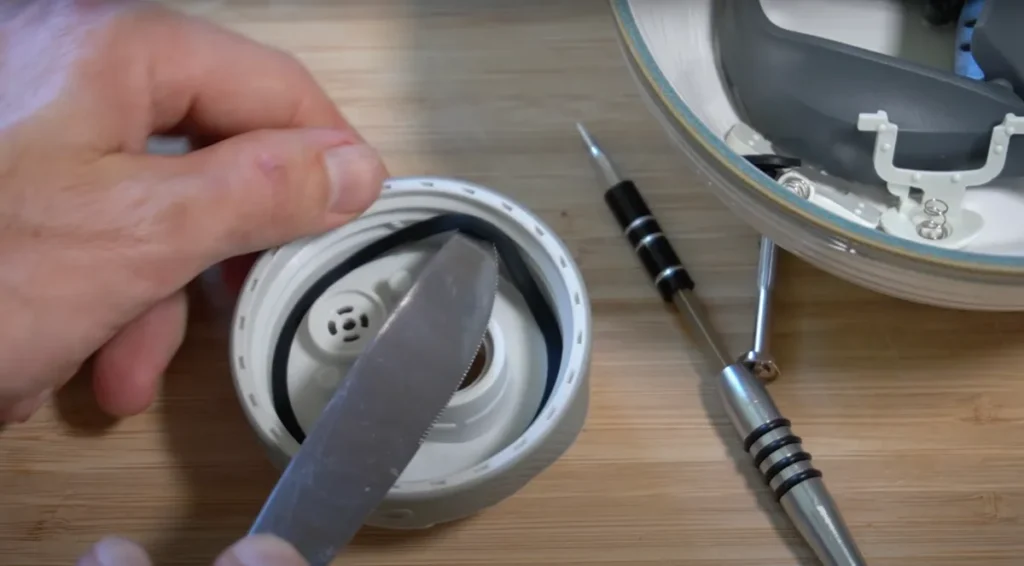
A lot of mold can grow in the rubber gasket so you want to remove and clean that.
Use your butter knife to pry out the rubber gasket. Part of it should pop up and then you can easily grab and remove it.
8. Pull apart the drinking spout
I personally found this to be the hardest part.
Firstly, pull out the bottom part (it should just pull apart fairly easily).
Next, using a small flathead screwdriver pry apart the plastic pieces by getting the screwdriver in between the tabs.
Honestly, I hate this part of the process and found it extremely difficult, time consuming and frustration. But eventually I got it all apart.
9. Clean the lid and treat it for mold
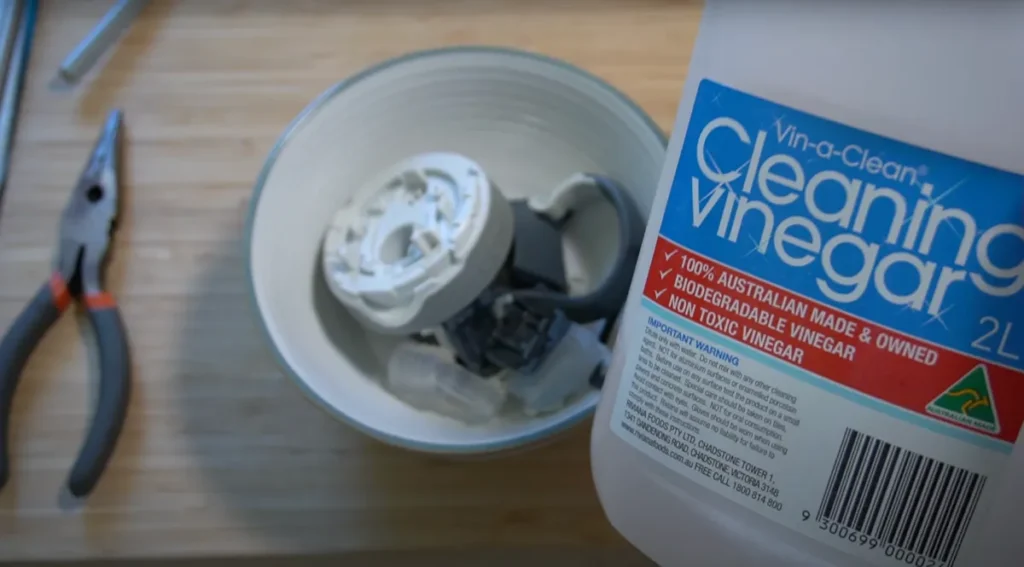
Now that you have everything apart soak it in 1 part vinegar and 1 part water for at least 30-60 minutes or overnight if it’s particular moldy.
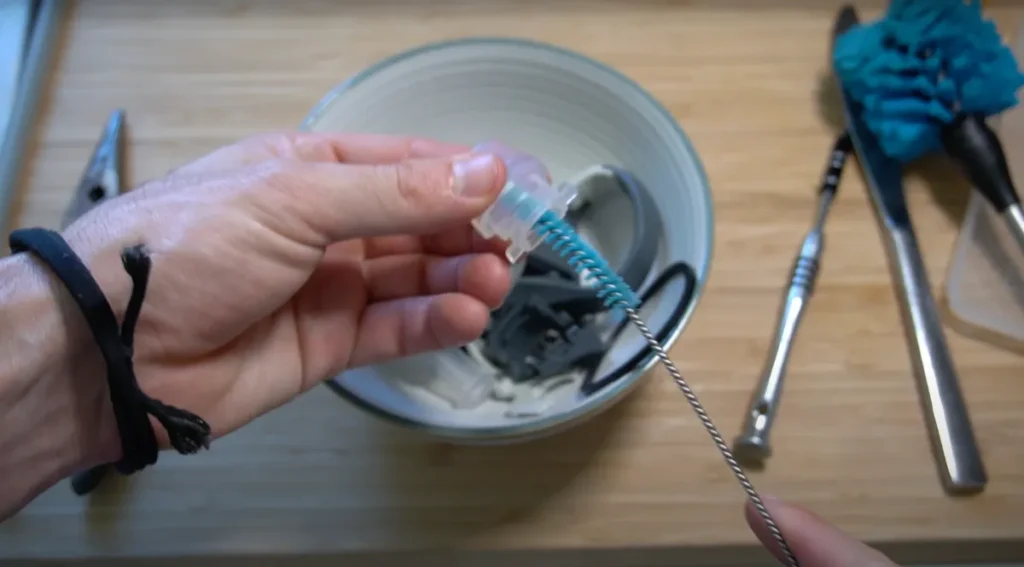
Make sure to scrub every single part really well using a bottle brush.
I personally use and recommend this 3-in-1 bottle brush set from Amazon as it has a long handled brush for the main bottle but a small brush which I have found ideal for the lid as well as a straw brush for cleaning the straw and the drinking spout pieces.
10. Leave all parts to dry
Once clean leave all parts to dry before beginning the reassembly process.
11. Reassemble The Lid
To reassemble the lid follow these steps
- Put the spout top and bottom back inside the 2 hard plastic spout pieces. Make sure you get the right orientation.
- Replace the front part of the push button and locking mechanism before the spout. Leave the back section off for now.
- Put the drinking spout back through the lid using pliers to pull it through and get it into place.
- Put the air valve back in by pushing hard with your finger or pulling it through with pliers
- Replace the back section of the push button mechanism. Make sure everything is moving and working.
- Put the top of the lid back on. It should click into place.
- Replace the rubber gasket by lightly pushing it in with your fingers and making sure that it doesn’t get twisted.
- Replace the 2 triangle screws. This could be optional to make it easier to pull apart next time.
- Replace the drinking straw and put the lid back on your bottle and test it.
Contigo Autoseal Lid
1. Depress the “push to clean” tab all the way back and up
To keep the field open for you to remove the seal, attach the “press to clean” tab to the adjacent upright piece with your rubber band. You’ll need to make 2 or 3 loops.
2. Remove the tiny screws on the lid’s underside
To do this, find the hard plastic “X” which has 4 holes and screws. Use a micro star screwdriver and carefully remove the screws.
You’ll now have 2 lid parts. Find the tiny washers inside the holes where the screws where, and gently remove them with your pliers.
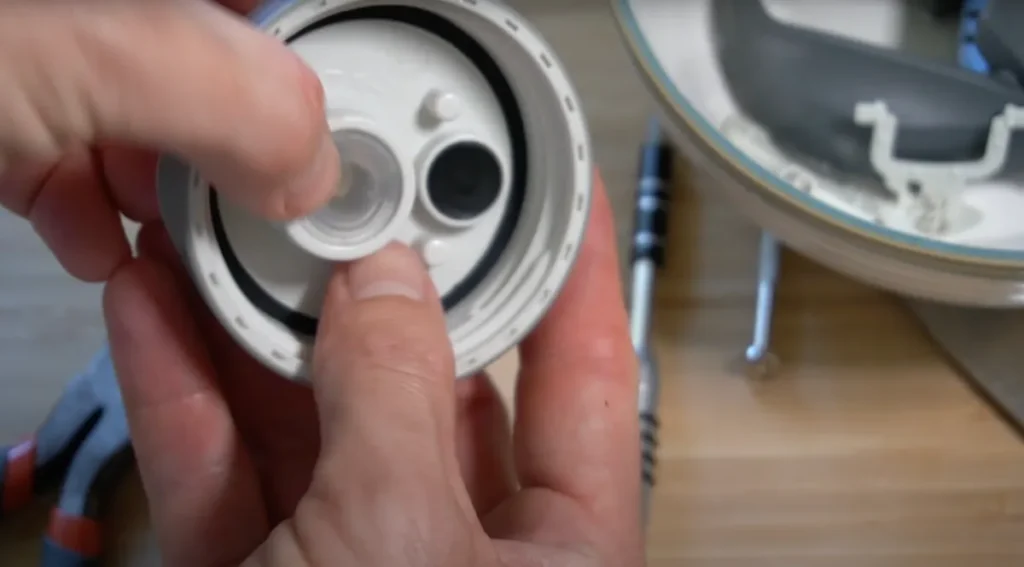
4. Take the lid part with the plastic “X” and gently pry out the gasket
The gasket is around the inner rim. If your bottle is leaking, a worn-out gasket is often to blame.
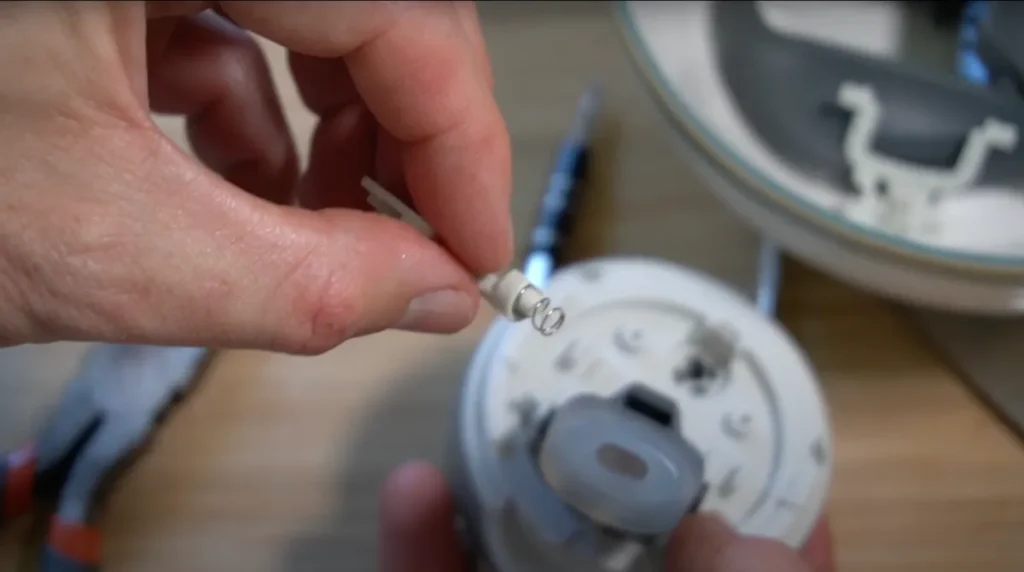
5. Locate the spring with the seal on it
Use your fingers, tweezers, or flathead screwdriver to remove it off the spring. Then, take the spring off and put the 2 parts somewhere safe.
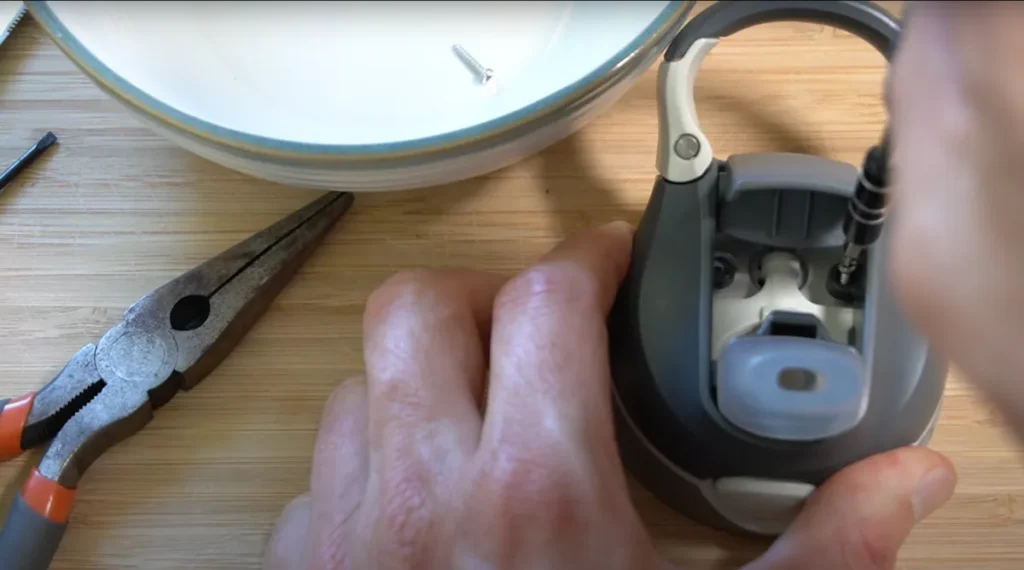
6. Detach the mechanism that was underneath the spring
This is a long part that you can pull out from the lid’s outer rim. I find that this part usually has a lot of mold and other build-up and usually causes my Contigo to smell.
Contigo Autoseal Chug Lid
NOTE: I will say that after attempting this pull apart myself I DO NOT recommend even attempting to pull apart and clean this lid unless you have an immense amount of patience and determination.
It is NOT designed for each dismantling and reassembly for cleaning AT ALL and I’m appalled at how little thought has gone into this for those of us who want to clean these lids and keep them working.
This is a big problem with Contigo bottles and given Contigo don’t even sell replacement lids I really hope they rectify this issue for future models.
With that warning out of the way if you do want to partially pull apart your Contigo AutoSpout Chug lid here’s how one person did it.
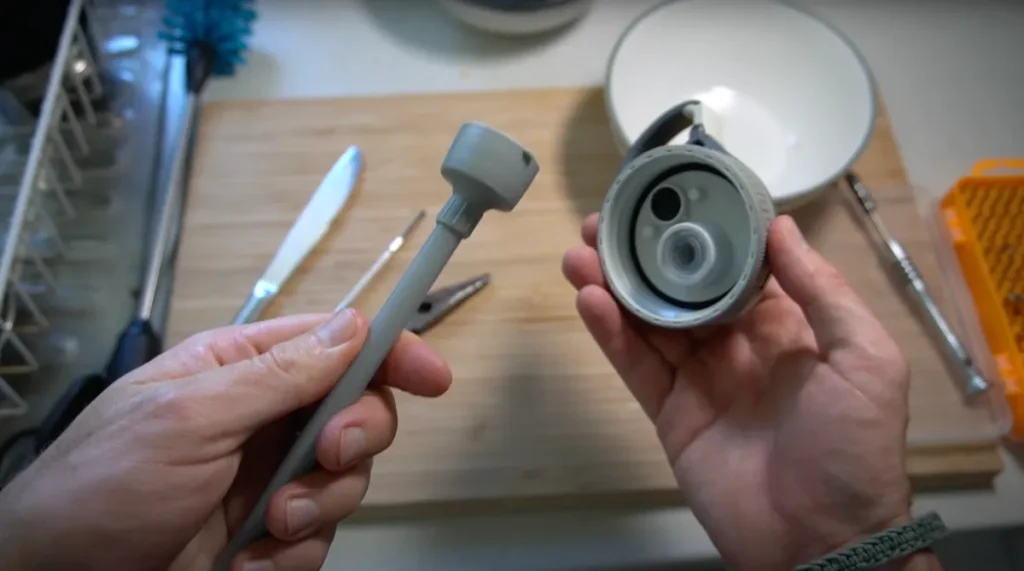
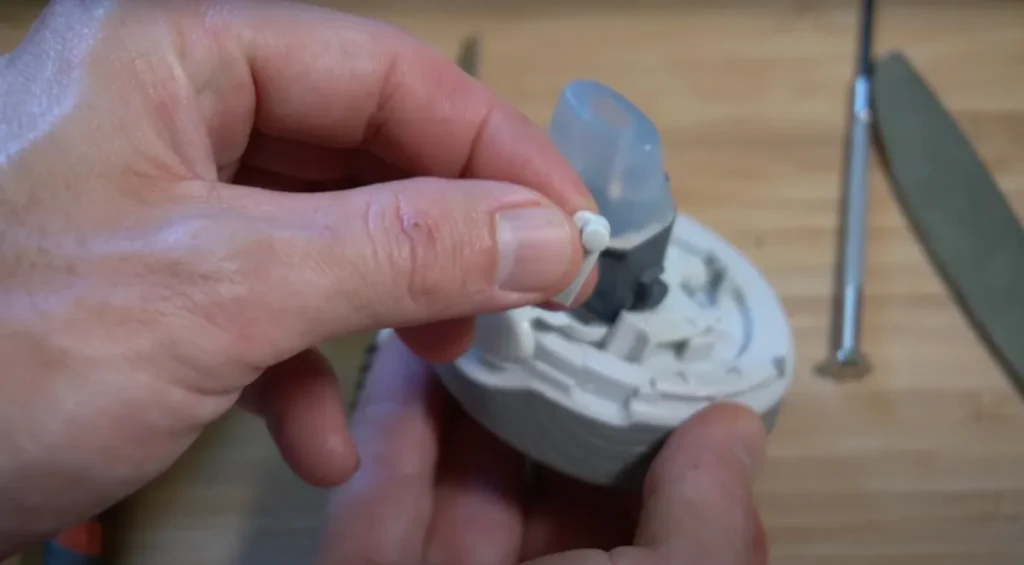
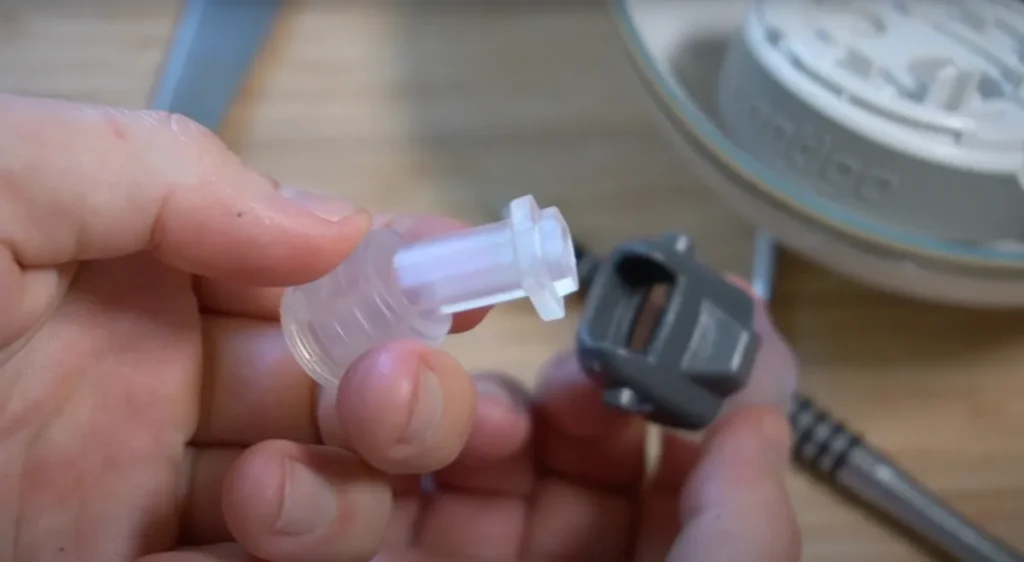
1. Remove the flexible transparent rubber square part
Inside the lid, find the flexible transparent rubber square part, and remove it with a flathead screwdriver. This part is a soft rubber spout embedded in the lid. It has a round section and a square section on the side.
Don’t use too much force, as this could damage it.
2. Remove the inner spout manually
Use your fingers and slow and steady force. If this doesn’t work, use your tweezers or flathead screwdriver to dislodge the rubber spout.
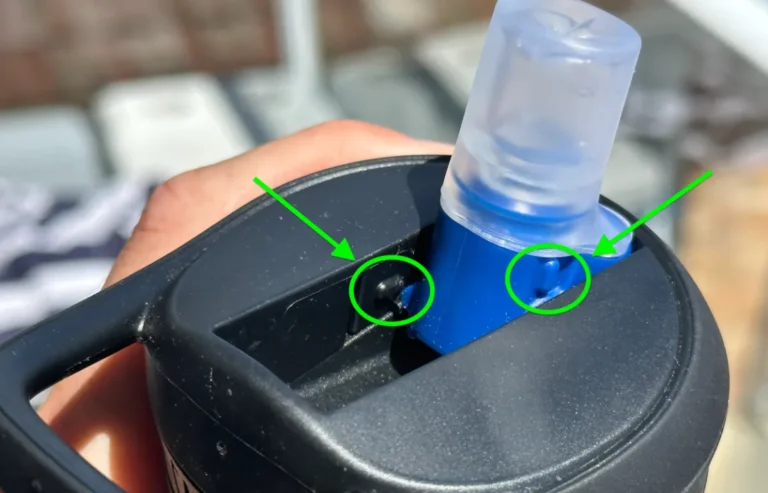
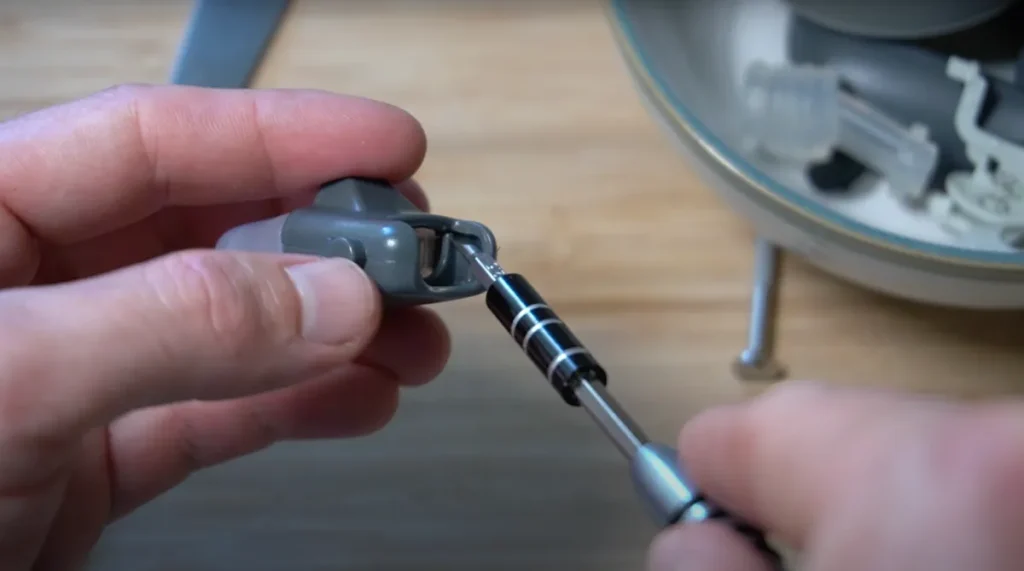
3. Separate the lid and the hard outer spout
Move the spout around a little to activate the push button. Then find the 2 small tabs securing the spout to the lid.
Move the tabs out of their holes with the flathead screwdriver, being careful not to break them.
4. Take the washers off the spout
You can use thin-nosed pliers or tweezers to get them off.
5. Open the spout’s seam
There is a horizontal seam around the spout that you can open with a micro flathead screwdriver.
When I first dismantled my Contigo Autoseal Chug bottle, I found this vide really useful:
Contigo Autopop Lid
If you have a Contigo autopop lid, you’re in luck!
This is the easiest Contigo lid to take apart, and only involves opening the lid and prying off the rubber seal around the convex part inside.
I recommend using a flathead screwdriver for the job (just be careful not to pierce it).
Contigo ThermaLock Lid
Contigo ThermaLock lids have 2 parts:
- A loose lid stopper
- An insulating lid stopper cover that’s tethered to the bottle with a hard plastic loop
Here’s how to take it apart:
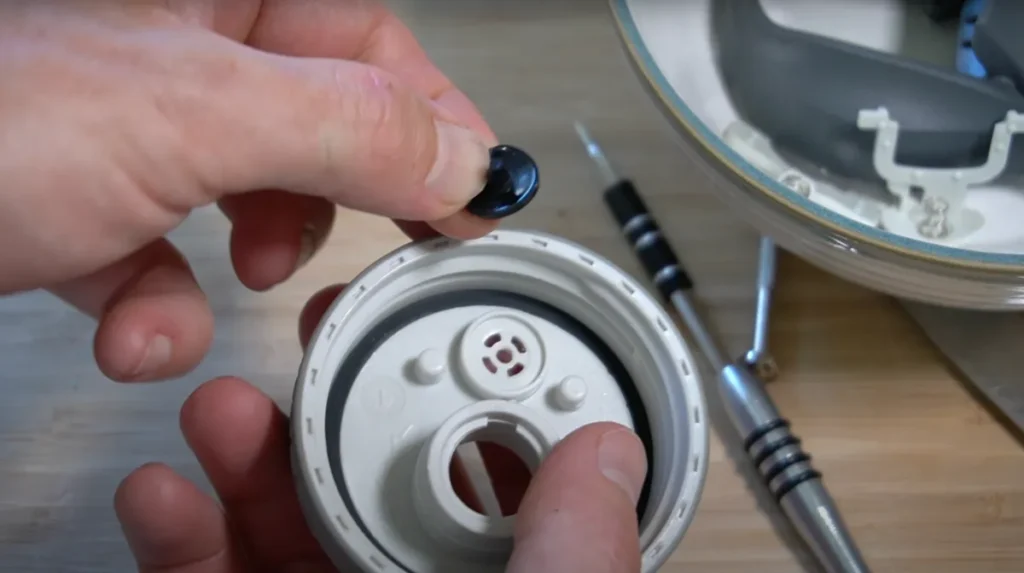
1. Remove the gasket on the stopper
Using your tweezers or flathead screwdriver, gently remove the gasket around the stopper.
2. Remove the 4 metal screws around the rings
To remove the hard plastic attachment connecting the lid to the bottle, you’ll need to remove the 4 metal screws around the rings.
You can do this by carefully rotating them with your thin-nosed pliers until they come loose.
3. Detach the lid from the bottle
Once the hard plastic casing comes off, you can remove the lid from the bottle.