As many ice connoisseurs already know, the right ice shape and consistency can make a world of difference when it comes to getting a drink just right.
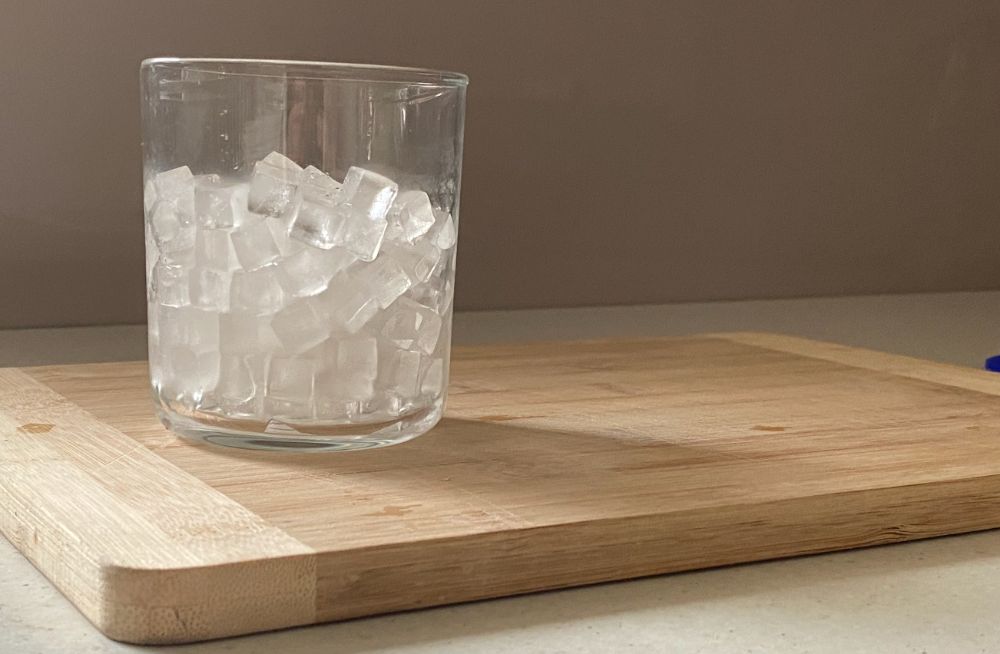
Pebble ice is the ideal addition to any cold, summer-y beverage, making the drinking experience that much more enjoyable. Pebble ice is easy to chew, has a great texture and can just make your drink taste amazing.
However, finding this size of ice in a local store can be almost impossible, but luckily there are a whole bunch of different ways you can make small pebble ice cubes at home.
Here’s how to make pebble ice at home:
- Use a small nugget ice tray.
- Use a nugget machine.
- Freeze carbonated water (for soft ice).
- Crush ice using a blender.
- Smash ice using a bag.
- Use an ice shaver.
- Fill up regular ice cube trays a small amount
In this article, I’ll take you through each of these creative approaches that can help you make pebble ice from the comfort of your own home. I’ll also provide you with some practical recommendations regarding the best tools and techniques you can use throughout this process.
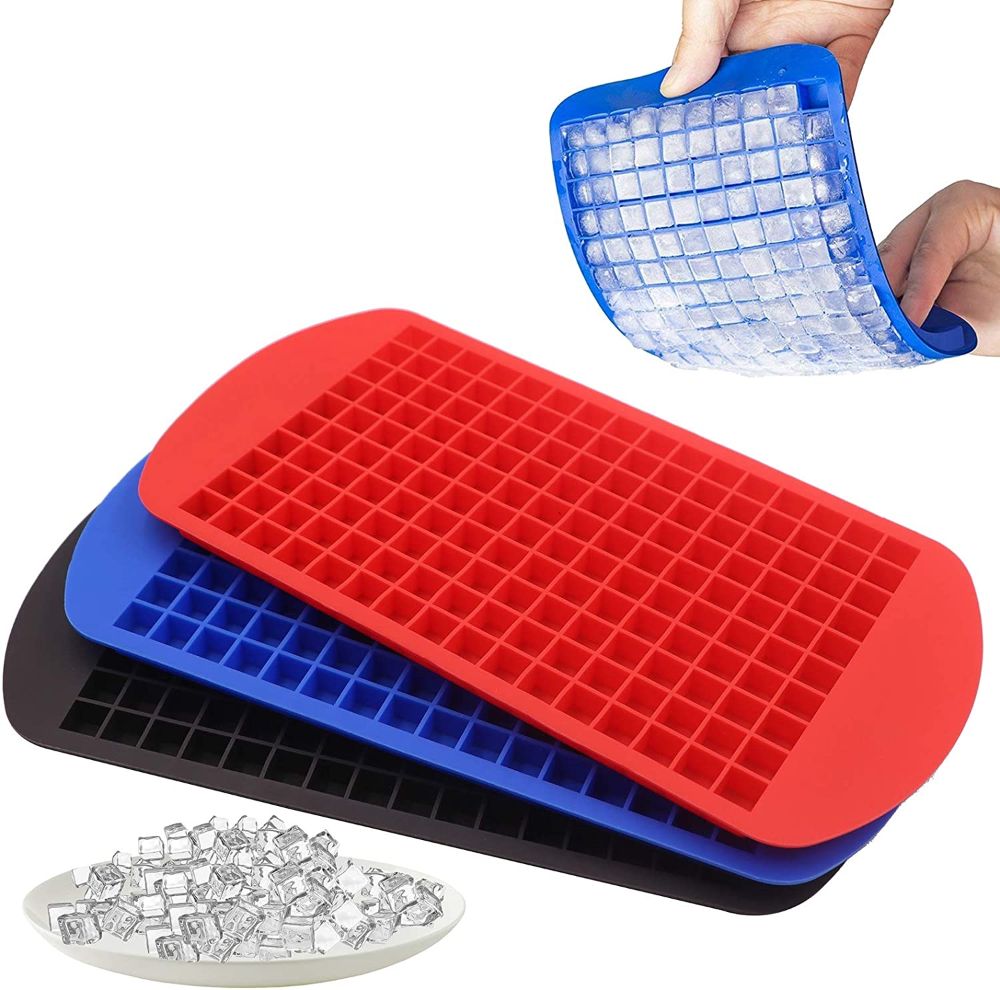
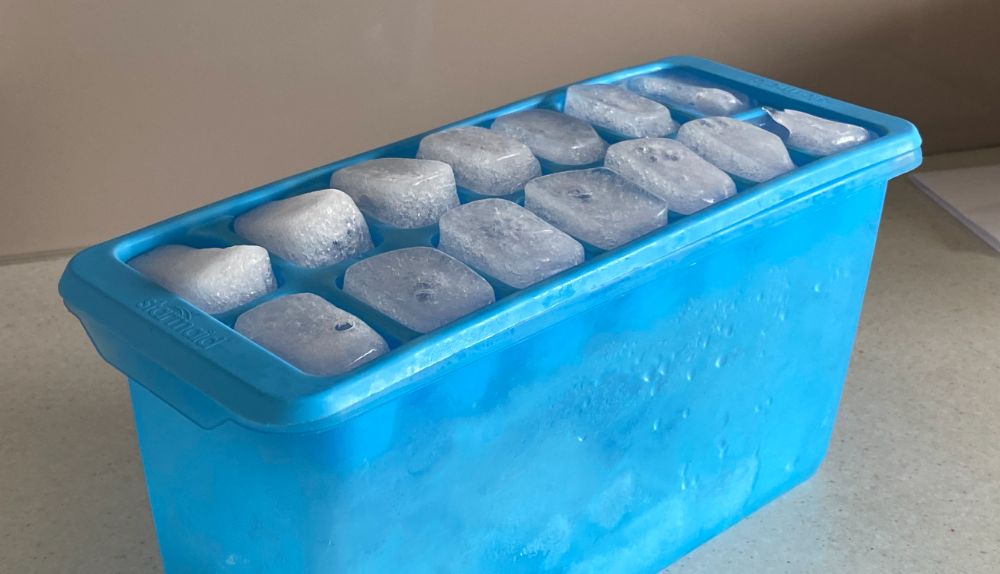
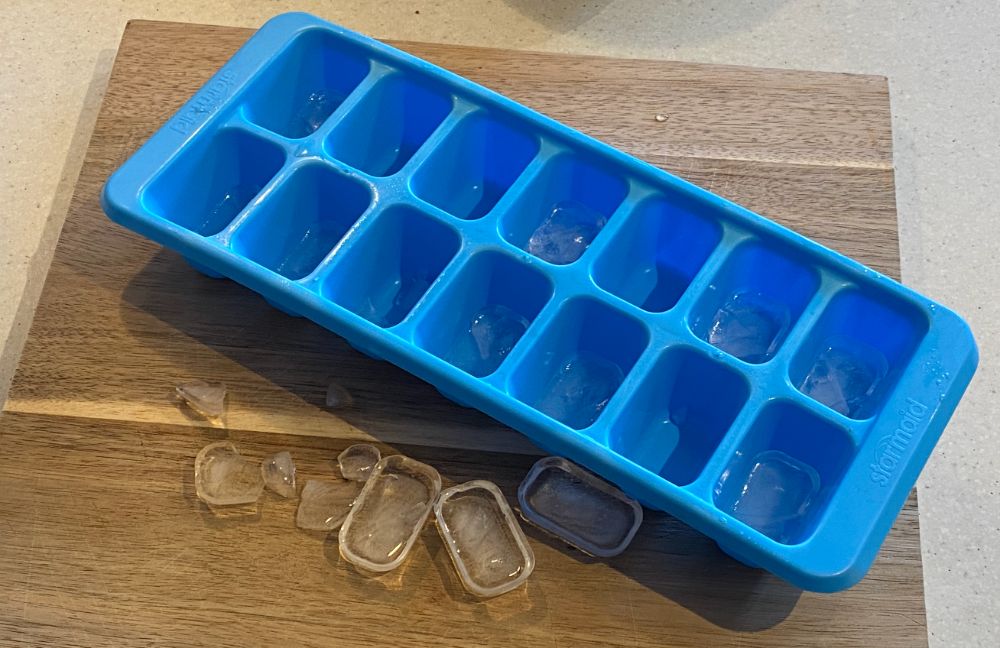
1. Use a Small Nugget Ice Tray
This is one of the quickest, most straightforward approaches on today’s list, and all it requires is a single Amazon order.
You have to fill the silicone openings with water just as you would with any traditional ice cube tray and place them in the freezer until the water solidifies. The malleable silicone of this tray makes it easy to take out your pebbles once they are frozen.
Below you can see a video showing the differences between pebble ice made from a machine and pebble ice made from a nugget ice tray.
They are pretty similar in size and texture with the ice from the ice cube tray being slightly harder.
This LeeYean Ice Cube Tray (from Amazon) is an excellent choice. It’s flexible, durable, and comes in a 3-pack that makes 480 ice pebbles at a time, making it an ideal choice for parties and large gatherings.
The downside of this tray is that you tend to have to manually push out each of the ice cubes from the silicone mold. This can be extremely annoying and time consuming for some people and satisfying for other people. Consider an easy release ice cube tray if you hate doing this.
Overall this is one of the cheapest and most effective ways of making pebble ice at home and having it on demand whenever you need it.
See the latest price of the Silicone Mini Ice Cube Tray at Amazon
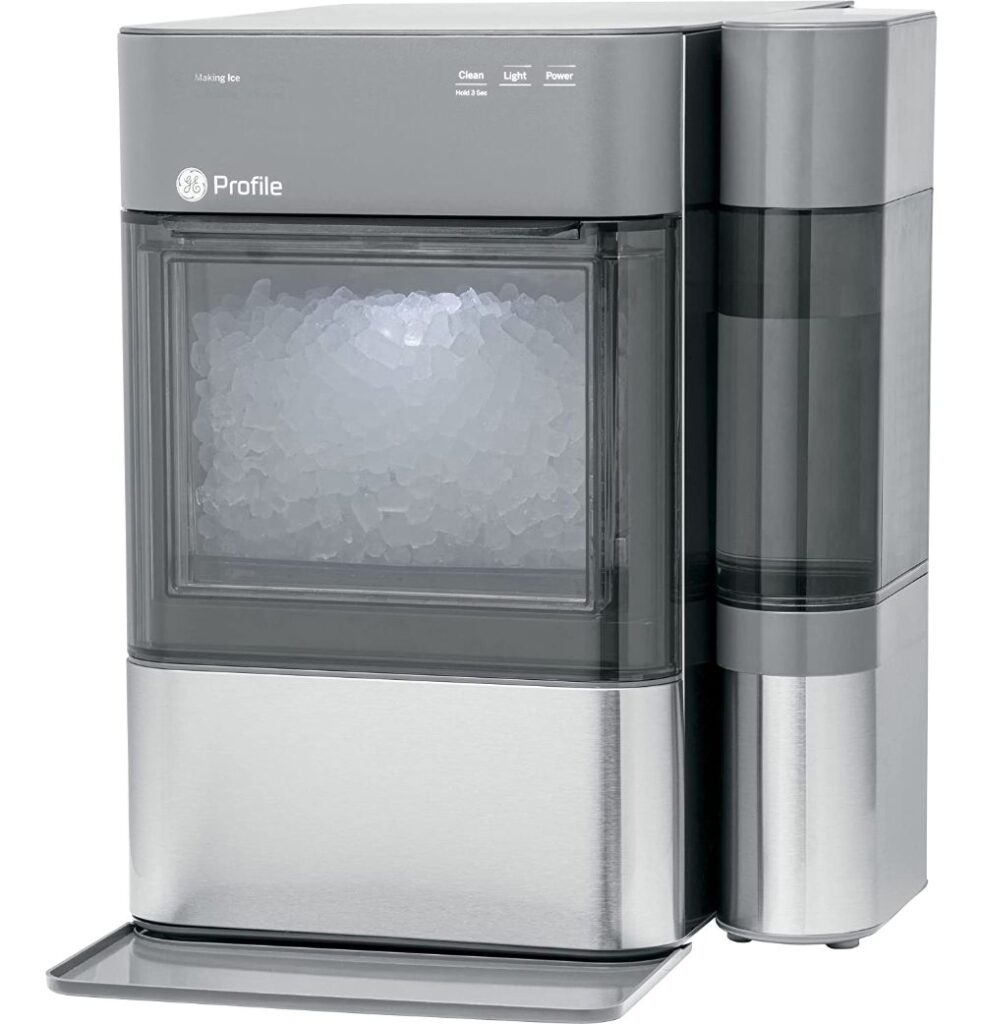
2. Use a Nugget Ice Machine
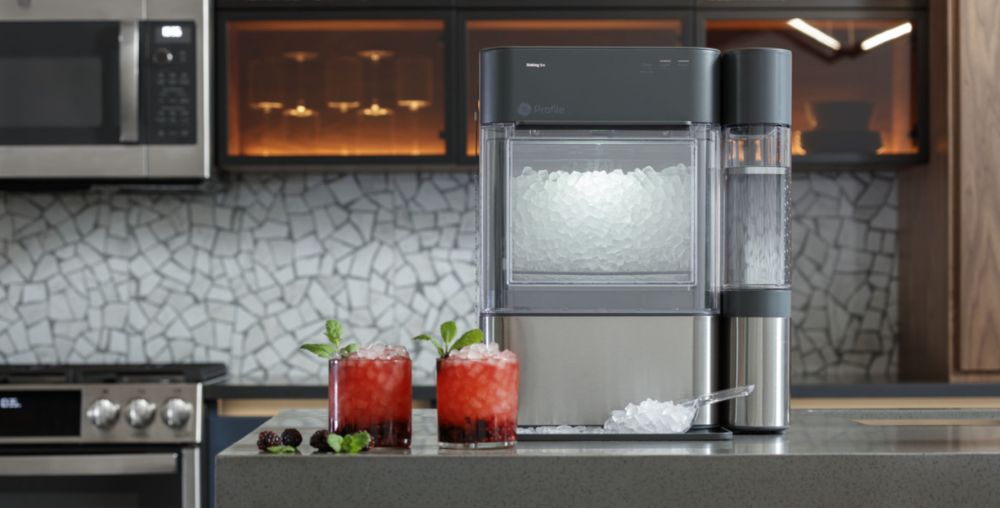
If you don’t feel like putting in the work of filling up a tray, waiting for the water to solidify, and then taking each piece out, a nugget ice machine might be the best choice for you.
Granted, they’re going to require a heftier initial investment. The most popular machine is the Opal Nugget Ice Maker and it retails around the $500 mark with other machines going for around $400-$600 as well.
Still, if you often find yourself needing ice pebbles, a nugget ice machine can often be worth the money.
Nugget ice makers work by pumping the water you input into a freezing cold cylinder, where ice forms and gets scraped off through the use of a spinner auger. Then, the ice gets compressed and broken down even further until the pieces eventually fall into a collection bin from where they can be used to chill any drink of your choice.
These ice makers are the best choice for establishments or households that constantly organize gatherings and parties that require a constant, reliable source of pebble ice. Families that have kids or even just people who LOVE pebble ice and use a lot of it everyday will get a lot of value from one of these machines.
When it comes to nugget ice machines, you can’t go wrong with this GE Opal Nugget Ice Maker. It is by far the most expensive approach on this list, but its performance more than justifies its price.
The Opal can make ice in a matter of minutes, and the supply will never run out (if you keep it topped up with water). It’ll make 1 pound of ice every hour – that’s 24 pounds of ice per day!
Additionally, the device can be wirelessly connected via Bluetooth to your phone, allowing you to schedule and monitor its activity throughout the day. If you’re interested in learning more about the machine’s inner workings and how it’s able to perform so well, check out this article.
Additionally, for those looking to get their hands on some pebble ice in a pinch, there’s no better choice than this GE nugget ice machine. The Opal machine can make its first nuggets in as little as 15 minutes. Afterward, it produces 1 ounce (28.3 g) of ice every additional 3 or 4 minutes. Sure it comes with it’s own set of problems, but overall this is a great machine and if you want premium quality pebble ice like you buy at the store then this is the best option for you.
See the latest price of the GE Opal Nugget Ice Maker at Amazon
(or compare to the price of the GE Opal Nugget Ice Maker at Walmart)
3. Freeze Carbonated Water (for Soft Ice)
If it’s less the size of the pebble ice you’re seeking and more the soft chewable texture then freezing carbonated water is a great way to get you soft chewable ice without needing any special equipment or ice cube molds.
The ice is white in the middle because of the bubbles in the carbonated water. As the ice freezes the carbon dioxide bubbles are forced out and this makes ice that is full of trapped air bubbles making it like and chewy in consistency.
If your pebble ice needs aren’t as frequent, you might be better off trying out this DIY approach. Soft is the operative word here—if you’re looking for sharp, angular ice nuggets, you might be better off choosing a different method.
Having said that, if you’re a fan of the ice with a unique chewy texture, you’re in luck! All you have to do is fill up an ice tray with carbonated water and proceed to crush it using one of the following approaches.
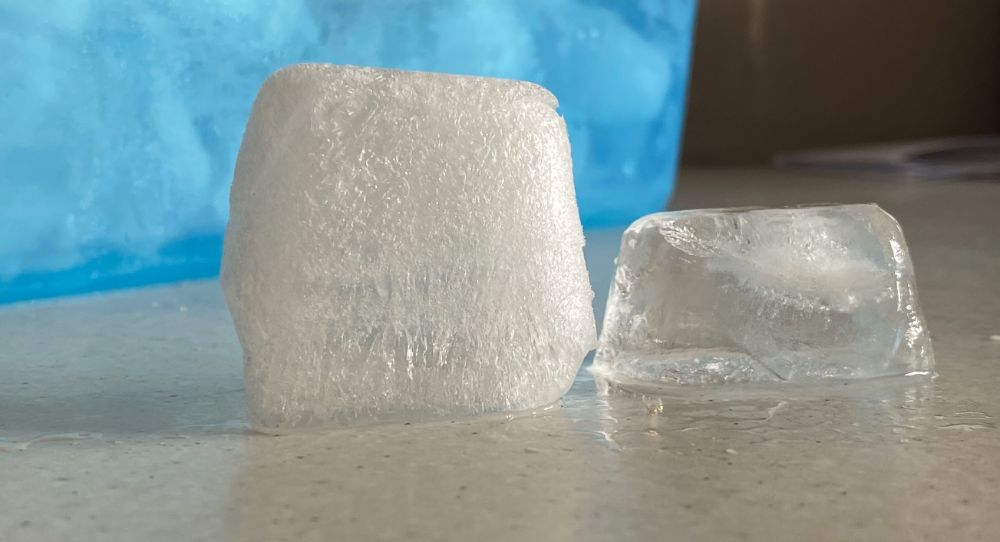
You might want to fill up your ice cube tray only half way as the ice cubes that this makes tend to be about twice the size of regular ice cubes.
They should still taste like regular ice cubes though and if you want them to be a smaller size you can break them up fairly
4. Crush Ice Using a Blender
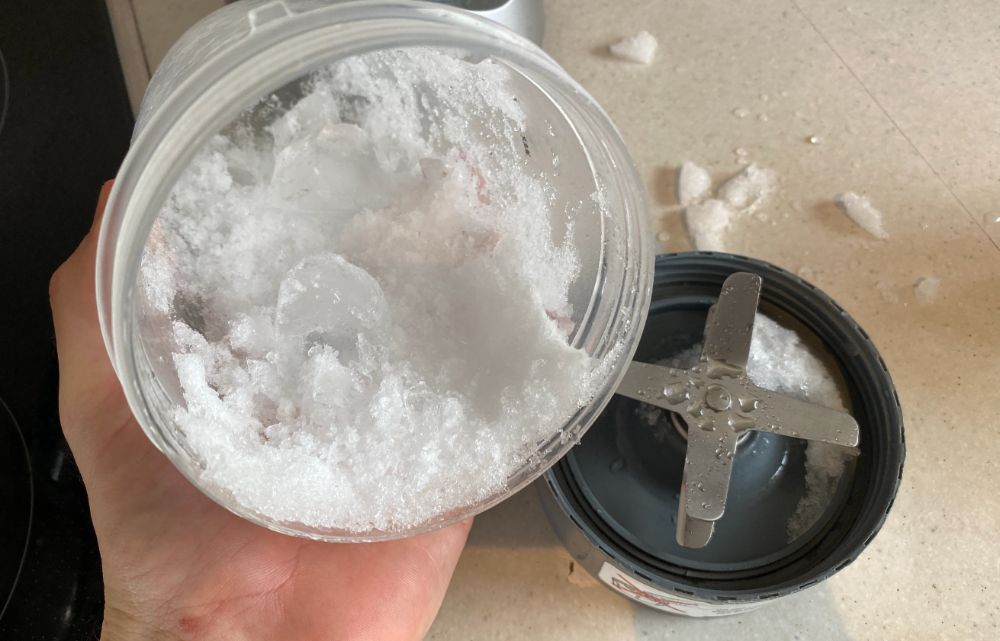
Let’s move on to some craftier approaches. If you’re looking to make do with what you already have in the kitchen (and don’t want to put in much physical labor), crushing your ice using a blender is the way to go.
All you have to do is place the desired amount of ice cubes into your blender and cover half of them with water.
Then, you’ll want to pulse until the chunks reach your desired size and consistency. Afterward, strain out the excess water, and voilà! You’ll have made your very own ice pebbles using your blender.
I did find that when I did this the ice was mainly flaked ice with some larger chunks of ice left over. It didn’t tend to make uniform pebble sized ice.
Still for some people this could be a better option than large ice cubes so it’s worth including on the list.
5. Smash Ice Using a TeaTowel or Bag
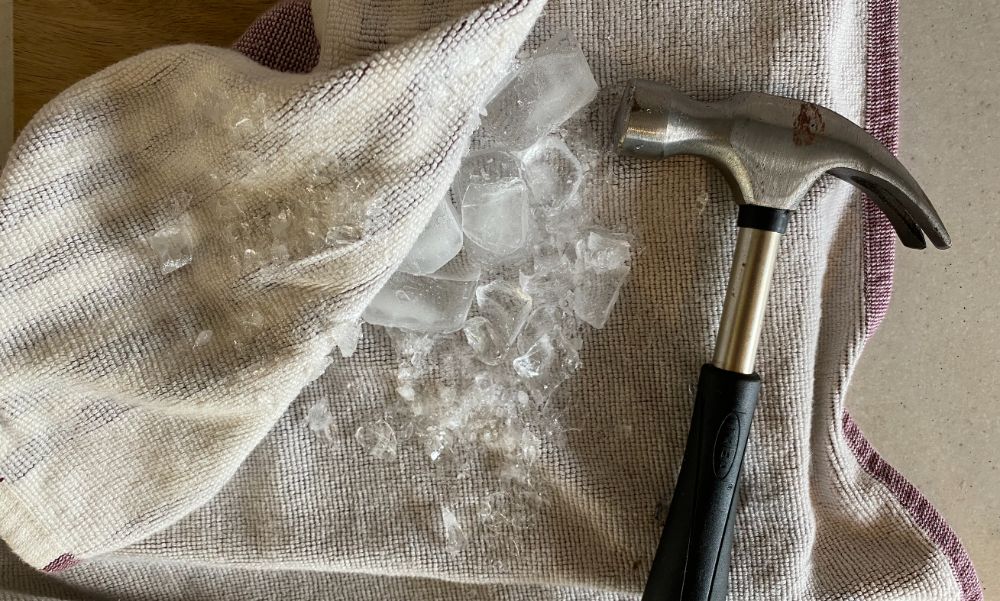
Alternatively, those taking up the role of the bartender in their household can always opt for this entirely gadget-free approach.
Smashing ice cubes is a great way to make pebble sized ice cubes with very little effort or fan fair. It’s also a lot of fun to do.
Here’s how to smash ice using a bag:
- Make your ice cubes as you usually would using a silicone tray.
- Place the cubes in a ziplock bag or wrap them in a tea towel.
- Lay the bag flat to ensure there’s a single, even layer of ice cubes inside the bag.
- Using a mallet, hammer, or anything durable you have on hand, smash to your heart’s content.
Just make sure that you put your ice cubes on a chopping board or something so that your kitchen bench is protected and doesn’t get ruined.
Not only is this approach easy and effective, but it can help you relieve some of the day’s stress as well! I had a lot of fun doing this and so did my kids.
Just be sure not to hit the ice too many times as you’ll end up with shaved ice. Hit it just a couple of times so you end up with good sized pebble ice.
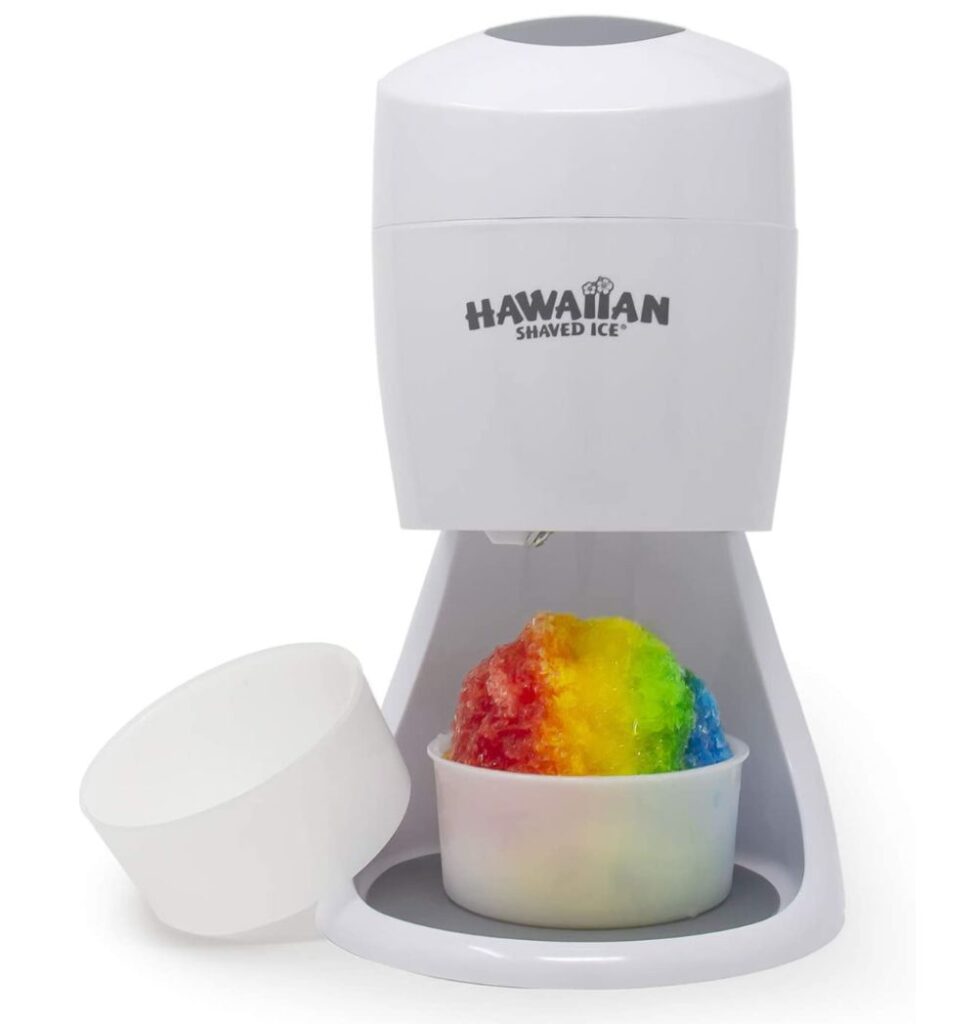
6. Use an Ice Shaver
Last but not least, you can always use an ice shaver. Those who are suckers for quirky gadgets but don’t want to spend a couple of hundred dollars on an ice nugget machine will love this approach.
This Hawaiian Ice Shaver (available at Amazon) is one of the best in today’s market (and my personal favorite). It allows you to make soft snow cones. It’s not quite pebble ice but the ice is nice and soft and can be compacted together to make it chewable and delicious in drinks.
The equipment is easy to use, compact and will serve all kinds of delicious icy treats that will leave any guest thoroughly impressed.
See the latest price of the Hawaiian Electric Ice Shaver at Amazon
7. Fill Up Regular Ice Cube Trays A Small Amount
Did you know you can actually make small pebble ice using nothing more than a regular ice cube tray? This clever ice cube tray hack allows you to make small, easy to chew pieces using your normal tray.
All you need to do is fill up your ice cube trays only a very small amount and then place it in the freezer to freeze.
This is one of the fastest ways to make ice cubes as the ice will freeze much quicker than larger ice cubes.
Once frozen twist the tray to get the ice out. Because the ice is so thin I found many of the cubes naturally broken into small pebble shaped pieces.
However if they don’t break by themselves they are thin enough you can easily break them with your hands or using a knife or a spoon.
Key Takeaways
There’s no shortage of quick, efficient ways to make pebble ice at home. Regardless of your needs, time, skill level, and requirements, one of the approaches in this guide will serve you.
Whether you’re a professional looking to invest in a nugget ice machine or a self-claimed bartender looking to learn the old ziplock-bag-and-mallet technique, don’t be afraid to try new methods of making pebble ice.