We've all had that moment where we've sat up in our tent after a night's sleep and brushed the walls of the tent only to have a rain of condensation fall down onto you.
Lowering the humidity level in your tent is one of the most effective ways to slow condensation buildup and to stop your tent walls from getting water. And a tent dehumidifier is one of the easiest ways to do so.
But the problem is, many portable dehumidifiers are bulkier than they need to be, overpriced, loud, or just outright ineffective, which is why I sometimes choose to just make my own.
There are two main ways to make a DIY tent dehumidifier — one being more portable but less efficient and the other being more effective but bulkier and heavier.
If you’re backpacking and need something that’s easier to carry, you can add silica gel, charcoal briquettes, baking soda, or non-dairy creamer to a bottle, can, sock, or breathable pouch.
If you’re car camping and portability isn’t as big a concern, rock salt or calcium chloride can be placed in nested buckets to collect moisture.
A tent dehumidifier can be a helpful part of reducing the amount of condensation that forms in your tent, but if you rely on it as the only method you’re going to end up disappointed.
Check out my deep dive on solutions for tent condensation to learn the other helpful methods that should be used alongside your dehumidifier.
The most important thing is to allow for air to flow out of your tent but opening the draft flaps or windows. But I understand this can make the tent colder at night so sometimes you need to keep the windows closed.
Or if you’re interested in a tent dehumidifier, but don’t really want to go through the trouble of making your own, check out my list of the best tent dehumidifiers on the market for some solid options you can just pick up from Amazon.
How To Make A DIY Tent Dehumidifier
There are quite a few desiccants you can use in a DIY tent dehumidifier but, regardless of which you choose, they fall into one of two broad categories — materials that suck in and trap moisture and materials that draw moisture from the air but don’t actually absorb it.
The former are easier to manage, lighter weight, and less bulky, but are also noticeably less efficient at lowering humidity. These are ideal for backpacking, where space and weight are a much larger concern than allowing a bit more condensation to form overnight.
The latter do a much better job of pulling moisture from the air, but require a clunky, bulky setup. These work best for car camping, where space and weight aren’t that big of a deal and minimizing humidity is the primary goal.
How to Make A DIY Tent Dehumidifier For Backpacking
If space and weight are a concern, your best bet is to make a lightweight desiccant dehumidifier in a can, bottle, or pouch.
All you’ll need is an absorptive desiccant of your choice and a container to hold it.
Step 1: Choose An Absorptive Desiccant

The first step is deciding which absorptive desiccant you want to use for your dehumidifier. You have a few reasonable options:
Silica Gel Crystal
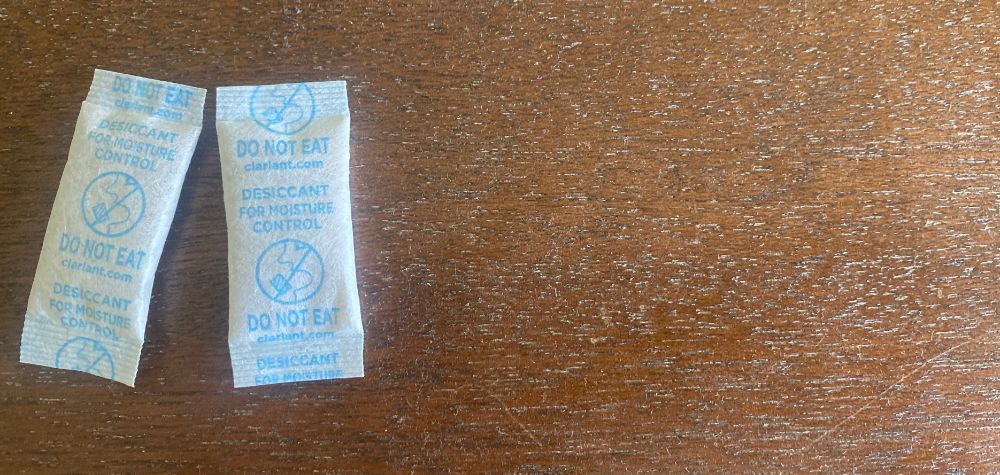
You’ve probably seen silica gel crystals in little packets inside of shoe boxes and other packages because it’s such an effective desiccant. It’s my go-to for all of my DIY tent dehumidifiers.
You can buy them in bulk from Amazon or a variety of places and you can even get and use the silica gel kitty litter if you want to buy it in bulk. Just try to get an unscented one so your tent doesn't smell like a kitty litter tray.
Silica gel is made from the same stuff as sand but has lots of tiny crevices that adsorb water taking it out of the air.
I like to use this because of the large amount of water it can adsorb, the cheap price and the fact that silica gel doesn't expire. In fact, you can recharge them simply by placing them on low head in the oven. If the silica gel packets get wet this is a way to rejuvenate them good as new.
Charcoal Briquettes
Charcoal briquettes can absorb a surprising amount of moisture from the air — and it’s likely that you already have some laying around in the garage or shed anyway.
Just make sure you DON'T light the charcoal briquettes inside your tent or keep any in there smoldering as they release carbon monoxide which can be poisonous.
Charcoal briquettes made with 100% natural ingredients and real wood. Each 16 pound bag of original charcoal briquettes generates about 4 uses.
Baking Soda
Baking soda is a natural, eco-friendly desiccant. It doesn’t work quite as quickly as silica gel or charcoal, but it’s cheap and easy to find.
You can also use it for cleaning after it's been used to absorb moisture in your tent.
High-quality food-grade baking soda great for cooking, baking and cleaning. Comes in a 2 pound resealable bag.
Non-Dairy Creamer
If you’re in a pinch, non-dairy creamer (or coffee whitener) absorbs moisture nearly as well as baking soda. It’s the least effective on this list however, while also costing more than baking soda. Consider it a last resort if you don’t have the time to find any of the other options.
Step 2: Choose A Container
Now that you’ve picked your desiccant, it’s time to decide on a container for it.
The easiest way is to simply fill a Nalgene or whatever other reusable water bottle nearly full of whichever you choose. It’s easy to unpack for the night (just open the bottle and sit it somewhere you won’t knock it over) and just as quick to pack back up (simply close the lid).
However, the wider the opening of the container the more moisture from the air that will be adsorbed.
Large, shallow containers are great for this as they have a wide opening.
If you’re using one of the non-powdered desiccants, you can tie them up in a sock or in a breathable pouch so you don’t have to worry about spills (trust me, cleaning up thousands of loose silica gel crystals rolling around your tent is NOT fun).
I like to double up and tie my silica crystals in a wool sock and keep that in an old Nalgene.
If you're using charcoal, it works great in an old coffee can with a few holes punched in the lid.
How to Make A DIY Tent Dehumidifier For Car Camping
If you’re car camping and space and weight aren’t really a big concern, making a DIY tent dehumidifier out of rock salt or calcium chloride in a couple of nested buckets will lower the humidity level in your tent much more efficiently than the method above.
Step 1: Prepare Your Nested Buckets
Start with two buckets of the same size (one gallon or larger).
The paint bucket is made of Premium-quality plastic material, which is sturdy to use. lightweight and leak-resistant.
Drill 10 to 15 small holes in the bottom of one of the buckets, aiming for holes that are large enough to drain water quickly but not so big that rock salt will fall through them (somewhere around ⅛” should do).
Place the bucket with the holes inside the other bucket that doesn't have holes.
Step 2: Fill The Inner Bucket With Rock Salt or Calcium Chloride
Rock salt (or sodium chloride) and calcium chloride are both super efficient desiccants, but they work a bit different than those listed in the method above.
Instead of absorbing and trapping humidity, they pull moisture from the air but allow the now-liquid water to mostly just run off afterward — hence the buckets.
While sodium chloride and calcium chloride both work about equally as well, rock salt is generally a cheaper and easier to find, as it's used as a common ice melt, making it the preferred option.
You may have noticed your ice melt leaking liquid and forming puddles in summer if you don't keep it in a sealed bag. This is because it absorbs moisture from the air, which is exactly what we want to do with out dehumidifier.
50 lbs of sodium chloride rock salt that can melt ice down to 5ºF/-15ºC
Whichever you choose, fill the interior bucket (the one with the holes) about ¾ full.
Step 3: Place In Your Tent And Empty As Needed
Stick your new dehumidifier in a corner of your tent. The exact location doesn’t matter much, just choose somewhere out of the way.
You’ll notice water starting to pool in the bucket, sometimes relatively quickly depending on how humid it is in your tent.
As needed, carry the bucket outside (a good distance from your tent) and pull out the interior bucket, letting as much water drain out as possible. It’s not a bad idea to empty your dehumidifier fairly often, since removing as much moisture from your tent as possible as soon as possible can only help.


